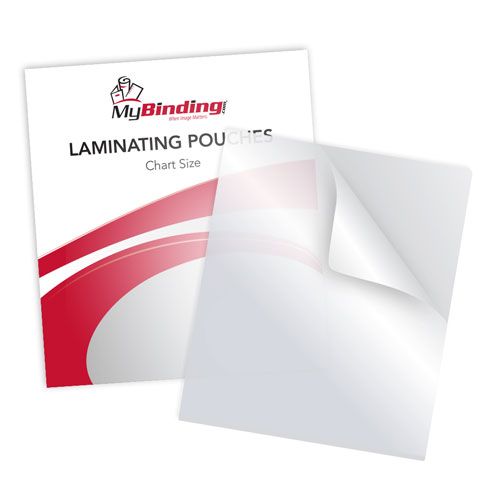
7MIL Chart Size 15" x 18" Laminating Pouches - 100pk - Clearance Sale
7.56
NewCondition
OutOfStock
We're sorry, but we no longer offer this item.
Call us at 1-800-944-4573 for personalized recommendations
or check out these similar items that may be a good fit:
-

7MIL School 2-1/2" x 3-5/8" Laminating Pouches - 100pk
$9.69
- Size: School
- Thickness: 7 mil
- Finish: Gloss
- Heat Required: Yes
-
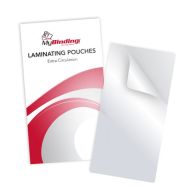
7MIL Extra Circulation 3-15/16" x 6-7/8 Pouches 100pk
$19.89
- Size: Extra Circulation
- Thickness: 7 mil
- Finish: Gloss
- Heat Required: Yes
-
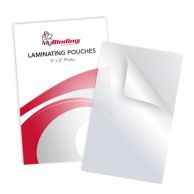
7MIL 3" x 5" Photo Card Laminating Pouches - 100pk
$15.39
- Size: 3 x 5 Photo
- Thickness: 7 mil
- Finish: Gloss
- Heat Required: Yes
-

7MIL Large Bookmark 2-3/8" x 8-1/2" Laminating Pouches - 100pk
$14.29
- Thickness: 7MIL
- Pouch sealed on longer side
- Corners: Rounded
- Finish: Clear
7MIL Chart Size 15" x 18" Laminating Pouches - 100pk - Clearance Sale


SWIPE FOR MORE IMAGES
- 0
- 1
- 2

| Product Name | Item Number | Price | Qty | ||
|---|---|---|---|---|---|
| 3MIL Chart Size 15" x 18" Laminating Pouches - 100pk | TLP3CHART | $54.69
|
Product Description
Pie, growth and anatomy charts, to name a few, aren't going to last long if you don't protect them, that’s why MyBinding is offering you chart size laminating pouches. Our 7MIL chart size pouches measure 15" x 18" and there are 100 per pack. MyBinding offers our customers a wide selection of laminating pouches, if you are looking for that hard to find or custom size, call our customer service experts and they will be happy to help.
This item is on clearance sale and only available while supplies last.
Product Details
- Size: 15" x 18"
- Thickness: 7MIL
- Finish: Clear
- Corners: Rounded
- Pouch: Sealed on longer side
- Quantity: 100 per box
Demonstration Video
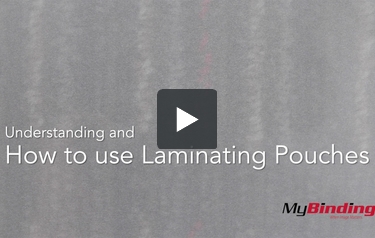
Transcript:
This is How to Use Laminating Pouches!
First off, make sure your project fits inside the pouch and does not extrude past the edges. The pouch should always be bigger than your page.Next, when choosing a size, make sure your pouch laminator is big enough and can handle the pouch thickness because we sell some pretty big pouches. Pouches come in thicknesses of 3 to 10 mil, but not every size comes in every thickness. All laminating pouches have rounded corners, And you can find some with prepunch side slots. Using a lamination pouch is simple: First open your pouch and insert your project, alig ... Read More
First off, make sure your project fits inside the pouch and does not extrude past the edges. The pouch should always be bigger than your page.Next, when choosing a size, make sure your pouch laminator is big enough and can handle the pouch thickness because we sell some pretty big pouches. Pouches come in thicknesses of 3 to 10 mil, but not every size comes in every thickness. All laminating pouches have rounded corners, And you can find some with prepunch side slots. Using a lamination pouch is simple: First open your pouch and insert your project, alig ... Read More
This is How to Use Laminating Pouches!
First off, make sure your project fits inside the pouch and does not extrude past the edges. The pouch should always be bigger than your page.Next, when choosing a size, make sure your pouch laminator is big enough and can handle the pouch thickness because we sell some pretty big pouches. Pouches come in thicknesses of 3 to 10 mil, but not every size comes in every thickness. All laminating pouches have rounded corners, And you can find some with prepunch side slots. Using a lamination pouch is simple: First open your pouch and insert your project, align all the edges so they are even. Then place the pouch into the carrier so they open the same way. The edge where the two sides meet is called the crease. Line up the carrier and pouch creases. With pouch in place, slide the carrier into your pouch laminator crease end first as seen here. When it’s done, remove the carrier and unveil your beautiful new laminated project!
Recommended for you
-
![10mil Colored Business Card Laminating Pouches - 100pk]() 10mil Colored Business Card Laminating Pouches - 100pk
10mil Colored Business Card Laminating Pouches - 100pkStarting At: $33.39
-
![Letter Size Sticky Back Laminating Pouches - 50pk]() Letter Size Sticky Back Laminating Pouches - 50pk
Letter Size Sticky Back Laminating Pouches - 50pkStarting At: $58.29
-
![Matte Matte Large Menu Laminating Pouches - 100pk]() Matte Matte Large Menu Laminating Pouches - 100pk
Matte Matte Large Menu Laminating Pouches - 100pkStarting At: $160.00
-
![Laminating Pouch Carriers (Minimum Order of 10 Required)]() Laminating Pouch Carriers (Minimum Order of 10 Required)
Laminating Pouch Carriers (Minimum Order of 10 Required)Starting At: $2.99
-
![Print Protector Display Sleeve - 25pk]() Print Protector Display Sleeve - 25pk
Print Protector Display Sleeve - 25pkStarting At: $15.19
-
![Polar Pressure Sensitive Self-Laminating Sheets - 3mil Clear Gloss 10pk]() Polar Pressure Sensitive Self-Laminating Sheets - 3mil Clear Gloss 10pk
Polar Pressure Sensitive Self-Laminating Sheets - 3mil Clear Gloss 10pkStarting At: $22.99


Related Categories you might also like


Questions & Answers
▶
Asked by Teresa
Thank you for your question. The closest pouch we carry is the 15" x 18" Chart Size Laminating Pouches that would need be trimmed down afterword. The other option would be to go will a roll laminator and laminate. You can find the Roll Laminators here .
Answered by MyBinding