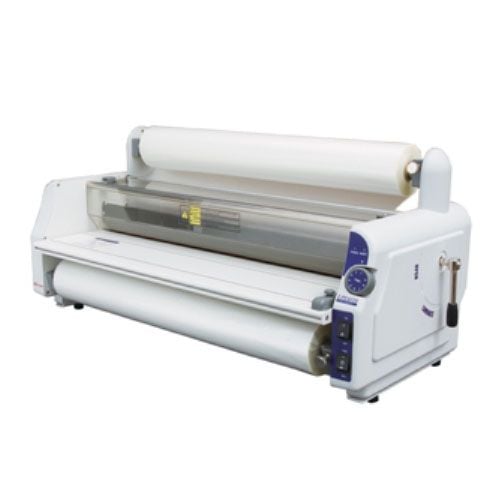
FujiPla 25" Easy-To-Use School Laminator


- 0
- 1
- 2
- 3
- 4
- 5
- 6
- 7

Product Description
Product Details
- Simple to operate and easy threading
- Film free quickly in case of a wrap-around
- Laminates up to 25" wide.
- Rollers can be gapped to eliminate flat spots
- Protective shield
- Fast, 5 minute warm up time
- Adjustable temperature with large dial
- Uses all standard school films, including GBC NAP LAM I
- Laminates 1.5 to 3.0 mil films
- Photo quality
- 1 year parts and 90 days labor.
- Add an additional 1 year On-Site EMA (Equipment Maintenance Agreement) available.
Item Specifications
| Maximum Lamination Width | 25” |
| Maximum Lamination Thickness . | .04” |
| Maximum Film Thickness | 3.0 mil. |
| Lamination Speed | 3 ft. min. |
| Temperature Control Range | Adjustable 194º ~ 300º F |
| Power Source | 120V AC, 60Hz |
| Power Consumption | 1400W |
| Dimensions (WxDxH) | 33.5”Wx15.4”Dx15.4”H |
| Net Weight | 62 lbs. |
| Warm-up Time | 5 min. (approx) |
| Heating Method | Hot Shoe |
| Roller Separation Lever | |
| Reverse Switch | Equipped |
| Core (Mandrel) | 1 inch |
| Warranty | 1 year parts and labor |
Demonstration Video
Fujipla LPE6510 Roll Laminator - Roll Up Shaftbearings Disassembly

Fujipla LPE6510 Rollers, Chambers, F4 temperature Fuse or Thermistor Sensor Disassembly
Staff Review
FujiPla 25" Easy-To-Use School Laminator Review
If your school is searching for a roll laminator, there's one you should take a look at. It's the FujiPla 25" Easy-to-Use School Laminator. Here are this product's strengths and weaknesses for your information.
Strengths:
-
The FujiPla 25" has a very good laminating width. This machine is capable of laminating items that are up to 25 inches wide such as student artwork, posters, and more.
-
This machine is compatible with film that's either 1.5 or 3.0 mil thick. You can use all standard school laminating films with this device. One popular film you can use is GBC's Nap Lam 1.
-
The FujiPla 25" warms up pretty quickly so you won't have to spend the entire day waiting for it to get ready. The machine will be ready for use after 5 minutes of warm-up time. Once it's ready to go, you'll be able laminate a letter-sized document (8.5" x 11") in less than half a minute.
-
All of this laminator's controls are conveniently located right on the front of the device. Controlling the temperature is incredibly simple: just turn the dial.
-
This device's rollers can be gapped. Gapping the rollers helps get rid of any flat spots so your documents will look great when they've been processed. Also, gapping makes loading new film much easier.
-
Since this machine will get warm during use, it's been outfitted with a protective shield so that injuries can be avoided. However, you'll still want to supervise any children who may be around the device when it's being used just to be safe.
-
The FujiPla 25" is backed by a year-long warranty. You can also purchase an on-site maintenance agreement so you can get the machine serviced where you work even after the warranty has expired.
Weaknesses:
-
This device is pretty large so if space is an issue, you may want to choose another laminator. The FujiPla 25" measures 33.5" (width) x 15.4" (depth) x 15.4" (height). If you do choose to use this device in a school, make sure an adult is the one who lifts it because it weighs 62 pounds.
-
Not all thicknesses of laminating film can be used with this machine. You won't be able to use film that's 7 or 10 mil thick, so you may want to select a different machine if your document require the protection a thicker film can give.
-
Finally, this machine doesn't have a cold lamination setting. Thus, you shouldn't process thermally sensitive items with it, such as color copies.
Overall, the FujiPla 25" Easy-to-Use School Laminator would be a great choice for educational institutions. It would even be a good choice for offices that are looking for a laminator that offers simple operation. While it would be nice if this device had a cold setting and the ability to handle thicker film, it's a good, basic laminator that will get most jobs done. If this sounds good to you, be sure to check out the FujiPla 25" today.