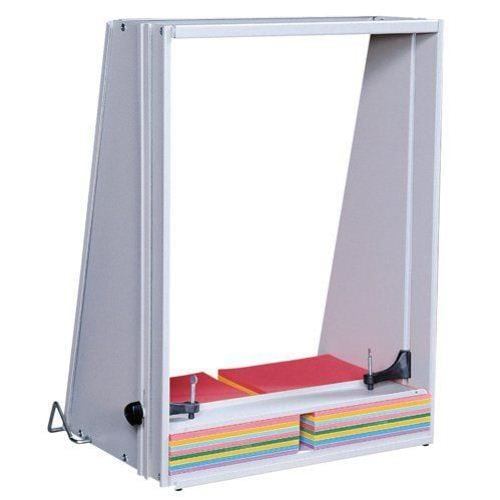
Martin Yale J1824 Padding Press
367.71
NewCondition
InStock
Martin Yale J1824 Padding Press


SWIPE FOR MORE IMAGES
- 0
- 1

Product Description
The Martin Yale J1824 padding press is designed to allow small or large print shops to quickly and easily make their own carbonless forms, note pads and scratch pads. The sturdy metal construction means that the J1824 padding press will hold up under normal usage in a print shop environment. The J1824 padding press will hold materials that are up to 19-3/4" high and up to 17-3/4" wide. Buy the Martin Yale J1824 Padding Press today and start making your own pads in no time.
Product Details
- Simple operation makes it easy to handle most padding jobs
- Ideal for padding carbonless forms, note pads, and scratch pads
- Wing screws tighten by hand - no tools necessary
- Tip back assure that stock is always square
- Capacity is 19 3/4" high and 17 3/4" wide
- Sturdy steel construction
- Dimensions: 19" x 24" x 13"
- Weight: 26 lbs.
- UPC Code: 11991018240
- Manufacturer's Warranty: 180 Day Manufacturer's Warranty (Extended Warranties Available)
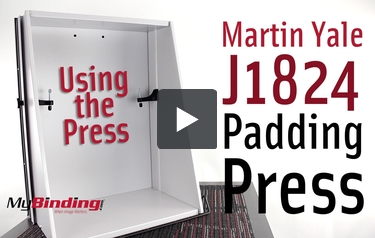
Demonstration Video
Transcript:
In this video we’ll show you step by step how to make your own pads of paper using the Martin Yale J1824 Padding Press!
First, we need to start with the door in place.
Next, count a single stack as a pad template. Now we’re going to take the pad counter and measure our template stack. Put a chipboard under the stack and set it aside. Now, place the counter onto the stack and hook your pages—the exact same size as your first one! Continue with the rest of them, placing chipboard between each stack.
Now it’s an unruly mess, so use a paper jogger to even the stack out.
Ok, back to th ... Read More
In this video we’ll show you step by step how to make your own pads of paper using the Martin Yale J1824 Padding Press!
First, we need to start with the door in place.
Next, count a single stack as a pad template. Now we’re going to take the pad counter and measure our template stack. Put a chipboard under the stack and set it aside. Now, place the counter onto the stack and hook your pages—the exact same size as your first one! Continue with the rest of them, placing chipboard between each stack.
Now it’s an unruly mess, so use a paper jogger to even the stack out.
Ok, back to the press, I’ve place a sheet under the door section. This will catch any of the mess instead of getting on the counter or table.
Next, raise the elevation bar so the entire press is sitting at an angle.
Place a large scratch paper in, folded in half, then place your project onto the page so it leans evenly against the door. The J1824 can actually fit two stacks in, but I only need one for now.
Place another folded scratch paper on the stack, and place the pressure plate on. Bring the clamps down onto the plate. To tighten it more, use the screws on the camps.
Now remove the door to reveal our painting area.
Lightly wet your paintbrush, then paint the side of your stack—starting in the center with strokes to the edges. Notice how the scratch paper keeps the glue off the actual press. Paint the entire side so it’s all covered, but don’t do too much—don’t worry, it should hold.
Close the glue lid tightly and wash your brush off with water. Never pull on the bristles or push the glue toward the handle.
Now wait 60 to 90 minutes for the glue to dry.
When dry, release the clamps and pull your project out.
Now we’ll use a pad separating knife. Slip it under the chipboard and cut part of the edge. I found that to get the best results, continue by pulling the pads apart and not trying to cut the entire edge. Do this with all of the pads. Now you just made your own custom notepads, all of which the pages easily tear out, but hold together well!
Now I want to share a little trick with you: When your first side of glue is dry, before cutting them you can rotate the project around and glue the other side. With both sides glued, now you can take the pads to a stack cutter and cut it into for sections, for 4 times as many quarter sized pads!
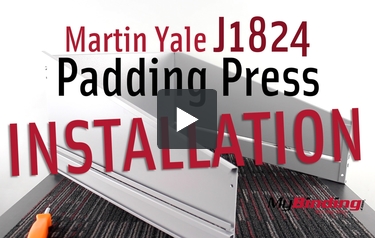
Transcript:
Right now we’re going to setup the Martin Yale J1824 Padding Press.
This video will work well in conjunction with the provided paper instructions.
First, take the door piece. We’ll be screwing on the door handle using the two black screws. Find the two holes at the top, align the handle and screw the screws in with a philips screwdriver.
Next, take one of your side triangular panels. Align the longest end with crevice on the base plate. The flat side will be against the base plate.
We’ll be using the short silver screws and the nuts. Insert three screws on each side, and twist a nu ... Read More
Right now we’re going to setup the Martin Yale J1824 Padding Press.
This video will work well in conjunction with the provided paper instructions.
First, take the door piece. We’ll be screwing on the door handle using the two black screws. Find the two holes at the top, align the handle and screw the screws in with a philips screwdriver.
Next, take one of your side triangular panels. Align the longest end with crevice on the base plate. The flat side will be against the base plate.
We’ll be using the short silver screws and the nuts. Insert three screws on each side, and twist a nut on under the base plate. Use a screw driver to tighten them. Do this to both side panels.
Now screw on the top plate using the rest of the same screws and nuts. Two on each side. Again, use a screw driver and now the unit is a solid piece! Lets continue!
Take a padding press knob and a nylon washer. Insert the knob into the washer and hold the knob in the slit of the side panel.
Now take the clamp, the thumb screw, and rubber tip. Screw the clamp and the knob together, until it gently holds in place. Then screw in the thumb screw, and place the rubber tip on the end of it. Do this to the other side.
Now, take the elevation bar and insert it into the to extra holes on the base plate. It should rotate to be either under the base plate, or on the side of the press. Hang your door on and you’re ready to make your own notepads!
Resources
Related Categories you might also like


Questions & Answers
Thank you for your question. We are based in the United States but we are able to ship most productions ( including the Martin Yale J1824 Padding Press) internationally. If you put items in your cart and view the cart, you can enter your country and postal code to get the shipping cost.
Answered by MyBinding