We're sorry, but we no longer offer this item.
-
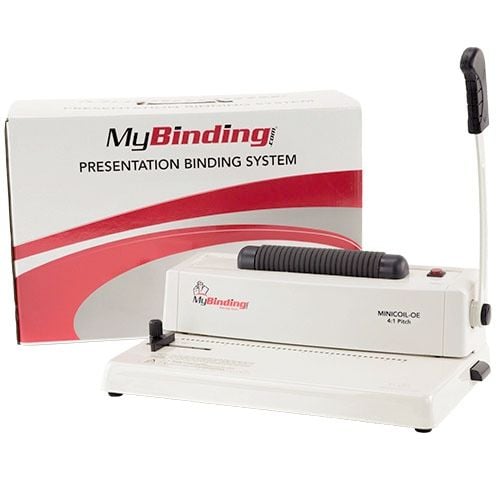
Coverbind MINICOIL Manual Coil Punch with Electric Inserter - Round Hole
$148.45
- GET BINDING Featured Machine
- Regular Price $164.95 - 10% OFF - No Coupon Needed
- 1" Maximum binding size
- 8 sheet punch capacity
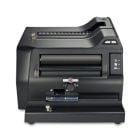
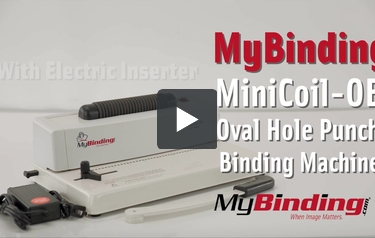
MINICOIL Manual Coil Punch with Electric Inserter - Oval Hole


- 0
- 1
- 2
- 3
- 4
- 5
- 6
- 7
- 8

Product Description
Product Details
- Punches 4:1 pitch .250 pitch 43 oval hole pattern.
- Punches up to 8 sheets of 20lb paper.
- Quality construction compact design. Adjustable depth margin.
- Manual punch with electric coil inserter.
- Includes waste tray and spiral coil selector.
- Warranty: 1 year.
Demonstration Video

Welcome to MyBinding video. This is the MiniCoil-OE 4:1 Pitch Punch and Coil Binding Machine. Before starting, make sure you are indeed using 4:1 coil as your binding. First, adjust the left backstop for the correct size paper. There's an easy 11 inch guide and the punch holes are numbered. Pull the left tab out depending on if you're making a small or larger book and here's a comparison of the margin sizes. Start off with punching a test page first to make sure that your punches are correct. With the pages aligned, pull the lever down. When you're finished punching all your pages, thread the coil manually through a few holes. 4 to 5 does the job well. Then turn on the roller and gently place the coil against it. It will spin the coil through the rest of the holes. When you're done, don't forget to turn the roller off. You should have extra coil on the sides. With coil crimper pliers, cut off the extra. Do so on both sides. This machine is not sold with a pair of crimpers. One of the best parts is that the MiniCoil-OE is almost made completely of metal. For more demos, reviews and how-to's, go to MyBinding.com.
MINICOIL-OE Manual Coil Punch with Electric Inserter - Oval Hole
Whether you're binding daily, monthly or yearly, this inexpensive machine makes binding simple and cost effective for you. All MyBinding’s machines are made with quality, long lasting materials and are backed by a two year warranty for peace of mind. Start by removing the thumbscrew on the right side, slip on the handle and replace the screw. Adjust the left edge stop for the correct size paper, then you can punch up to 8 pages of 20 pound paper. There's an easy 11 inch guide for st ... Read More
Whether you're binding daily, monthly or yearly, this inexpensive machine makes binding simple and cost effective for you. All MyBinding’s machines are made with quality, long lasting materials and are backed by a two year warranty for peace of mind. Start by removing the thumbscrew on the right side, slip on the handle and replace the screw. Adjust the left edge stop for the correct size paper, then you can punch up to 8 pages of 20 pound paper. There's an easy 11 inch guide for standard paper, and the punch holes are all numbered. This particular machine makes oval holes at a 4:1 pitch, meaning it makes four holes per inch and 43 per page. Remember to use 4:1 wire with these booklets. The tab on the left side of the machine is used to set your margins depending on the size of your booklet. Don’t forget to periodically empty the waste tray. After you've punched your pages and covers, take your coil and twist it through four or five holes. Plug in the machine, and press the red button on top to engage the coil roller. Gently press the coil to the roller and watch the coil spin right through to the end. Even out the ends, take your coil crimpers and crimp the ends so it won't come unbound. Stop paying expensive labor and make perfect booklets on your own time with MyBinding's line of hole punch and binding machines.
For more videos and all your binding needs, go to MyBinding.com