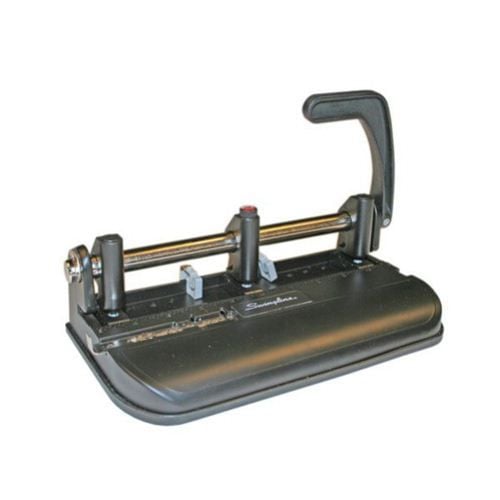
Swingline Lever Handle Heavy Duty Hole Punch - 74350


- 0
- 1
- 2
- 3
- 4
- 5

Product Description
Product Details
- Useful lever handle makes manual punching of larger stacks of paper easier
- 32 sheet paper punch capacity; punches 9/32" holes
- Able to punch 9/32", 11/32" or 13/32" holes. Additional/replacement punch heads are available.
- Adjustable 7-hole punch capability, margin depth and paper guide
- Replacement punch head item number A7074866 in 9/32" size, A7074867 in 11/32" size and A7074868 in 13/32" size
- Limited 90-day Manufacturer's Warranty
Item Specifications
- UPC: 050505743506
- Centers: Fully Adjustable
- Detailed Color: Black
- Material: Metal
- Number of Punch Holes: 2-7
- Performance Guarantee: No
- Punch Hole Size: 9/32"
- Punching Capacity: 32
- Actual Machine Dimensions: 11.3"x5.8"x3.8"
- Actual Machine Weight: 20.1lbs
- Shipping Length: 11.8"
- Shipping Width: 11.7"
- Shipping Height: 12.6"
- Shipping Weight: 20.1lbs
- Period of Manufacturer's Warranty: Limited 90-day
Demonstration Video
Staff Review
Swingline Lever Handle Heavy Duty Hole Punch Review
When selecting a hole punch, you should always get one with a high punching capacity so that you'll be able to get your work done as soon as possible. The Swingline 74350, otherwise known as the Lever Handle Heavy-Duty Hole Punch, can help you out. This device has a great punching capacity, durable construction, and adjustable punch heads. And it has some other features as well. Here's a look at what it has to offer so you can determine if it's the right punch for you.
-
If you're looking for a device that can punch a bunch of sheets at once, the 74350 is the perfect choice. This punch can handle up to 32 pieces of 20 lb. bond paper at a time, so you'll be able to get a lot of paper punched in a hurry. This would be a good device to get if you need to process a lot of paper and desire to do so quickly.
-
The 74350 has seven punching heads that are completely adjustable. You can create a number of different hole patterns thanks to the heads so you can use this device for probably all of your punching needs.
-
The punching heads themselves are high-quality and extremely sharp. They're able to cleanly put 9/32" holes in your documents so the pages will turn freely once they're in a binder.
-
The 74350 has an adjustable margin depth control as well as a paper alignment guide. The guide will help you accurately line up your paper for punching the holes will be in the right place. Meanwhile the adjustable margin depth control will allow you to place the holes as close to or as far away from the edge of the sheet as you want.
-
The 74350 has a lever handle that makes punching easy - at least for right-handed people. The handle is located on the right side of the device, so using this particular punch might be a bit challenging if you're left-handed.
-
This is a very durable punch thanks to its all-metal construction. You'll be able to get a lot of use out of this punch for a long period of time so it's a good investment.
-
The 74350 comes with a 90-day warranty just in case you experience any problems with it right after you purchase it. The warranty will enable you to get it repaired or replaced if necessary.
As you can see, the Swingline 74350 has just about everything you could want in a hole punch. It has an excellent punching capacity, a paper alignment guide, and you can even adjust the margins so the paper will be punched right where you want. This product is solidly constructed and very durable, and its adjustable punching heads will enable you to produce different hole patterns. While it would be nice if this device was designed with both right- and left-handed people in mind, overall the 74350 is worth your consideration if you need something that can help you process your pages quickly.
-
![Master 3020B Hole Punch by Martin Yale - Clearance Sale]() Master 3020B Hole Punch by Martin Yale - Clearance Sale
Master 3020B Hole Punch by Martin Yale - Clearance Sale$46.93
Regular: $66.00
You save: 29%


Related Categories you might also like


Questions & Answers
1. The punch has two 'S' shaped margin guides that snap onto the back ledge of the punch, behind the punch heads.2. Position the guides toward the outer two punch heads for the best results.The margin can be adjusted to either 3/8" or 1/2" margins.
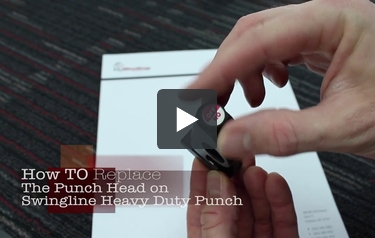
2. Remove the screws from the punch head from underneath the base
3. Use a flat screwdriver to pry open the flat "C" shape retainer located at the end of the round metal shaft.
4. Slide the round shaft out until it has freed of the punch heads
5. Put the new punch heads into place and slide the round metal shaft back into its original position
6. Re-position the punch heads. Replace the screws into the base of the punch heads, position the heads and tighten.
7. Make sure that all the punch heads are in place
8. Mount the 'C" shape retainer back into its original position.
A7074866 - 9/32" holes
A7074867 - 11/32" holes
A7074868 - 13/32" holes
2. Remove the screws from the punch head from underneath the base
3. Use a flat screwdriver to pry open the flat "C" shape retainer located at the end of the round metal shaft.
4. Slide the round shaft out until it has freed of the punch heads
5. Put the new punch heads into place and slide the round metal shaft back into its original position
6. Re-position the punch heads. Replace the screws into the base of the punch heads, position the heads and tighten.
7. Make sure that all the punch heads are in place
8. Mount the 'C" shape retainer back into its original position.