
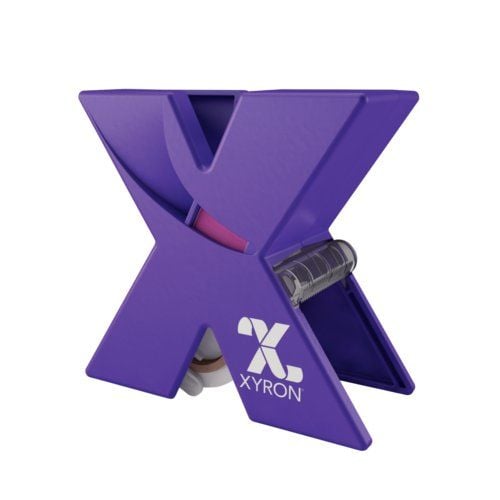
Xyron Create-A-Sticker Model 150 with Cartridge - XRN150


- 0
- 1
- 2
- 3

Product Description
Product Details
- Simply insert the item, pull thru and peel sticker. It's that easy.
- Apply adhesive edge-to-edge for a strong hold.
- No messy glue to clean-up.
- Other cartridges sold separately.
- Comes with non-toxic, acid-free, permanent adhesive.
Item Specifications
- Product Code: xrn150
- Dimensions: 2.38" x 4.13" x 5"
- Material Width: 1.5in. (3.81cm)
- Material Length: 20ft (6.09m)
- Product Size (inch) 1.5
- Manufacturer's Warranty: 1 Year Manufacturer's Warranty
Demonstration Video
Is it so great for kids to use?
It’s great for kids, it comes in cute colors, there’s pink, purple, I mean it’s just and it’s sparkly. It’s just the greatest thing. The thing I really love about it is you can use it on tiny projects, tiny things you’re working on for your project, really intricate die cuts and we’re going to run a couple items through it. Chipboards, it’s incredible the things you can run through it. It takes anything up to the thickness of the ... Read More
It’s great for kids, it comes in cute colors, there’s pink, purple, I mean it’s just and it’s sparkly. It’s just the greatest thing. The thing I really love about it is you can use it on tiny projects, tiny things you’re working on for your project, really intricate die cuts and we’re going to run a couple items through it. Chipboards, it’s incredible the things you can run through it. It takes anything up to the thickness of the nickel. You just want to, when you’re using the thicker items, make sure you guide it through the top with your finger and then you give it a good rub. You want to go around the edges maybe with a fingernail or the edge of the pen. That is going to make the chipboard or the ribbon or the button that we’re going to put through in just a bit completely adhesive in covering every crevice in the back, edge to edge, top to bottom. Once you have it on, you want to; Helen’s going to now try to peel off the plastic. You just set that aside and you got it. They’re sticky all over the place. You can use this on 3D projects; you can use it on home decors, something you’re going to hang on the wall. That is going to be there forever, you don’t have to worry about it falling off. I love it more than anything for ribbon. You know you’re using ribbon on lamp shades, on the top of your albums, on your scrapbook pages, on cards and it’s always been hard to find a way to get ribbons to stick from end to end. This is the perfect machine for it and you can use it, if you’re just using a few inches or if you’re doing a few feet, this is absolutely the greatest thing ever. It’s the same thing as you run it through, give it a good rub, peel off the plastic. It’s incredible and it’s got it all sticky and fantastic and you’re going to lay it across your page or across your project. The thing I really like about it for using it for ribbon is if you look in the machine, there’s this little line through the middle. You can actually take two pieces of ribbons, stick them both through at the same time and pull it off the edge so that’s going to save you some adhesive, you’re going to get your projects done a lot faster and it’s fantastic. The thing I love about this, one of the many things is that you can actually put buttons through which I think is just amazing because they’re thicker and they tend to be difficult for people to adhere on to their project because again if you’re using liquid, it just kind of squeezes out the top but this, same premise. You run it through, you usually want to with buttons and things that are thicker, kind of guide it through with your finger somewhat that it comes right out the other end. Give it a good rub around with your finger, peel it off, it’s sticky on the back. This is great for lampshades, frames, kids’ projects, put it on jars and it’s on and everything on this piece of paper is on for good. So I really just think this is the most amazing tool. It’s so affordable, it’s cute, you can carry it around in your tote bag. I absolutely love it and the great thing about this, just like with all the other Xyron product is that it’s so easy to refill. You just pull these two little tabs, this comes right out, you get your new refill, pop it back in and they also have changed the packaging somewhat so there are actually dots on the package that tell you if it’s repositionable or permanent so that you know what you’re picking up when you buy it at the store which I think is genius. For more information or ideas on how to use your 1.5” Create- A-Sticker, go to Xyron.com/project
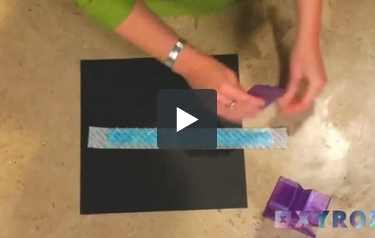
You simply run it through the machine, burnish it to make sure you have your adhesive on every possible edge. I'm going to peel this right off and you've turned your Technique Tile into a sticker. It will adhere to almost any surface, card stock, canvas, bone... Ola and you've got the perfect project!
Staff Review
Details of the Xyron Create-A-Sticker Model 150
Laminators come in all shapes and sizes and can be used in hundreds of applications. One of the more fun things laminators are capable of is creating stickers. A fun, portable device for this application is the Xyron Create-A-Sticker 150. Here are the details about this tiny machine.
- The Xyron 150 can create a sticker from just about anything 1.5 inches wide or less. It comes with a 20 foot roll of non-toxic, acid free permanent adhesive. Twenty feet may not sound like much but it lasts for a long time before running out. Refill cartridges are inexpensive and quickly snap in and out for a quick and easy change. Refills come in both permanent and repositionable adhesive.
- The compact design of this machine allows it to be taken anywhere. It is lightweight and portable, making it the perfect tool to add to your scrapbooking supplies. You don’t even need batteries or a plug-in since it doesn’t use heat. This is especially handy if you frequently attend scrapbook parties.
- It is very easy to use. Simply place your item in the device, pull the adhesive through, and tear off your sticker. Cold lamination doesn’t require heat, allowing you to use this machine anywhere. The lack of heat and electricity used combined with the simple operation provide a safe and fun crafting tool for children.
- The uses for this device are endless. Scrapbookers rave about all the things that are much easier to adhere using this machine. One of the more popular uses is for smaller letters and die cuts. Many smaller embellishments are easier to use when morphed into a sticker. Punch outs, clip art, mini photos, patterned paper, cardstock, thin chipboard and felt are commonly ran through this machine before attachment to a scrapbook or greeting card. You make ribbon self-adhesive to help with card making, bows, and scrapbooking. Chipboard letters can go through upside down, then have glitter, flocking, or whatever you like sprinkled on top. The result is letters with flair, which you can rerun through the device to make the backside sticky as well. One user even reported using their Xyron with thin buttons.
- There are a few things you may want to purchase along with this device. You may want to get a rub-on tool to apply once the sticker is complete. Firmly rubbing the sticker before removing the backing will help it stay adhered. The second thing is an adhesive eraser. Excess glue may stick to the edges of the finished product. An adhesive eraser will gently remove the gunk without damaging your item.
As you can see, the Xyron Create-A-Sticker is an excellent addition to any craft room. Scrapbookers love the convenience and ease of turning practically anything into a sticker for quick and easy adhering to their pages. And since the adhesive is acid-free, items won’t yellow with age. Xyron covers this machine with a one year warranty, so you can rest easy that you’re getting a quality device. Whether you need to adhere small items for a paper craft or you have children who would be thrilled to make their own stickers, this is a great buy for any office.
Related Categories you might also like


Helpful Tips
How to Make a Sticker With the Xyron Create-A-Sticker 150
Although it may seem like it’s too difficult to make your own stickers, nothing could be further from the truth. The Xyron Create-A-Sticker 150 is popular with people who want to make their own stickers for scrapbooking, class assignments, and so on. Here is how you make a sticker with this device:
- Insert a roll of adhesive into the Create-A-Sticker. You can use special cartridges created by Xyron to make this step as easy as possible. The adhesive will be 1.5” wide. Both permanent and repositionable adhesive is available.
- Decide what you want to turn into a sticker. Some possibilities include a small photograph or drawing, a ribbon, a pressed flower, etc. Keep in mind that the adhesive strip is just 1.5” wide, so you will be creating small sticker. However, a new adhesive cartridge will give you 20” of adhesive, so you can make borders for scrapbooks, baby books, and so on.
- Place the item of your choice in the Create-A-Sticker’s feed opening. Tug on the paper liner and drag the item through the device.
- Finally, use the tear bar to free your sticker and remove the plastic lining from it. When you’re ready to use your sticker, just remove the paper backing and apply it. Repeat the process the next time you need to make stickers.
Making stickers isn’t difficult at all, although you might want to practice a bit with the Xyron Create-A-Sticker 150 just to ensure you’re getting the results you need. Good luck and have fun!

