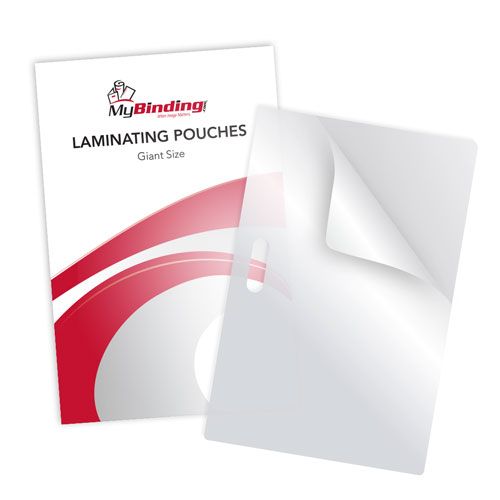
7MIL Giant 4-1/2" x 6" Laminating Pouches with Long Side Slot - 100pk
28.59
NewCondition
OutOfStock
We're sorry, but we no longer offer this item.
Call us at 1-800-944-4573 for personalized recommendations
or check out these similar items that may be a good fit:
-

7MIL School 2-1/2" x 3-5/8" Laminating Pouches - 100pk
$9.69
- Size: School
- Thickness: 7 mil
- Finish: Gloss
- Heat Required: Yes
-
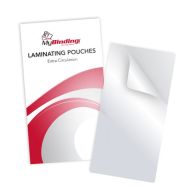
7MIL Extra Circulation 3-15/16" x 6-7/8 Pouches 100pk
$19.89
- Size: Extra Circulation
- Thickness: 7 mil
- Finish: Gloss
- Heat Required: Yes
-

7MIL Large Bookmark 2-3/8" x 8-1/2" Laminating Pouches - 100pk
$14.29
- Thickness: 7MIL
- Pouch sealed on longer side
- Corners: Rounded
- Finish: Clear
7MIL Giant 4-1/2" x 6" Laminating Pouches with Long Side Slot - 100pk


SWIPE FOR MORE IMAGES
- 0
- 1
- 2
Product Description
Our 7MIL Giant 4-1/2" x 6" Laminating Pouches with Long Side Slot offer giant size protection for your laminating needs. MyBinding offers our customers a wide selection of laminating pouches, if you are looking for that hard to find or custom size, call our customer service experts and they will be happy to help.
Product Details
- Size: 4-1/2" x 6"
- Thickness: 7MIL
- Finish: Clear
- Corners: Rounded
- Pouch: Sealed on longer side
- Slot Size: 1/8" x 1/2"
- Slot Location: Long Side
- Quantity: 100 per box
Recommended for you
-
![4]() 4" x 6" Photo Card Laminating Pouches - 100pk
4" x 6" Photo Card Laminating Pouches - 100pkStarting At: $9.69
-
![Laminating Pouch Carriers (Minimum Order of 10 Required)]() Laminating Pouch Carriers (Minimum Order of 10 Required)
Laminating Pouch Carriers (Minimum Order of 10 Required)Starting At: $2.99
-
![Print Protector Display Sleeve - 25pk]() Print Protector Display Sleeve - 25pk
Print Protector Display Sleeve - 25pkStarting At: $15.19
-
![Polar Pressure Sensitive Self-Laminating Sheets - 3mil Clear Gloss 10pk]() Polar Pressure Sensitive Self-Laminating Sheets - 3mil Clear Gloss 10pk
Polar Pressure Sensitive Self-Laminating Sheets - 3mil Clear Gloss 10pkStarting At: $22.99


Related Categories you might also like


Questions & Answers
▶
Asked by Debbie Brown
Thank you for your question. Unfortunately we do not have a pouch that measures 3" x 31/4" . The 2 pouches we have that are closest to that measurement would be the ID Badge (2-9/16" x 3-3/4") and the Large Jumbo (3" x 4-3/8") .
Answered by MyBinding