C-Line 4" x 6" Memory Book Flip Pocket 6pk - CLI-66027 - Clearance Sale
1.59
NewCondition
OutOfStock
We're sorry, but we no longer offer this item.
Call us at 1-800-944-4573 for personalized recommendations
or check out these similar items that may be a good fit:
-
Wilson Jones Clear View-Tab Report Cover with Multicolor Tabs - W55766
$7.09
- Clear Front
- Format tabs with insert sheet or on-line templates
- Translucent Multicolor 5 Divider Tabs
- 20 Sheet Capacity
-
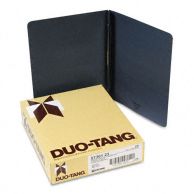
Oxford 2" Dark Blue Two-Hole Prong Report Covers (5 Boxes, 25/Box) - 5730123
$226.79
- Sheet Capacity :500
- Spine Color(s):Dark Blue
- Fastener Material:Metal
- Sheet Size (W x H):8 1/2 in x 11 in
-
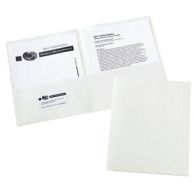
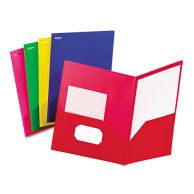
Avery White Two-Pocket Folder 25pk - 47991
$15.59
- Embossed paper construction provides a simple and economical organizational solution
- Two interior pockets provide storage space for papers, brochures and more
- Includes 25 two-pocket folders
- Stylish business card holder
-
Oxford Assorted Fashion PolyPort Twin-Pocket Portfolio 25pk
$91.19
- Inside Pockets:One Back, One Front
- Assortment:5 Blue, 5 Green, 5 Pink, 5 Red, 5 Yellow
- Cover Material(s):Polypropylene
- Sheet Size (W x H):8 1/2 in x 11 in
C-Line 4" x 6" Memory Book Flip Pocket 6pk - CLI-66027 - Clearance Sale


SWIPE FOR MORE IMAGES
- 0
- 1
- 2
- 3

Product Description
CLEARANCE SALE - Available only while supplies last. Act now before they're gone.
Enjoy hours of endless fun creating pages that capture your most treasured memories and keepsakes. The memory book scrapbook flip pocket is the perfect product to create a timeline or help tell a story that concludes from your main scrapbook page. The clear finish offers a sharp, transparent display that makes every presentation bold and bright. C-Line scrapbook page protectors are here to protect your precise memories, family fun and make the moment last forever!
Please note that clearance items are only available while supplies last. Once inventory is depleted we can no longer offer this item.
Product Details
- Attach 4 x 6 photos, keepsakes or mini-pages on top of your scrapbook page
Item Specifications
- Global Product Type: Page Protector
- Pre-Consumer Recycled Content Percent: 0 %
- Total Recycled Content Percent: 0 %
- Post-Consumer Recycled Content Percent: 0 %
- Insert Size: 4 x 6"
- Quantity: 6/PK
- UPC: 038944660271
- Part Number: CL-66027
Demonstration Video
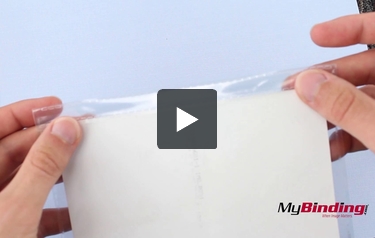
C-Line 4" x 6" Memory Book Flip Pocket - 6-PK
Transcript:
C-Line 4" x 6" Memory Book Flip Pockets!
In each pocket is a horizontal slot to insert your 4 x 6 photos.
Insert you pictures facing the white strip.
Then fold the top over the slot.
When removing the release liner, do pay attention that you are grabbing the paper and not more of the plastic. It can be a little tricky.
But remove the line to reveal the adhesive.
With the adhesive edge still folded, place your first flip pocket onto your project. Flip it upside down and make sure it is on good.
With your other flip pockets, align them just below the first. Do this with as m ... Read More
C-Line 4" x 6" Memory Book Flip Pockets!
In each pocket is a horizontal slot to insert your 4 x 6 photos.
Insert you pictures facing the white strip.
Then fold the top over the slot.
When removing the release liner, do pay attention that you are grabbing the paper and not more of the plastic. It can be a little tricky.
But remove the line to reveal the adhesive.
With the adhesive edge still folded, place your first flip pocket onto your project. Flip it upside down and make sure it is on good.
With your other flip pockets, align them just below the first. Do this with as many pockets as you would like.
Now we can cycle through an assortment of stack photos.
Recommended for you
-
![Cardinal White EconomyValue Ring Binder Without Packaging - 12pk]() Cardinal White EconomyValue Ring Binder Without Packaging - 12pk
Cardinal White EconomyValue Ring Binder Without Packaging - 12pkStarting At: $25.39
-
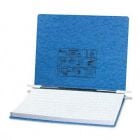
![Acco Light Blue PRESSTEX Hanging Data Binders]() Acco Light Blue PRESSTEX Hanging Data Binders
Acco Light Blue PRESSTEX Hanging Data BindersStarting At: $9.69
-
![C-Line 8.5]() C-Line 8.5" x 11" Clipboard Folder
C-Line 8.5" x 11" Clipboard FolderStarting At: $2.79