
Drytac 42.5" x 66.5" Hot Press Heated Glass Top Vacuum Press
11860.49
NewCondition
OutOfStock
We're sorry, but we no longer offer this item.
Call us at 1-800-944-4573 for personalized recommendations
or check out these similar items that may be a good fit:
-
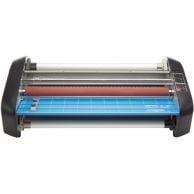
GBC Pinnacle 27 EZ Load 27" School Thermal Roll Laminator - 1701720EZA
$1,895.82
- Warm-up Time: 8-10 min
- Variable Speed: Up to 10 ft./min.
- Film Thickness: Up to 3 mil
- Film Width: Up to 27”
-
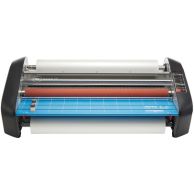
GBC Pinnacle 27 Standard 27" School Thermal Roll Laminator - 1701700A
$1,924.79
- Film Width: Up to 27"
- Max Film Thickness: 3 mil
- Variable Speed: Up to 10 ft./min.
- Warm-up Time: 8-10 min
-
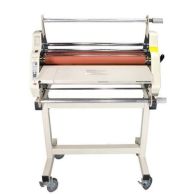
Tamerica VersaLam 2700-P 27" One Side / Two Side Roll Laminator
$3,520.00
- Lamination Thickness: 1.5 - 10mil
- Lamination Speed: 4 fpm
- Laminating Width: 27"
- Mounting Capability: up to 3/16"
-
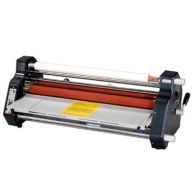
Tamerica TCC-2700XM 27" Extra Mount Roll Laminator
$2,389.00
- Lamination Thickness: 1.5 - 10mil
- Lamination Speed: 8.8 fpm
- Laminating Width: 27"
- Mounting Capability: up to 1/4"
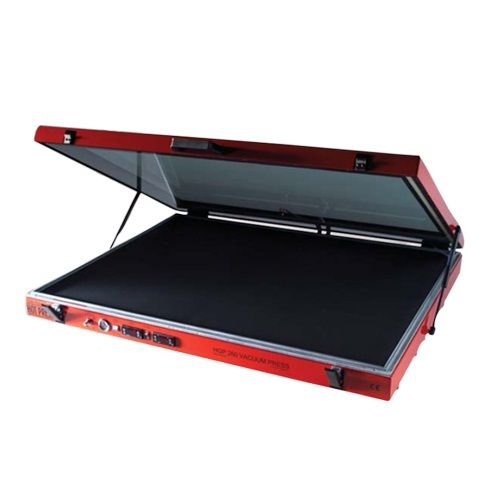
Drytac 42.5" x 66.5" Hot Press Heated Glass Top Vacuum Press


SWIPE FOR MORE IMAGES
- 0
- 1
- 2
- 3
- 4

Product Description
The Drytac 42.5" x 66.5" Hot Press Heated Glass Top Vacuum Press handles a wide range of presentation materials from foam board and wood to photos, art prints and delicate fabrics and is is well regarded by picture framers, photolabs, digital service bureaus and other finishing professionals for their ability to produce a very even spread of heat across the work surface, leading to a superior quality of surface finish. It features an automatic electronic timer with a manual override switch and vacuum pressure adjustment capabilities. Upon completion of the cycle, vacuum pressure is automatically released and the timer resets itself. The top panel of the Drytac 42.5" x 66.5" Hot Press Heated Glass Top Vacuum Press is made up of two sheets of reinforced tempered glass. The inner surface of the lower sheet has an invisible conductive film embedded in it. A controlled electric current is passed through this conductive film creating a highly efficient heating system. A sensor on the glass monitors and controls the temperature by means of a digital thermostat. The glass is extremely smooth and scratch resistant. The transparent top panel allows the operator to view materials during processing and correct mis-aligned work or folded back corners.
Product Details
- Glass top allows most applications to remain visible even when the press is closed.
- State-of-the-art heating system that ensures fast, even heating.
- Programmable vacuum cycle for consistent results.
- Adjustable pressure control.
- Dedicated vacuum pump.
- Wide range of sizes to suit most applications.
- Quick accurate temperature adjustment.
Item Specifications
- Size: 1194mm x 1800mm (47" x 71")
- Diaphragm Working Area: 1080mm x 1689mm (42.5" x 66.5 ")
- Time to Vacuum: 30 Sec.
- Time to Temp: 12 Min.
- Voltage: 220V Single Phase; 50/60Hz
- Wattage: 4.2 kW
- Current: 18 Amp.
- Weight Net / Shipping: 111 Kg (244 lbs.) / 145 Kg (320 lbs.)
- Manufacturer's Warranty:1 Year on Parts / 3 Months on Labor
- Part Number: HGP360
Demonstration Video

Transcript:
Hello and welcome to this training DVD for the Hot Glass Vacuum Press. We are here today to show you some of the features, the control panels, the setup of the machine, the safety features of it and actually how to use the machine and process your work through here. The machine that we are using today is the HGP260 but this DVD is relevant for all machines that we manufacture and previous data machines. This is the most up to date model, some of the features on here might be slightly different to a machine that you might have on sight, that may be a couple of years old but please refer to the ...
Read More
Hello and welcome to this training DVD for the Hot Glass Vacuum Press. We are here today to show you some of the features, the control panels, the setup of the machine, the safety features of it and actually how to use the machine and process your work through here. The machine that we are using today is the HGP260 but this DVD is relevant for all machines that we manufacture and previous data machines. This is the most up to date model, some of the features on here might be slightly different to a machine that you might have on sight, that may be a couple of years old but please refer to the instruction manuals for some of the control panels if they do differ. You will notice that we have got the machine setup, it’s already put on to its stand, we have, there’s instructions within the box of the stand, how to set this up and how to locate the machine on to it. You will notice that we have actually bolted it down, bolted the machine down on to the stand, so if we lift the machine up you will notice that the stand comes with it. That’s the safety feature and must be done, you must bolt it down to the stand and secure it tightly. Also just for the purposes of this video, we’ve got it slight angled against the wall, most people will have it set back against the wall with the work bench alongside it, approximately the same size as the actual vacuum presser itself, so that when you are processing work it goes straight from the bench, straight into the machine. We are going to talk to you about some of the control panels, the control panels at the front, some of the other safety features on the machine. We will start at the front of the machine, you will notice that either side of the machine that we’ve got two latches, this is actually to secure the lid at the press down, okay and they are very easy to do. Starting from the center of the machine working towards me, we have here the temperature controller okay, then we have the power on and off button, the timer, the pump, switch, a vacuum gauge and a pressure adjustment gauge, okay the main, obviously the main switch is the main power on and off switch. So we have actually plugged it into the wall, plug straight socket in, again different machines require different power requirements. So again please check to our either our catalogue or the instruction manual for the power consumption fringe machine. This 260 is just straight plug and play. So we have plugged it in, we have switched it on, you will notice that also we have actually already got this to temperature again for this training video. Again depending on the size of the machine we will take different times to get to the set temperature. The machine is actually set in the factory at ninety degrees centigrade and it will fluctuate because it’s thermostatically controlled. It will fluctuate around from anywhere, from about eighty six, eighty seven up to about ninety three, and it cuts itself in and out and just regulates its own temperature. To set the temperature what we do is we press the set button, and then we can go up and down using the up and down arrows, okay release the set button and that goes back to the temperature the machine is currently at, okay. For the 260 to get to ninety degrees it takes around about fifteen minutes. The next dial that we have here is the timer control, the timer control is used in conjunction with the pump switch. Now we have got the latches down. If we just switch on to manual, you will hear a pump switch itself on, okay that pump will continuously run, will extract all the air from inside the press. This should take around about fifteen seconds for this size of machine, again other sizes of machine may vary and this will, the pump will be switched on constantly it never changes until the point where you come and switch it back on to automatic, and you will notice then as well when I switch onto manual, you will notice that the actual vacuum dial comes round and we are aiming for around twenty eight on the gauge which has given us pretty much full pressure, okay. Back onto automatic, automatic mode then includes the timer so what we have here, when we have it on the automatic mode we can actually, we have got it set here for two minutes, we press the start button what will happen is again I, you will notice that the timer it will pull vacuum, again takes about fifteen seconds to pull vacuum, you will notice that the timer is starting to count down. Once it comes to the end of the cycle, I just stop it there, it will actually allow air back into the machine, so you will notice the vacuum gauge drops off. It will also reset the timer to the pre-set time that you’ve had as set before. To actually set the timer what we do is we press the program set button, okay and we have got the seconds that start flashing, so you can actually go up and down on the seconds. If we press the hAnd button the minutes start to flash and again you will notice that we can go up and down on the minutes, okay. Press start again and that’s we are already presetting it. So automatic mode you can use the timer, manual mode the pump will just continuously run. Then we come onto the pressure adjustment gauge, again if we turn the pump back onto manual you will notice that it will come to pressure, it’s maybe been a little bit quicker this time because I have not opened up the lid and allowed too much air back into it. So it’s only taken just a few seconds to get to vacuum but normally as I say it will take about fifteen seconds. Then we have the pressure adjustment, you will notice here you’ve got the pressure adjustment, the vacuum gauge on around about twenty eight. If we unwind the pressure adjustor, you will notice that gauge dropping down so there is less actual pressure within the press and you will also hear that the actual pump makes a little bit noisier sound. The idea for the pressure adjustment gauge is if you are using something like a phone call, phone center board which you can usually easily damage on the edges, some people like to back the pressure off but there is a slightly better way of doing things and will show you that later on the DVD. So we have here on the side of the machine three little fuses, you will notice that a Pump 5A, a Temperature 1A and a Timer 1A what we have is we just undo one of these, take it out you will notice that there is a little, a little small glass fuse that you will buy from any hardware store. That, the pump one if you come in one day and the pump suddenly stops working the first thing to check would be the pump fuse, just to make sure that it’s all working. Also with the temperature and the timer controller on the front of the machine if either of, if either of them go out, if both of them go out something is going to be different, which I will show you in a second. But if either of them go out it’s likely to be that the temperature controller or the temperature fuse all the time of the use. So have a look at those and get those changed. So we have spoken about the fuses we will move towards the back of the machine, we will talk about the vacuum pump, I’m just going to pop a piece of card just on top of the lid of the press. You will notice that this is the vacuum pump, it has four suction feet on the bottom of it and I don’t want it to stick to the lid of the press. I’m just going to unplug it and show you how it is supplied. It comes on its own separate box, so you will notice that, that’s the machine, that’s the pump itself. So you will take it out of its box, on here there is a little kettle type plug, okay so that gets plugged into the back of the machine. There is only one place for it to plug into, so we just lock that in. The pump also gets supplied with a length of a red hose and you will notice that if I push it into the pump itself it will actually lock in. To disconnect it what you have to do, you have to press and hold the blue collar and then pull the pipe out, so pushing it in actually locks it in place, and the same again for the other end that pumps into, plugs into the machine. At the back of the machine there is only again one place that it will plug into exactly the same fit in here on the back of the machine. So sticking with the vacuum pump you will notice that on here there is a moisture trap which is to collect water within the press itself, it is working a ninety degrees centigrade, various substrates will give off moisture if its card stock that sort of product, it contains water and at ninety degrees centigrade it will give off moisture. So the steam will work its way through the pipe work, via, go in through the pipe. What we don’t want to do is to allow any other moisture to get into the pump and let it rust, so what we have here is a, a built-in moisture trap. It’s a little plastic jar that sits in line with the pump and the pipe work. If this does fill up with water to about half way all we do is we will unscrew it. You actually unscrew it clockwise, take that out, pour the water away pop that back in and then screw it back in into place, anticlockwise, making sure that it is locked in firmly. So, okay that’s the pump all working properly, that can go back down onto the floor. Okay, let’s turn to back of the machine, what we want to talk to you here is about two circuit breakers, they are in here. You will notice that, on the larger the larger of the two the one closer to the center of the press, this one actually is there to protect you, so if you do get any short circuit or the machine shorts out, then this one will actually trip out, and do no harm to the operator. If you do get any power surges that are coming in through, if it a power spike or something that from the electricity display, rather than damaging the machine, this will actually trip out, so it protects the machine. So the large one protects you as the user the smaller one protects the actual machine. You will notice that they are both pointing towards the center of the press. When they are actually being used they have to be pointed towards the center of the press. That's the on position, you will notice that if I turn one of those off, one of them, both of the lights at the front of the machine will switch themselves off. If I turn that back on, they will both come back on. So if you turn the machine on in the morning, put the main power on, off switch and you’ve got it plugged into the wall, with a plug, with a wall plug socket on, neither of the lights turn on at the front, then just double check that these two switches are actually working and they are pointing towards the center of the press. Okay, well before we get started we would like to talk to you about some of the accessories that we are going to be using today. Firstly we have here a self-healing cutting mat available in various sizes. The idea is, is here that if you cut into it the actual, there is fibers within the cutting mat that spread apart. Once the blade has gone through they actually reseal themselves, so it’s always a nice flat surface to cut on, very, very useful. We move then on to the tacking iron that we are going to be using. The tacking iron is used to adhere dry mounting tissue to the back of the poster, and then back down onto the board, again we will show you how to use this very shortly. We then have the piercing tool, the majority of our films are over laminating films, are, come pre-pierced, but there are products that we do need to pierce, so again we will be showing you how to use one of those later. Obviously a cutting knife, preferably one with snap off blades always good to have a nice new sharp blade to use. We have got then the big purple ruler that we sell. The idea for this is that it’s got a good finger protector, so when you are cutting, you’re working it actually protecting your fingers and you are not coming anywhere near your fingers, and then finally we have got the tack cloth or tack rag to clean down substrates or posters and prints. Be aware when you are using this, it has got some adhesive residue on here, so especially with inkjet prints it can leave some residue or take some ink off the surface of the print. So just be careful when you are using this, always be check that it’s good to use on the actual print that you are using. Okay before we get started on how to use the machine with some of the processes, what we would like to do is to talk to you about some of the workings, within inside of the machine. The machine is made up of two parts, the lid of the press, the base of the press. The actual lid of the press is basically two layers of glass, the top layer of glass is a toughened layer of glass, so that if you do want to use as a work bench when you are not using the machine you can do, but please make sure that you put a piece of board on there nothing too heavy and it’s always good to put a cutting mat on there, and please never use a glass cutter actually on top of the actual press. The bottom layer of glass is where the heat comes from and you will notice that it’s at eighty seven at the moment but its preset at ninety degrees. So this piece of glass is actually reading ninety degrees centigrade, which is approximately a hundred and ninety five degrees Fahrenheit. So just be very careful, don’t touch the glass it will burn you, so just be aware that that is a very hot item. In the base of the press, what you have in the base of the press, is basically a rubber diaphragm with a grey seal that works all the way around the edge. A little hole in the bottom at the back right hand corner, that’s connected to the vacuum pump. So when you close the lid, the actual grey seal seals all the air inside the press, you switch the pump on, the air is extracted from with inside the press, the diaphragm then because there is a vacuum created inside, forces itself up onto the glass. So this is where you get your heat this is where you get your pressure from. You will also notice in the base of the press we’ve got protocol grey vacuum foam. Grey vacuum foam is designed for two reasons here when we dry our mounting, which is the next process that I will show you. It’s actually being used as a breather blanket so it’s on the base of the press. The second usage which I will show you later is when you are heat sealing and it designed. Heat sealing films are pre-pierced so they come with holes in them. The idea here is that, you put this on top of the heat seal film the air travels out through the heat seal film, out through the foam and out into the atmosphere. So it’s got two uses breather blanket and on the top as heat for the heat seal film. We have here as well clear silicone release film. Clear silicone release film is a double sided product, nothing else stick to this either side, so again here when we are dry our mounting it goes on top of the print so that, if we do have any overhang of dry mounting tissue it’s not going to stick to the lid of the press. When we are heat sealing we are basically flip both of these over, so that the silicone release film is on the bottom and the heat seal film out of the, the foam is, sorry is on the top. The idea then is with heat seal film, the adhesive is facing downwards so again it’s not going to stick to the base of the press. With the silicone release film just be a little bit careful when you are using it. We are just going to settle that for the dry mounting process I will show you next. So we are just going to roll it back, just be a little bit careful because it can sometimes kink. So we are just going to roll it back on itself, just be a nice and gentle with it, so that we are ready for when we are sticking a picture in. The first thing that we would like to show you is basic dry mounting. So it’s sticking a picture this time, in this instance we are using just a movie poster. Mounting this down onto a piece of card that we have got here. This is a piece of white display board that we sell, two millimeter or two thousand micron thick. We are going to be just sticking this picture, turn onto this board. This time we are going to be using a product called a dry mounting tissue which is called either [inaudible 15:21]. It’s a double sided adhesive, a heat activated double sided adhesive that will stick the picture down onto the board. It’s exactly the same on both sides, and the idea is that it melts and bonds the two surfaces together. So we are going to stick this picture down onto card, first before we do that, we just explain some of the boards that you can and can’t use in the press. Here we have got a selection of some of the substrates that we are going to use. This is the two thousand micron two millimeter thick card that we are going to use. Very smooth on both sides it’s a very good product to mount down onto and we’ve also. In the press you can also use, this is a foam centered board is a very light weight board. There are some issues with using foam centered boards in the vacuum press which we will actually cover in the later chapter when we are actually mounting the picture down on to foam centered board. But you have to be aware that the edge actually crush down very easily. So we will explain that further in a bit further detail. Here we have also got, this is twelve millimeter of about a half an inch thick MDF. Which we can mount to picture down onto as well, and again we are going to show you that later on the DVD. Here we have got a three millimeter Masonite or Jewel faced hardboard again this is a nice product to mount your picture down onto, again all of these, all four of these products that these substrates can be mounted down using the dry mounting tissue, okay. Two that we want to avoid and I know picture framers especially can use this type product. This is a fluted or corrugated tight cardboard. Probably you can actually see already that there are ridges within the surface of the board. If you mount a picture down onto this, especially in the vacuum press where you have given it a lot of pressure over the surface area any one time, this will actually show through, and it will make your picture look like it’s ridged and ribbed, so avoid that. Also the other one to avoid is a product called Foamex, Foamex is an expanded rigid PVC. This is a 5 millimeter thick board, it’s a very hard substrate, you will identify it quite easily, because it’s normally got a clean film to protect the surface of the board, not ideal for vacuum presses. We would recommend that this is done through one of our [inaudible 17:34] mounters through the roller laminator systems. So two to avoid, but plenty are the ones to choose from. Okay so we want to stick this picture down onto the board, so what we have got here, this is the dry mounting tissue. We will just move our poster to the right, roll the sheet or roll the dry mounting tissue out. We can lay our poster onto it then trim. You can notice here I'm leaving about a centimeter or half an inch all the way around the print, just makes life a little bit easier, when you are actually sticking it down on to the board, because when I trim all the boarder, the board is a lot larger than the dry mounting tissue and the poster. So we can trim it all up in one go afterwards. So we are now going to mount the picture down onto this two millimeter card or two thousand micron white display board. Using our tack rag, actually we give this a little bit of a wipe over just to make sure that there is no dust or dirt on the substrate. Remember that when you are mounting and laminating dust is your mortal enemy, so always make sure that everything is nice and clean. We can position the board, even just make sure, turn the print over just make sure that the back of the print is nice and clean. Position it centrally, liner up so that the board, the tissue and then the print is going down in that order, over to the press, into the press, slide it underneath the silicone making sure that it’s within the confounds of the press. Making sure that the poster is within the actual dry mounting tissue area. We can then roll back our silicone release film, making sure that it covers the dry mounting tissue. Close the lid of the press, pop the latches on and then press the start button. You will notice that we have actually got the timer set two minutes and twenty seconds. The twenty seconds is basically to allow the time that is going to take for the actual press to pull pressure, to extract all the air and you will hear the pump changes sound now and we are just at, pretty much at two minutes, okay so that’s going to take for this size, for this type of poster on this type of substrate using [Inaudible 20:09], dry mounting tissue, it’s going to take approximately two minutes than the press. So you can see that the actual cycle, the machine is coming to the end of its cycle, its counting down twenty three, twenty two. So we have got this preset, at the end of, when it gets, drops onto zero you will notice that the pump will switch itself off. This will reset itself back then to two minutes and twenty seconds, we can then undo the latches, take the work out, pump switches itself off as you can see two minutes twenty seconds. Air is allowed back into the press so that it’s going to be easy when we undo the latches. Just to lift the lid of the press. Just be a little bit careful when you are lifting it up that the silicone doesn’t come up with it. That has a tendency then sometimes to crease the silicone release film so the better that you can protect it yourself the longer it will lust. So again we are just going to roll it back, get the silicone release film out of the way. So we will lift it out get it onto a flat surface onto the, your work bench, put it onto a cutting mat will actually absorb the heat so it takes the heat out of the board quite quick and allows it to cool nice and flat. All you need to do then is just trim it out and it’s ready for framing. Okay we would like now to show you how to try and mount, mount this map for instance or any other poster, photograph down onto some foam centered board. Foam centered board is a very light weight product, this is a five millimeter thick substrate and we are going to use it again, using the dry mounting tissue that we are using sticking the picture down onto the board. One thing you will notice is that we’ve actually allowed ourselves quite a large boarder of the foam centered board. The reason for this is when it goes is when it goes into the vacuum press the rubber diaphragm when it forces itself up will crush the edge of the foam centered form approximately about an inch all the way around coming into the board. So again we are just going to move out of the way take our piece of dry mat and tissue, our roller, dry mat and tissue sorry. Roll that, take your poster, your print and your map. Cut the dry mat and tissue, okay just making sure the board is nice and clean. Just using the tack rag there again. We can lay the dry mounting tissue onto the board. So a little cleaning down on the back of the print, again cleanliness is the most important thing here so, again you can see that we have got the board, the largest and the dry mounting tissue and then the print. So we will take the board, the dry mounting tissue and the print over the base of the press, pop it into the base of the press on top of the grey vacuum foam. Pulling back the silicone release film making sure that everything gets covered. The overhang of dry mounting tissue especially, okay. We can then, once it's all covered, close the lid of the press down, put the latches on press the start button and you will notice here that we have got it set to three minutes and twenty seconds, again the twenty seconds is to allow for the, for the vacuum cycle to actually pull pressure, three minutes because we have gone on to foam centered board. Foam centered board is, has got more of a clay like coating on it and it’s not as breathable as the dry mounting tissue, sorry the white display boar that we used earlier. So therefore you are going to need a little bit longer in the vacuum press. Again you will notice that, we are coming to the end of the cycle, where it the three minutes twenty seconds are almost up. Again this is, we are using the timer in the automatic mode so again once the machine has come the end of the cycle after the three minutes and twenty seconds, this will reset itself, again the pump will turn itself off, the air will be allowed back in so that we can actually lift up the lid of the press, and then we will take it out and put onto a flat surface. So there it switches itself off you can see it’s already reset itself. Undo the latches, lift the lid up. Static normally helps the film maker release liner to stick to the lid of the press so again we are just going to carefully, roll the silicone release film out of the way. Fold it over to one side. We can take the board, get it laying on a flat surface and you will actually notice here where instead of five millimeters thick this is probably now around about two millimeters thick. So when we do trim this out again ready for framing, this the actual board where the print is will be five millimeters thick, and I will show you that. Take a big purple ruler, nice sharp blade, always use a sharp blade when you are cutting the foam board, and you can see here, if I put those two side by side the difference in thickness, so we are back to the original thickness of the foam board. So just be a little bit weary when you are using foam centered board in the vacuum press. Okay we would now like to talk about how to draw a dry mount a photographic print down onto a piece of board. Again we are going to be using the white display board, the two thousand micron card that we are using. This time we have got a photographic print, slightly different to paper prints that we use earlier, post to prints movie posters etc. With photographic prints you have a plastic emulsion, basically a plastic surface that’s over the top of the photograph, helps to protect the image underneath, but also this actually stops the photograph from being breathable, So it’s going to take a little bit longer in processing time in the press, and it’s just going to be, you have to be a little bit more critical, or a little bit more sorry, a little bit more cautious on actually working with the print. So again let’s move the board out of the way, take a piece of dry mounting tissue, cut a piece again, half inch approximately half inch, a centimeter all the way around the print. Any excess dry mounting tissue never throw away, maybe just roll them up and pop them inside the [inaudible 27:04] they will come in handy for something at one stage, so again take the board, I’m just going to give this a good wipe down, clean it off, take the dry mounting tissue, lay it on to the board and again you can see the tissue is smaller than the board. Take the print, back of the photograph, just making sure that the back of the photograph is nice and clean, again cleanliness is the most important thing here, pop it onto the board all lined up and then back over to the press. So again, go into the press, fold back the silicone release film making sure that everything stays within sight, the actual rubber band that goes all the way around the vacuum press. Close the lid then. This time we are going to use the timer, we have got it set at three minutes, set at three minutes twenty, so again the twenty seconds is the to allow the vacuum to pull, the three minutes is roughly about the time it’s going to take to process this work. So you are going to treat the photograph pretty much the same, that you would be treating foam centered board and if you are mounting photographs onto foam centered boards be doubly weary because there is no breathability in either direction, so that would probably need even longer in the press. Okay we would now like to show you how to dry mount a picture into the center of a piece of board. So that we are not going to have any other dry mounting tissue showing round the outside. So what we have done, is we have cut a piece of the board that we are going to make the picture onto, to the size that we require. Let’s move that out of the way, take you picture, the dry mounting tissue is slightly larger than the print. We are going to turn this over, position it so that the dry mounting tissue covers the back of the print. Then we are going to use this item here, this is a thing a thing called a tacking iron, and I know this is a very hot shoe, so it’s almost like the tip of a soldering iron. So it’s going to get very hot and give very intense heat. So we are just going to very lightly tack the dry mounting tissue to the back of the print, and what we are going to do here using some scrap so they can release paper. It’s going to be face down in contact with the dry mounting tissue so that if you do get any residue it’s not going to transfer onto the actual, the foot of the tacking iron, so we are just going to, very lightly just tack it through, okay. You can then carefully take the print and turn it over and you can see it’s very lightly tacked to the back of the print, okay. Taking your straight edge you are going to trim up all of the sides. So once you have got the tissue trimmed up fresh, we will take our board, turn that round, we would have it marked out the center where we need to line up the print, okay. The opposite end to where we have tacked it to the back of the tissue to the back of the print, we are actually going to lift the print up, allowing the dry mounting tissue to lay out flat, again taking your silicone release paper, again just rubbing it down so that it’s just all held in position, okay that, it’s not going to move around on the board now we know that centrally aligned to the board. So again same process back over to the press goes into the base of the press on top of the film, again we are just going to fold and rollover the silicone release paper, close the lid down, and switch it on. It’s finished the cycle, we have taken air to the press and you can see here that the dry mounting tissue has been trimmed up fresh there is nothing, overhanging and is ready for framing. Okay we would now like to show you how to make a carrier board which is, which is basically a siliconized board. What we are using here is the white display board the two mil or two thousand micron display board that we used earlier to mount the Scarface poster down. Again using the dry mounting tissue the same product that we have used for mounting the Scarface poster and the map down onto the boards, and here we are using a piece of silicone release paper, this actually, these pieces of silicone release papers actually come off the back of one of our heat seal films, so its recycling, reusing the actual silicone release paper. So what we do, is we get everything lined up almost in square, okay. We are going then pop that into the vacuum press and process it exactly the same way that we would have dry mounted the Scarface poster down onto the board for about two and a half minutes. Okay so now it’s pretty much finished its cycle we just have it set on manual here for a couple of minutes rather than using the timer. So I just switch the pump button onto water, undo the latches, lift the lid of the presser again being just being careful with the silicone release film, fold it back, and again like you would any mounted picture just take it out of the press and allow it to cool on a flat surface, you then got one carrier board made. Okay we would now like to show you quite a common thing for a picture framer, which is poster prints that have come rolled up in a tube, they are already, have been sealed with clean film, all rolled up nice and tight, it going to be very difficult for us to work with something like that. So we’ve taken the plastic cover off, you will notice that, we already know what the size of the poster is. So we’ve cut ourselves, piece a board, again that we use in here, two millimeter card, two thousand micron white display board, again using the dry mounting tissue, we will take two extra pieces of cards actually here, about six inches, fifteen centimeters wide. You will notice what we are going to do here, is to start to rolling the print out, and you can see that it is quite difficult to handle when it is rolled up in a tube so, we will have the one edge held down, we can then roll the rest of the poster out, take a rather strip of the white display board, okay, and you will notice all its doing is basically just weighting the picture down on both sides. We will line it up making sure that it is nice and square on the board, that it is, the tissue is overhanging all the way around, okay. We can then process this, so we are going to pick the whole item up, so we will take it over to the press, onto the base of the press on top of the foam, okay. We can, making sure that it’s still all lined up, even the boards in place for a second. We can lay the silicone release film over the top, okay, close the lid down still making sure that it’s all lined up, that the print is lined up with the tissue and the board. We can close the lid part most of the way down and you will notice then if I can just slide those out, it helps keep the print in place, we can then close the lid fully down, put the latches on and flip the switch on and you will notice here that the print is now being kept nice and tight, nice and flat, its, you can see the air is actually being extracted out. That’s the silicone release film, smoothen itself out, getting rid of all the air and the print is now nice and flat in the center of the board. Okay we would now like to show you how to dry mount an oil painting, down onto a piece of board. The board that we are using here is three millimeters hardboard or Masonite that we are going to stick it down onto. You will notice here, that the, the picture that we are using is an actual oil painting. One from the Far East, the other is quite common these days and you will notice that there is a lot of raised areas where the oil is raised above the canvas. So this is going to be a little bit tricky but we have got to be a little bit careful with this. We are not actually going to use dry mounting tissue here either, dry mounting tissue is very good for flat substrates on flat substrates, so photographs prints etc. down onto flat boards. We are actually going to use a protocol dry mounting film, and dry mounting film again is a double sided adhesive, but is much more aggressive and it will flow into the hills and valleys of the canvas underneath, and give you a much better bond, okay. So the first, what we are going to do, this is going to be a two part operation, we are going to put the picture to one side first, okay, and the board, just move that into that way. We will start here, this is a, the double sided mat, sorry the dry mounting film is a double sided adhesive, heat activator adhesive with a release paper on both sides so we are just going to take off one side of the release paper, okay we can discard that. Then we are going to use the piercing tool and we are just going to lightly pierce through the film. Always pierce through the film and not through the paper. If you pierce through the paper the likelihood is that you are going to push fibers of paper into the film, which might create lampstand underneath the print. Do it in the both directions, okay, let’s move our print out of the way. We are going to take our board, so we will clean it down, clean the hardboard down using a tack cloth or tack rag. Give that a good wipe down, you will notice that there is quite a bit of residue that comes off the board. It’s always good to get that clean. We will take the dry mounting film, flip it back over, lay it down on to the board, and position it in the center. Let’s give that a light smooth out, and we can then pop that back to the press, that can go into the press. We are actually just going to pre-coat the board with the adhesive, so again just fold back the release liner, sorry the silicone release film, flatten it out to the press, we will process that, put that onto the surface of the board for about a minute. So we have now processed this in the presser, this is now a pre-coated board, it has the second sheet of silicone release paper on top. So we need to remove that, so we just dig a knife into the release liner lift it up. You will notice that the adhesive is then stack down on the board. We can take that piece of silicone release paper away, throw that out of the way. Take your print, making sure that there is no loose pieces of cotton that are stack over the back. You can then lay that down making sure that its level with the film, okay. This can then go into the press, again on the base of the press on some foam, again silicone release film, we are just going to fold that back over. Now you will notice that I have got four sheets of grey vacuum foam. The product that is in the base of the press, now when you buy a sheet of vacuum foam it comes in an eight four by four four sheet, plenty enough, there is probably enough for four sheets of foam in the base of the press, because of the raised texture going against the glass we need to actually protect that raised texture against the glass. So here we are going to use the four sheets of the foam, we are just going to lay it on top of the silicone release film, so it gives the surface, the print, some protection from the actual glass. So again close down, put the latches on. So we will switch the pump on, press the start button, you will notice here that we have got it set up four minutes and twenty, again the twenty seconds is to allow for the cycle to work, four minutes because of the thickness of the film, we have got four layers of film in there, so that’s going to take some absorption of heat coming through and we are also actually going to back off the pressure. So we will wait until it’s actually got to full pressure as I said it should take about twenty seconds. It’s taken a little bit longer, probably because of the actual film that’s in there. There is a lot of air that’s trapped within the film. You can see there it’s coming up to pressure, once it’s getting up to pressure what we are going to do, is we are going to back this off. So we are going to use the pressure adjustment gauge, it’s going to wind that out, we are going to back the pressure off, to about half way, just before half way on the dial, and again you will notice that, that should be fine. Reading probably about one o’clock on the dial, as I say it’s going to be in there for about four minutes and twenty seconds, so we just wait for that to process. Okay so we have taken it out of the press, it’s finished its cycle and you will notice now that it is bonded down onto the surface of the board all the raised areas, the oil that’s been raised, they are still all raised there is no, it hasn’t flattened it down at all and again ready for framing. Okay following on from the oil painting, what we would like to show you is another project which has got a raised embossed surface on there. This time it’s a certificate, you will notice that it’s got an embossed area down the bottom here. So what we are going to do, we are going to mount this down onto a piece of board, again this time using dry mounting tissue, back to the dry mounting tissue rather than the dry mounting film. Mounting it down onto a piece of the white display board the two millimeter or the two thousand micron card that we’ve used, Again what we are going to do, put it into the base of the press with the silicone release film over top, and keep covering that, piece of foam over the top of that, again close the press down, wait for its pull pressure and then back the pressure off again to about the central mark, about half way on the dial. Okay so here it is, finished its cycle out of the press, you will notice, nice and flat, mount it down and you will notice that we can still see the embossed raised texture within the print. We would now like to show you how to process fabrics. This is art on fabric, there’s been, somebody has brought this back from Australia. Take off the heading, incase, so we want to mount this down onto a piece of board, the idea for mounting this down onto a piece of board, if you just put this into a frame that’s not mounted, it’s not physically stack down onto a board, because of the weight of the fabric, it actually going to drop down in the frame and you will see it sagging down inside so, again because its fabric we are actually going to use rather than dry mounting tissue ,we are going to use dry mounting film. We are going to mount this time, just onto again, piece of card, this could be hard board, MDF pretty much anything again, the substrate that you want to choose. We precoated the board, again we’ve taken dry mounting film, we’ve removed one release liner, we’ve pierced it, we’ve put it onto the board and we’ve put it into the press, so that we’ve now got a pre-coated board with a heat applied glue, so again we are going to take our knife lift up, the dry mat, the release liner on the dry mounting film. We can pull that release liner all the way off again keenly lets, making sure that there is no bits on the back of the fabric. So it nice and clean, we can lay it down onto our adhesive, and again this goes into the press, base of the press on top of the foam with the silicone release film on the top, for approximately, depending on the thickness of the fabric, it’s going to be in there for about three and a half minutes. So as we can see this is now being processed, it’s out of the press, it’s being permanently stack down onto the board, nice and flat, ready for framing and again as we can see it’s not going to drop once it’s in the frame it’s not going to sag down. Another thing that I will show you here just quickly, is if you notice this print has been quite badly creased, rolled up and I think somebody sat on it, so there is quite a lot of creases that are running through the print, again the machine is going to flatten this out quite considerably so, again we have got board, dry mounting tissue, the print, a clear silicone release film over the top, making sure that everything is inside the press, we will close the lid down, put the latches on, switch the pump on and again you will notice in here that the air will be extracted out, the print will flatten itself out. Unfortunately if there are any marks in the surface of the print, where the ink is actually split and you have got the white fibers of the paper coming up and showing through, there is no a great deal that the machine will do about that because it’s actually the ink that split rather than the paper that’s, the paper that’s been creased. So we are going to leave that in there for a couple of minutes, that will flatten itself out and come out hopefully, well I expect it to be very nice and flat. So we’ve left it in there for a couple of minutes, we will switch the pump off, undo the latches, lift the lid up again it’s that static that’s, pulling it up and if I fold back the release liner you will notice that, that’s down very flat, much better than it was when it was first brought into your shop. Okay we'll now like to show you how to do canvas transfers of paper prints. What we are doing here, this is a regular poster that we've got you will see that part of the boarder is still left on. We do need to trim off the boarder so that it makes it look more like an oil painting effect rather than a poster that has been stack down onto canvas. For a special effect what we are doing here, we are using one of the row to trim, craft cutters just to give it a deckled edge going across the edge which will look nice when on the finished stretched item. So we are going to use the big purple ruler, bring it in a few millimeters from the edge of the print. The idea of the cutter is that it comes with various different wheels that will give you different jagged edges. So we have got it set up, holding it nice and firm, you can see here, just cut through that again, it’s given us a nice deckled edge. Okay so that will show up nicely when we actually stretch it round the wooden stretcher frame. So the next thing that we need to do is to laminate the surface of the print. You will notice that we are not mounting it down onto a board, this is just an unmounted print, an unmounted paper print. We have got here, this is our heat seal film. This is a product called [Inaudible 47:04] heat seal film and you will notice that we have got about four inches, round about ten centimeters larger than the print. The idea for this is, this actually, the heat seal film and the canvas will get stretched round the back of the wooden stretcher frame and hold everything in place. So the first thing that we do, we flip it over, we fold back about five inches over the release liner, okay we put a crease in that release liner, okay we can take our print, tack cloth, clean the print down, again be careful when you are using the tack cloth make sure that you are using it on the right type of images and it’s not going to damage the print at all. So that’s nice and clean, we can then take the heat seal film, position it, you will notice that the actual heat seal film has got the release liner underneath has got a grid on it’s that helps us line up where we need it to be. So we can smooth out the leading edge of the heat seal film, roll up the heat seal film, give the print another quick wipe down underneath and then if you pull the release paper from underneath, just a smooth action. What we are not looking to do is to take it all the way off, we just want to stop at the bottom of the print, okay and if you just push, press your finger onto the heat seal film you will notice that the heat from my finger actually bonds the heat seal film on to the surface of the print. We can then flip it back up, if there is any crease we can actually, we can take release, remove the release liner away at this stage, sorry the heat seal film away at this stage and smooth it back out, so it’s nice and smooth. The idea for the release paper to stay underneath is because that, we’ve got quite a large boarder of heat seal film. Not so bad now, when there is no heat on the product at all, but when it comes out of the press the likelihood is that this heat seal film will want to fall back over on itself. It’s just going to be easier making it look [Inaudible] like this. So this ready to go into the press, just quickly in the press you will notice that we have flipped everything over, so the foam is now on the top and the silicone release film is now on the bottom. So what we will do is just roll that out of the way, we can take our print, lift that up, pop that on to the silicone release, on the base of the press the foam can come over and cover everything and close the lid down, put the latches on and we will press the start button. You will notice that this time we have got it set five minutes and twenty seconds, again the twenty seconds is there to allow for the machine time for it to pull vacuum, and the five minutes is the length of time the heat seal film takes to use. Now this is a [Inaudible] heat seal film and it is fifty micron thick. Basically the rule affirm for every ten microns of thickness of film it will be one minute in the press at ninety degrees or a hundred and ninety five degrees Fahrenheit. So if it’s a fifty micron thick film it will be approximately five minutes. Okay we have now taken the laminated, deckled edged print out of the vacuum press. You will notice that the surface has been laminated, all the holes have been resealed. You will hear in the background the vacuum pump still going, I have actually processed in the exactly the same way that we have done with this paper print, but it’s a photographic print that’s now in the machine. Again just laminating the surface of the print and we’ve got a two inch boarder that’s going all the way around. Canvas transfers, which is what we are doing here, paper prints and photographic prints processed at the start in exactly the same way, so they are both heat sealed but this is where the process slightly changes. So we’ve got one [Inaudible] in the press. We are going to show you how to do this one first, we are going to start this one off. So we turn it over and you will notice that we need to take off the silicone release paper that’s on the back of the print, okay, finger nails are obviously quite good in this scenario, okay so we just remove the silicone the back into the paper, we can discard that. Now while the picture is still faced down, what we want to do, the idea here is that this is actually going to go into a bath of water, which is the bath of water that we have got sat in front of us. The idea is that the actual water soaks into the print, and we are going to do almost like an image transfer. So we are going to take, we are going to remove the heat seal film or the heat set laminate off the surface of the print that’s going to take basically the top surface layer of the print away with it. What we are going to do first is we are going to very lightly pierce the back of the print so that water will migrate and absorb into the fibers of the paper very quickly. So again using the piercing tool but very, very lightly we are not going to put any pressure on this at all, I’m basically just going to, allow the piercing tool to just to go over the surface of the paper. We are just going to really give it a good piercing over the back there, okay. As long as you are not putting any pressure on there nothing is going to start showing through at the front, okay. So that’s nicely pierced, it’s got little holes in the back. What we are going to do is put this into the tray and allow it to soak in, okay, just push that down and you will notice straight away that the water is flooding into those holes, and if you have pierced it well enough that’s probably going to take round about five or ten minutes in the water, okay we will go over on to the photographic print while that’s soaking. So over to the photographic print that’s now being laminated it's been in there for about five minutes. We are going to switch the machine off, undo the latches, okay, there is our photographic print that has had the same treatment, so it’s just had the surface of the print laminated, and you will notice that we’ve actually used two different laminating films. The first print that, the paper print we’ve actually used a protocol [Inaudible 53:37] heat seal film, this time we are using [Inaudible 53:40] heat seal film and again you will notice that it’s got quite a large boarder all the way around, again once we’ve mounted it onto the canvas, the canvas and the heat seal film will be stretched around the back, okay. So again we need to remove the release paper, you will notice that we are actually working on top of the vacuum presser here, there is a good reason for that which is why we are, because when we are using photographic prints, it’s good to try and keep the emulsion warm, it helps stop the emulsion from cracking, so by working on top of the press, and you will notice I’m actually putting the silicone release paper just back down. By working on top of the press that keeps the emulsion nice and soft, so when we are actually stripping it and when we are taking the emulsion off the packing paper it’s not going to end up cracking. Across one of the shortest edges, we will start at one of the corners, will bend it over my finger, then I’m going to get my finger nail, dig into the, between the emulsion and the packing paper, and we are going to start splitting it so that the actual paper has started to split. Always work with the photograph face up, yeah always has to be face up so that you are taking the plastic off the packing paper. Never work with it face down, so we are going to work across one of the shortest edges, as I said just folding it back on itself, I’m just going to pull it back on itself, just keep working across that shortest edge, bring it down a little bit down the length of the print. Okay so we’ve got the lead edge, running all the way across [Inaudible] we are actually going to be using a metal bar or a piece of wooden [Inaudible], we are going to drop that onto the heat seal film, roll up the heat seal film, okay to the edge of the print and then holding the paper down we are just going to pull, the heat seal film back, taken the emulsion with us you can see, that its stripping here. Again roll it up, pull it back, roll it up, let me pull this towards us a little bit, so roll it back again roll it up and just keep working all the way down. You can see once it has started it gets quite easy, take the silicone release film away. Again roll it up and just keep following the same action until you get to the very end and you can see there that the print, you can see the image of the print coming through. So the actual, the print is very thin, this will then want to take on the texture of the canvas coming through from the bottom. So back over to the table and you will notice that now we’ve got, this one is stripped. We are going to put this to one side, we are going to concentrate on the one that's soaking in the bath of water. For this we are going to need something that’s flat and shiny, in this case we are going to be using a piece of a [Inaudible] you can see that it’s been used many times before for demonstrations. A piece of glass anything like that is fine. So we are just going to lay it onto our work surface, take the print that’s being soaked in the bath of water, it does get a little bit wet, you work surface will be a little bit wet, so have some paper towels on standby. We are going to put this, again face up, the same way that we did with the photographic print. You will notice that this is going to be a little bit easier than it was with the photographic print, incase, we smooth it out, and again let’s just start and move it into, so that we can see it, we will start in one corner and then, again the idea here, the prospect is actually going to be keeping the packing paper nice and flat and actually sat down so the suction of it is going to keep it down. You will notice again that the print is looking very thin and comes off as I said slightly easier than it was with the photographic print, okay so there we’ve got a nicely stripped print. We can move that out of our way, lay that back onto the work surface. Again just make sure that there’s no bits of debris on the back of the print. Now this, the process now reverts back to the same way, so the photographic print that you see here, again its stripped, the paper print has been stripped so mounting on to the canvas is done in exactly the same way, so heat sealing and laminating the surface of the print is done in the same way. The second process you either wet strip paper prints, dry strip photographic prints and then we are going to mount it back onto the canvas, so we will move the picture just out of the way slightly. This is our canvas, this is an adhesive coated canvas, which has got a protective release liner on it. This has got a heat activated glue already on here, it’s a beige what we call traditional canvas which has got a heat activated glue on the one surface and protected by a release liner. So what we do is that the actual canvas is cut slightly larger than the heat seal film, we are going to fold back the release liner and put a crease in there, okay. We will take our paper print. Okay so we now need to mount the picture onto the canvas, we need to line up the print with the [Inaudible] of the canvas so it’s running nice and square. So we just lift it up, make sure it’s in the center of the canvas. We can then look through the heat seal film, look at the edge of the print make sure that it’s all nicely lined up, smoothed out. Don’t worry about any creases that are on, the actual heat seal film, that’s going to go round the back of the stretcher bar anyway, okay so again we can just roll up the print. Pull some of the release liner off expose some more of the adhesive on the canvas. We can then, we turn it away from ourselves it’s a little bit easier. Just rub the print down, taking away some of the release liner, again just rubbing the print down as we go. Keep on going. Always good to keep it away from any heat at this stage because if the heat starts to activate the adhesive it does become quite a strong bond so just smooth it out again, don’t worry about any of the creases , okay. We then need to, you will notice that the actual canvas is larger than the heat seal film, if we were to put this into the press now and just, we need to cover this with foam so that the foam is going to push the print down into the texture of the canvas. The overhang of adhesive from the canvas will stick to the foam. So what we are going to do is, we are just going to trim the canvas so that it’s exactly the same size as the heat seal film. So we are just going to come in about a centimeter or about half an inch from the edge of the heat seal film, trimming off the excess all the way around, we’ve still got plenty of canvas there to stretch around to the back, okay and that’s ready now to go back into the press. So lift the lid of the press up, again as I have said earlier it’s going to go under the foam so we move the foam out of the way, take the print onto the base of the press, cover it with a foam and we are going to switch that on, and that’s going to take around about three to four minutes in the press. Okay so now that it’s been processed in the press, we’ve taken it out and you can see there, that the canvas, you can see the canvas effect coming through from the back and also the deckled edge that gives it quite a nice touch. Okay, we would now like to show you how to heat seal a picture, some people ask this whether you can, whether you can dry mount and heat seal all in one go. The answer is yes, you can do it, we wouldn't recommend that you do it, as dry mounting only takes a couple minutes in the press, you are better of sticking the picture down onto the board first, getting it nice and flat lined up with the board all happy so that there is no movement, the print isn’t going to move a round at all and then heat seal it as the second stage. So we've got this picture, this is the picture that we've just dry mounted earlier. This is already mounted down onto the board, now with this picture we are actually going to trim it out flash and then frame it. So what we are going to do, is we are going to heat seal it and using the [Inaudible] the [Inaudible], sorry the [Inaudible film] we've cut a piece that’s slightly smaller than the board, because we are going to trim this out it doesn’t have to overhang, if the print was flash, then just allow it to overhang a little bit. So we've cut it a little bit smaller, okay, we will fold back around about two inches, five centimeters of the release liner, put a crease in there, take your tack cloth again caution when you are using the tack cloth making sure that you are not going to damage the print at all. Take our heat seal film, position it onto the board, okay just tack it down and again if you just roll up the heat seal film, again just give that a little wipe down, underneath. We can pull away the release liner, again if there is any creases in there we can just lift it back off, smooth it down making sure that it’s nice and flat and there is no creases. Then we are going to pop this into the vacuum press. So over to the press, again cause we are heat sealing it needs to go under the foam on top of the silicone release, close that down, close the lid down, put the latches on and we are going to start the timer, five minutes and twenty seconds, [Inaudible] the heat seal film or [Inaudible] film fifty micron, five minutes in the press plus the twenty seconds. So we are going to just bake that, what you will also notice, is that we have kept the silicone release paper. So once that’s processed, we will show you something that’s going to happen with this. Okay so now that we've processed the print and we've heat sealed it, we’ve taken it out of the press, it had already been dry mounted but we’ve now heat sealed the surface of it we can either cut it out, leave it like that, cut it out and frame it or for added effect what we are going to do, the silicone release paper that we took off the back of the heat seal film earlier, we are actually going to use this, we are going to scrunch it up, we are going to scrunch it up into a ball really go to tone on it take out some of the frustration, really scrunch it up, now this can only work properly with the [Inaudible] or the [Inaudible] heat seal film, we wouldn’t recommend it for any of the others. The texture that, the embossed texture doesn’t come through well enough, all we are actually looking to achieve, is that a leather air tight finish, okay. So once we have scrunched it up nicely, we are going to just smooth it, fold it back out, okay, that gets laid, silicone side down, silicone side face down over the top of the print and we are going to pop this back into the press. Again on top of the silicone release, okay, underneath the foam, so the foam goes up over the top, making sure that silicone release underneath is still in line, we close that down, put the latches on and then we will start it again. We are going to leave it in there for another five minutes, the longer that you leave it in there, up until a point, up until about ten minutes the deeper the texture you are going to get. So leave that in there for five and we will get a nice leather finish. Okay so that we’ve processed this, we’ve taken it out of the press, and as you can see it’s got a crashed antic leather effect over the surface, again we can trim this out and that again is ready for framing. Okay, a popular way nowadays of producing canvas prints is printing directly onto an inkjet canvas. So rather than printing onto a photographic paper, or taking a paper print, heat sealing it and stripping it, and then mounting it onto canvas, this is actually being printed directly onto the canvas through one of the big inkjet printers, okay. This is very unstable at the moment, so it does need protecting, what we are going to do is here, this is [Inaudible] heat film, we’ve cut ourselves apiece that’s larger than the print and again it’s exactly the same way, we are going to fold back a couple of inches around about five centimeters of the release, put a crease in there, okay , we can take a tack cloth just wipe over it, lightly wipe over the canvas, again, caution when you are using the tack cloth on the actual surface of the print that you are going to be using it onto. Take the heat seal film turn it back over, line it up onto the canvas, okay, again if we just roll the heat seal film up, okay, and you can see there that the release paper is underneath, again we can just give this a quick wipe down, we then just pull off the heat seal film in one go. Again always do this on a cold surface, again if the actual adhesive on the heat seal film starts to activate it might pick up some of the inks off the inkjet prints. We are just going to smooth that down, you notice here that we haven’t left too much of a board long for this process, just for this demonstration purpose, but again you would normally have about a four inch board all the way around. What we are going to do now, again it’s just trim, heat seal film off square so it’s in line with the canvas. So nothing is going to be overhanging. So once we have trimmed it off, we need to put this into the press, again we are going to put this into the press for five minutes, we are using [Inaudible] heat seal film again. What we are going to do, as you can see, if I lift this up you will actually notice that the heat seal film bunch is up in the center. We are actually going to use a carrier board, which is the board that we made earlier to transport this into the press. So we have got our carrier boards on standby. Lay it on the table, lay your work onto the carrier board and then we are going to pop it into the press. So again lift this up, we are going to fold, the foam out of the way, get that out of the way and then that goes into the press. Fold the foam back down, making sure that it covers, and we can switch the pump on, and it’s going to take about five minutes as I said so, just press the start button, five minutes twenty, twenty seconds again for it to allow to pull to pressure, five minutes for the heat seal film to work. Okay we’ve now taken the laminated inkjet canvas out of the press and you can see here, this is an unlaminated vers
Related Categories you might also like


Downloadable Information
Questions & Answers
Thank you for your question. The maximum temperature is 235 degrees for the HGP360.
Answered by MyBinding

