Fletcher-Terry 2200 Measuring Stops
236.07
NewCondition
OutOfStock
We're sorry, but we no longer offer this item.
Call us at 1-800-944-4573 for personalized recommendations
or check out these similar items that may be a good fit:
-

Keencut 2X Base Extension Support Arm 24" Long - SUP60
$171.00
- Work with Ultimat Gold and Futura Cutters
- Lenth is 24 Inches
- 1 Extension / Box
- 5 Year Warranty
-
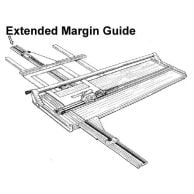
Keencut 30" Extended Margin Guide Kit - UGMG
$288.90
- Work with Flexo Futura, Ultimat Futura and Gold Cutters
- Lenth is 30 Inches
- 1 Guide / Box
- 5 Year Warranty
-
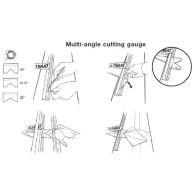
Keencut Multi Angle Cutting Gauge - UGMAG
$211.50
- Work with Flexo Futura, Ultimat Futura and Gold Mat Cutters
- Cut is Straigth
- 1 Set / Box
- 5 Year Warranty
-
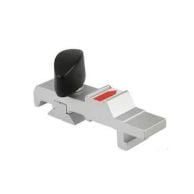
Keencut Reverse Bevel Stop - UGREV
$92.88
- Work with Flexo Futura, Ultimat Futura and Gold Mat Cutters
- Can provide a more sturdy hold
- 1 Stop / Box
- 5 Year Warranty
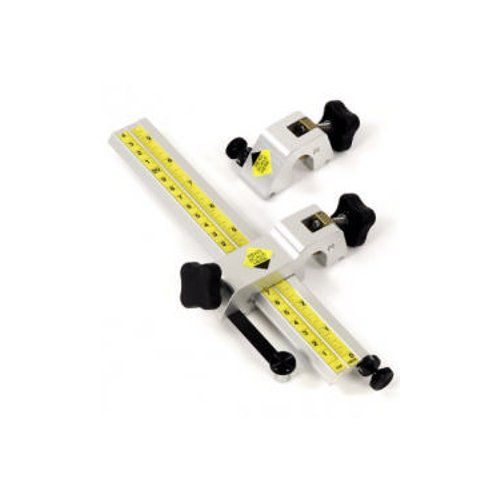
Fletcher-Terry 2200 Measuring Stops


SWIPE FOR MORE IMAGES
- 0
- 1

Product Description
The Fletcher-Terry 2200 Measuring Stops will save time while reducing overcuts and undercuts. Especially useful for cutting multiple mats - one set of stops per package.
Product Details
- Type: Measuring Stops
- For Use With: 2200 Matt Cutters
- Quantity: Set of 2
- Cutting Capacity: 48" (1219mm)
- Part Number: 04-622
Demonstration Video

Transcript:
… new blade in the machine. Loosen the knob here. Pull the magazine out. Take the old blade out. Discard the old blade. Grab the new blade and by putting it into the magazine like this and rotating and pushing it down up against the depth adjustment screw, it should be adjusted. Slide that back into the cutting head, position and tightening it down. Then you grab a mat blank and cut our first mat. Take the mat blank, in this case, the red mat, and face down, set our desired measurement on the guides. So I’m going to go with 3 ¼. I can use the locator pin on every half-inch increment – 3 ½, 3 i ...
Read More
… new blade in the machine. Loosen the knob here. Pull the magazine out. Take the old blade out. Discard the old blade. Grab the new blade and by putting it into the magazine like this and rotating and pushing it down up against the depth adjustment screw, it should be adjusted. Slide that back into the cutting head, position and tightening it down. Then you grab a mat blank and cut our first mat. Take the mat blank, in this case, the red mat, and face down, set our desired measurement on the guides. So I’m going to go with 3 ¼. I can use the locator pin on every half-inch increment – 3 ½, 3 inches – or by adding the mat gauge to this combination, I can arrive at 3 ¼ inches. Tighten the guide. The guide swings into square. Position the mat up against the mat stop. Then we position the top stop into this position, kissing the outside edge of the mat and setting the scale to the desired dimension, 3 ¼ inches, to get the entry [inaudible 00:01:15]. Then set the bottom stop to the same dimension, 3 ¼, and the stopping dimension. From that position, I can go ahead and drop the blade down, make my first cut. Rotate the board 180 degrees so that I have the same dimension on both sides. This way, when I rotate to the construct dimensions, I only need to relocate, reposition the top stop one time. Each time I make these cuts, I try to keep my arm in line with the clamp so I’m making a straight cut throughout the entire process. And that’s how we cut a perfect mat.