
We're sorry, but we no longer offer this item.
Call us at 1-800-944-4573 for personalized recommendations
or check out these similar items that may be a good fit:
-
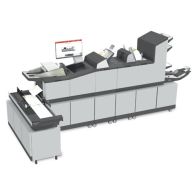
Formax 7700 Series High-Volume Inserters
Call for Quote 1-800-944-4573- System Speed: Up to 7,000 envelopes/hour (#10 envelopes)
- Document Feeder Capacity: Up to 2,000 sheets (combinations of 500 and 1,000 sheet feeders)
- High-Capacity Insert Feeder: Up to 250 sheets 20# (80gsm), up to 1/4” (6mm) booklets
- Duty Cycle: Up to 300,000 pieces per month

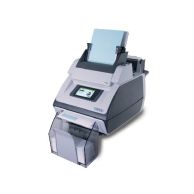
Formax 6306-Standard 3 (Three Station - 3 Standard Feeders w/ Vertical Stacker) Fully-Automatic Folder and Inserter


- 0
- 1
- 2
- 3
- 4

Product Description
Product Details
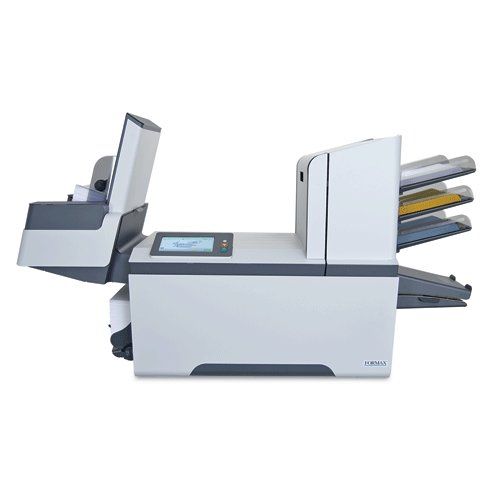
- 7" Color Touchscreen Control Panel: Graphical interface provides quick, easy setup.
- 50 Programmable Jobs: Handy for recurring or frequently processed applications.
- High-Capacity Vertical Stacker: Holds up to 500 finished envelopes in a neat, sequential stack.
- Fully Automatic Adjustments.
- Envelope & Paper Presence Sensors: Graphic indicators on touchscreen assist operators.
- AutoSetTM: Automatically senses and sets paper length, fold type, envelope size, fold length and double document detection. Simply load and go.
- Clamshell Design: Easy access to the paper path.
- Production Feeder: Holds up to 1,200 sheets (20#) or 325 BREs.
- Accumulate Before Folding: Documents are fold and inserted all together.
- Double Document Detection: Essential for document security.
- Eco Mode: Energy-saving feature places the inserter into sleep mode after 1 hour of inactivity.
- Multiple Insert Capability: Fold and/or insert sheets, BREs and cards in almost any combination.
- Multifeeding: Allows for a set number of pieces to be pulled from one feeder, then collated, folded and inserted automatically.
- Fold Types: C, V, Z, Double Parallel, No Fold.
- CIS Scanner: Spans the width of the feeders and reads OMR, 1D and 2D BCR, OCR printed horizontally or vertically anywhere on the page.
- Fold Only without Inserting.
- Daily Mail Mode: For inserting stapled sets.
- Seal and Non-Seal Capabilities.
- Cascade Mode: Maximizes output by connecting multiple feeders with the same document. When one feeder empties, the next automatically starts feeding, for a total hopper capacity of up to 975 sheets.
- Enhanced Folding System: Fold/insert up to 8 pages in tri-fold and up to 10 pages in half-fold .
- Short Feed Trays: For feeding BREs and short inserts.
- Advanced OMR, Advanced BCR, MailDocTM.
- Side Exit Tray: Holds up to 400 envelopes.
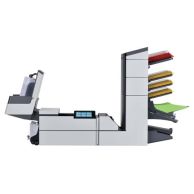
- 5 Models Available (Choose Above):
- FD 6306 Standard 3: Three Station with 3 Standard Feeders w/ Vertical Stacker
- FD 6306-Special 3: Three Station with 2 Standard Feeders, 1 Special Feeder on Bottom, w/ Vertical Stacker
- FD 6306-Standard 2F: Two Station with 1 High Capacity Document Feeder and 1 Standard Feeder, w/ Vertical Stacker
- FD 6306-Special 2F: Two Station with 1 High Capacity Document Feeder and 1 Special Feeder on Bottom, w/ Vertical Stacker
- FD 6306-Standard 2FP: Two Station with 1 High Capacity Document Feeder and a Production Feeder, w/ Vertical Stacker
Item Specifications
- Speed: Up to 3,800 pieces per hour
- Duty Cycle: Up to 40,000 pieces per month
- Standard Feeders: Up to 325 sheets each, 20# bond
- High-Capacity Feeder (Standard 2F, Special 2F, Standard 2FP models): Up to 725 sheets, 20# bond
- Envelope Hopper: Up to 400 envelopes, top-loading
- High-Capacity Vertical Stacker: Up to 500 filled envelopes
- Sheet Size: 3.5" - 14" H x 5" - 9" W
- Programmable Jobs: 50
- Maximum Insert Thickness: 1mm
- Maximum Set Thickness: 2.5mm
- Envelope Size: 3.5" - 6.4" H x 5.5" - 9.8" W *
- Set Thickness: Up to 2.5 mm
- Dimensions: 51" L x 29" H x 20" W
- Weight: 175 lbs. (3 stations)
- Voltage: 120V AC, 60 Hz
- Manufacturer's Warranty:
- 90 day limited Manufacturer's Warranty on parts.
- Excluding wearables and labor.
Demonstration Video
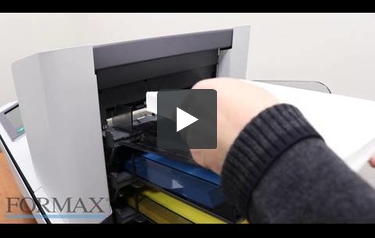
Formax 6306 Series Unboxing and Setup Video
Related Categories you might also like


Inserter Testing Instructions
INSERTER TESTING INSTRUCTIONS
For each individual job that you plan to run through the inserter please do the following: Hand fold and insert one perfect "example" of the job and write a nickname for it on the outside of the envelope. We'll attempt to duplicate the example you've created for us using the machine. Please also include (50) additional outer envelopes that go with that job so that we can get a really thorough testing. Repeat this for every different job you want tested, put them into a larger manila envelope or box, and finally include some form of identification like a business card or a copy of our electronic correspondence. Send it all to:
MyBinding Forms Testing
1 Education Way
Dover, NH 03820
When will I get my results?
We typically have test results within 2-3 hours of your samples arriving. We'll then provide you the Scope of Work which lays out what you can expect when your jobs are run on the machine. You are not obligated to purchase just because we tested your samples, we frequently use the testing process as a way to select exactly which unit would be best for you. We do our best over the phone, but nothing compares to seeing samples and running them through a machine.
Why do you need to test samples? Don't you know what your machine can do?
Whitaker Brothers offers rock bottom pricing on inserters because we have zero returns on these machines. This is accomplished through this pre-sale scoping process. While we can get a pretty good idea of whether a unit will work for your application or not based on your description on the phone, the cost of return shipping on a mistake can exceed $500 so it's not worth taking a chance.
What benefit is there to sending samples up for testing?
Samples testing produces the scope of work you expect out of the inserter. It'll lay out every sample you sent us, our test results, and recommended changes to the mailing (if any are needed). That way before you purchase, and before it lands at your doorstep, you know exactly what the machine can and cannot do. This also allows us to pre-program folds into the machine making your learning curve much easier. Most importantly the scope protects you for incompatibility on any of the jobs you send us to test. If our scope said that a job will work, and when the machine arrives it doesn't work, we are on the hook to make things right.
I need this equipment immediately and cannot wait for the testing process!
While we always prefer to go through the presale process, sometimes time doesn't allow it. If you accept full responsibility for the compatibility of your jobs on the equipment and willingly forgo testing then we can ship immediately. You will not be able to return the product for any reason though. You may have to change your job, change your envelopes, or change the number of sheets you insert to make everything work. We're still responsible for the warranty, and we'll still give you all the assistance we possibly can. But skipping the testing phase puts all responsibility on the buyer.

