MyBinding Knowledge Base
How do I assemble documents for binding with the Fastback Photopress by Powis Parker?
The Fastback PhotoPress Signature sheets are special sheets that feature an adhesive layer that will not activate until the contents are bound with the Fastback PhotoPress. This makes it easy to reposition photographs while assembling the book without having to worry about the photos prematurely adhering to the sheets.There two types of Signature Sheets available for this system: Double Sheets, and Single Sheets. We will discuss each technique separately. The Double Signature Sheets are used to bind photographs that take up one page (e g , 8×10 photos in an 8×10 book). The Double Sheets are folded sheets with three adhesive sides and one side that has no adhesive. The side without adhesive is easily distinguished from the adhesive sides. When assembling books, the non-adhesive side of the Sheet should always face to the right. The Single Signature Sheets are used to bind panoramic photos. They have adhesive on both sides. The order in which the photos, endleaves and signature sheets are assembled is very important.To speed up the process, stack your photographs in the order that you want them bound and keep the endleaves and the signatures handy. While working with photographs, always wear cotton gloves to avoid fingerprints.Book Assembly Without Panoramic Photos
1. Place the first photo in the assembly caddy laying face down to the left. This is the photo that will appear through the window on the cover of the book, so make sure that the image fits the window properly.
2. Place the first Double Signature sheet behind the photo and open it at the fold.
3. Insert the front endleaf into the center of the first Photo-Press Double Signature sheet.
4. Insert the next picture into the Signature to the right of the endleaf. This will be the first picture in the book. Close the Signature sheet (with the endleaf and photo inside of it).
5. Place the second Double Signature sheet behind the first. Now open the second Signature.
6. Place the next two photos facing each other into the center of the Signature sheet. Then close the sheet.
7. Repeat steps 5 and 6 until all the photos are assembled with the Double Signature-Sheets.
8. With the final sheet, insert one photo into the fold of the sheet along with the rear endleaf.
9. The book block is now ready to bind with the Powis PhotoPress.
Book Assembly With Panoramic Photos
Creating books with panoramic photos is slightly more complex. Books made up of panoramic photos do not use the Double-Signature sheets except at the beginning and the end of the books. Please note that even if most of the contents of an book is comprised of panoramic photos, you will still need at least three single-page photos for the cover window, the first photo after the front endleaf, and the last photo before the back endleaf. However, Before assembling a book with panoramic photos, the photos, you must first score the photos. We recommend using the Powis Scoring Machine with your Fastback PhotoPress.
1. Place the first photo in the assembly caddy laying face down to the left. This is the photo that will appear through the window on the cover of the book, so make sure that the image fits the window properly.
2. Place a Photo-Press double sheet behind the photo and open it at the fold. Then, insert the front end leaf into the center.
3. Insert the next picture into the Signature to the right of the endleaf. This will be the first picture in the book. Close the sheet (with the endleaf and photo inside of it). Up to this point, the assembly of an book with panoramic photos and without panoramic photos is the same.
4. Place a Single Signature sheet behind the first assembled Signature.
5. Next place the scored and folded panoramic photo after the Single Signature.
6. Repeat steps 5 and 6 for each panoramic photo. If you wish to intersperse the panoramic photos with standard page-sized prints, follow steps 5 and 6 shown on Page 9.
7. For the final section of the book, you will need to use another PhotoPress Double Signature sheet. Open the Double Signature sheet and insert one photo into the center of the PhotoPress Double Signature sheet, followed by the rear endleaf.
8. The book block is now ready to bind with the Fastback PhotoPress.
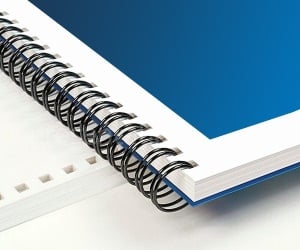
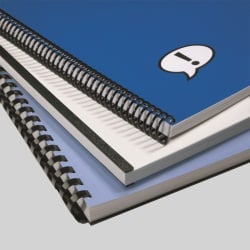
< Over the years, a number of customers have asked me whether they can use twin loop wire with their plastic comb binding machine. These customers often don’t want to have to buy a brand new machine but like the look and feel of twin loop wire binding. However, the answer to their question isn’t as simple as it seems. You see, they actually do make twin loop wire that is designed to work with the plastic comb binding hole pattern. With that said, if you want to use these wires you are going to need a way to close the wires. What is Spiral-O Wire? Let me explain a little bit more…There is a product that we carry called Spiral-O Wire. This wire has 19 loops and is designed to work with the hole pattern from a plastic comb binding machine. Spiral-O Wire is sometimes called Wire Combs or Ibico Wire and was originally designed for use with some of the older Ibico binding machines. A number of the older Ibico plastic comb binding machines also included a twin loop wire closer on the front of them to allow users to use both plastic combs and wire. This 19 loop wire was designed for this purpose. What Equipment is Needed? As the Ibico brand has been phased out by GBC and all of the older Ibico plastic binding machines have been replaced with new models, they no longer have the twin loop wire closer on the front of them. This presents a problem in trying to use these spiral-o wires since you can’t use the wires without a way to close them. One of the only options left is to purchase a Twin Loop wire closer. However, since twin loop wire closers are not incredibly cheap this option usually only appeals to users who have larger electric plastic comb binding machines. Otherwise, it is often advisable to simply buy a low end 3:1 pitch twin loop wire binding machine (the supplies are cheaper). This being said, if you have one of the older Ibico binding machines that has a wire closer included you are in luck. The Spiral-O binding supplies that we carry will work perfectly with your machine and you will be able to use both plastic combs and wire depending on your needs. These Spiral-O binding supplies are available in Black, Silver, White, Blue and Red and in sizes up to 1″ in diameter. If you aren’t sure what type of wire binding supplies that you need to work with your machine simply give us a call. Our trained sales representatives will be glad to help you find the correct supplies for use with your machine.(Read More)