MyBinding Knowledge Base
How to Remove and Replace a Control Board on a Royal Sovereign Laminator?
Here is a transcript of this video:
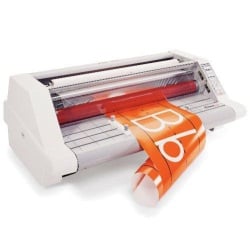
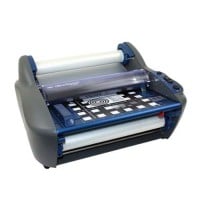
In this segment, we’re going to show how to remove and replace a control board on a Royal Sovereign Laminator. We’ll need a Phillips screwdriver to take the side cover off and a small screwdriver, a Phillips, in order to take out the control board. First, what we do is we have to remove the feed table on the laminator by lifting up and out. We’re going to remove the side cover by removing the four screws that hold the side cover in place. Remove your side cover, disconnect the safety switch on the back and, in the front, you’ll have ribbon cable that you need to depress and remove to get the cover off. To replace the sub-PCP or the controller, there are two screws that you’ll need to remove from the board in order to remove it. Grab your small screwdriver and remove those two screws. Lift out your board and you need to take out your new board. Okay, we want to put the buttons back on to this sub-board or your control board like so. Take this, positioning back into the side panel, and replace the two screws. Now, we need to put the cover back on to the laminator. First, plug in your ribbon cable. Position the handle into the hole. Plug in your emergency stop. Position your cover. Make sure there are no wires hanging out. And now we’re going to replace the three screws. Now we need to check the functionality of our control board. We need to replace our table. Put the back of the table to the pins in the front cover of the laminator. Drop it down. Then we’ll go to the back and turn on the laminator. We’ll take our speed button and see if our speeds go up or speeds go down. We will then hit the run button to see if our laminator works, and it’s working. And we can check our speed going up, speeds going down. Stop the machine and check for a reverse and the rollers are running in reverse.
< Over the years, a number of customers have asked me whether they can use twin loop wire with their plastic comb binding machine. These customers often don’t want to have to buy a brand new machine but like the look and feel of twin loop wire binding. However, the answer to their question isn’t as simple as it seems. You see, they actually do make twin loop wire that is designed to work with the plastic comb binding hole pattern. With that said, if you want to use these wires you are going to need a way to close the wires. What is Spiral-O Wire? Let me explain a little bit more…There is a product that we carry called Spiral-O Wire. This wire has 19 loops and is designed to work with the hole pattern from a plastic comb binding machine. Spiral-O Wire is sometimes called Wire Combs or Ibico Wire and was originally designed for use with some of the older Ibico binding machines. A number of the older Ibico plastic comb binding machines also included a twin loop wire closer on the front of them to allow users to use both plastic combs and wire. This 19 loop wire was designed for this purpose. What Equipment is Needed? As the Ibico brand has been phased out by GBC and all of the older Ibico plastic binding machines have been replaced with new models, they no longer have the twin loop wire closer on the front of them. This presents a problem in trying to use these spiral-o wires since you can’t use the wires without a way to close them. One of the only options left is to purchase a Twin Loop wire closer. However, since twin loop wire closers are not incredibly cheap this option usually only appeals to users who have larger electric plastic comb binding machines. Otherwise, it is often advisable to simply buy a low end 3:1 pitch twin loop wire binding machine (the supplies are cheaper). This being said, if you have one of the older Ibico binding machines that has a wire closer included you are in luck. The Spiral-O binding supplies that we carry will work perfectly with your machine and you will be able to use both plastic combs and wire depending on your needs. These Spiral-O binding supplies are available in Black, Silver, White, Blue and Red and in sizes up to 1″ in diameter. If you aren’t sure what type of wire binding supplies that you need to work with your machine simply give us a call. Our trained sales representatives will be glad to help you find the correct supplies for use with your machine.(Read More)