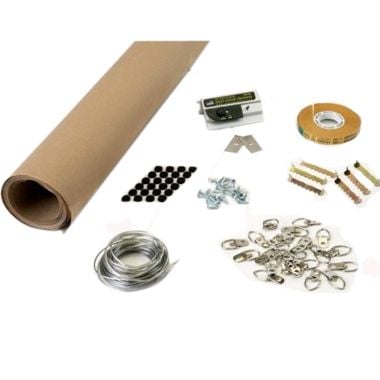
Logan F502 Frame Backing Kit
34.86
NewCondition
OutOfStock
We're sorry, but we no longer offer this item.
Call us at 1-800-944-4573 for personalized recommendations
or check out these similar items that may be a good fit:
Logan F502 Frame Backing Kit


SWIPE FOR MORE IMAGES
- 0
- 1
- 2
- 3
- 4
- 5
- 6

Product Description
A handy complete kit of supplies needed to apply the backing and hardware to wooden picture frames. Use the ATG tape to apply dust cover paper to the back of the frame, professionally trim it to size using the F60 Dust Cover Trimmer, install saw tooth hanger or D-rings with screws provided, tie the wire and apply the felt bumpers.
Product Details
- Includes: 30' x 30" Roll of Dust Cover Paper, 20' of 43lb coated picture framing wire, 6 pcs Saw Tooth Hanger, 24 pcs felt bumpers, 24 pcs D-Rings with screws, one roll 36yd ATG tape, F60 LOGAN Dust Cover Trimmer with two pcs #270 blade and Fully Illustrated Instruction.
- Use the ATG tape to apply dust cover paper to the back of the frame.
- Professionally trim it to size using the F60 Dust Cover Trimmer.
- Install saw tooth hanger or D-rings with screws provided.
- Tie the wire and apply the felt bumpers.
Demonstration Video
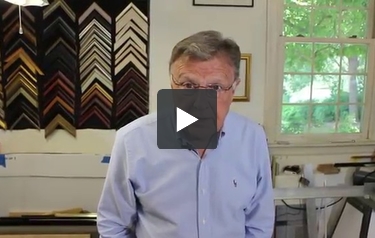
LOGAN F502 Frame Backing Kit Demo
Transcript:
This is the F502 Frame Backing Kit. The kit includes a dust-covered trimmer and three blades, a roll of dust-covered paper, a roll of ATG tape, 24 D-rings and screws, six saw-tooth hangers, 24 felt bumpers, and 20 feet of coded picture frame wire.We have our finished picture ready for the backing to be applied. We’ve already got our points in here to secure it. So the first thing we’re going to do is take the ATG tape. This is double-stick tape. Run it about a quarter of an inch long inside the frame, the same all the way around. Run it all the way to the corner now because [won’t need – 01:01 ...
Read More
This is the F502 Frame Backing Kit. The kit includes a dust-covered trimmer and three blades, a roll of dust-covered paper, a roll of ATG tape, 24 D-rings and screws, six saw-tooth hangers, 24 felt bumpers, and 20 feet of coded picture frame wire.We have our finished picture ready for the backing to be applied. We’ve already got our points in here to secure it. So the first thing we’re going to do is take the ATG tape. This is double-stick tape. Run it about a quarter of an inch long inside the frame, the same all the way around. Run it all the way to the corner now because [won’t need – 01:01] gaps in it. And then we’re going to go in here and pull the paper off. This leaves the tape on the frame. It’s a good idea to press your tape on good so that when you pull the paper off, it doesn’t pull the tape off too, just to make sure it adheres to the wood. Here we go. Now that the tape is on the back of the frame, we’re ready to apply the paper. I’ve pre-cut a piece of paper, just slightly bigger than a frame, laid it on the table. And we will press it on like this. And we turn it over, go around the edges, fold it down. This makes the trimmer easier to use.Now we’re going to trim off the excess paper with the dust cover trimmer.Start at one edge, just [slightly – 02:06] over the top. Put it at about a 45-degree angle. Bring it down till it falls off. We go around all four corners just like this. Now you’re kind of angling the dust cover trimmer in toward the [wark – 02:21]. You don’t want it to run out this way. This will come off cleanly and perfectly. Check it. Make sure it’s okay. Wipe any excess tape off. Don’t put it [upside – 02:48] down because that would be a problem.We’re ready now to put the hanger on. There are a couple of ways to put hangers on your artwork. Let’s start with what’s called the sawtooth. This is a device. It’s very simple, but it is not good for heavy work, only for very light pieces of art. What you do with the sawtooth is measure across… Now this one comes out to about 15-1/2. So I want about 7-3/4, which will be the halfway mark. With the sawtooth, you notice there’s a little [divot – 03:24] right in the middle. You want to put that right over the mark that you just made and then tap it in with a hammer. This will hold light artwork. I would not use it for anything with any weight to it.To use the D-rings, you want to come down approximately one-third of the way. I’m just going to eyeball this and put it in at 5 inches. That’s about a third. Then I take it all and I put a starting point on each side. This will make it easier to put the screw in. Then grab your D-ring. Put it there. See, I can start the screw, just conventional Phillips screwdriver. Put this right in. And this will be the strongest way to hang your piece of artwork, your picture, your painting, whatever you have. This is going to give you a very strong place to hang your wire.
We’re ready to apply the picture frame wire. Coded picture frame wire is easiest to work with. I go through 2-3 inches more than I have to and tie a knot. Then I take the excess of the wire and I wrap it around like this. Go the other side, just a little 2 or 3 inches beyond the hanger, beyond the D hanger. Pull it through. And I’m going to tie a knot, just like I did with the other one. Wrap it around.The last step is to apply a couple of bumpers on the back. This gives your work a little separation from the wall. It kind of helps it from sliding back and forth. And now that frame is completed and ready for the wall.