
Therm-O-Type Foil Fusing Starter Kit with 2 Foil Colors and Optional Foil Cutter & Work Station
0.00
NewCondition
InStock
Therm-O-Type Foil Fusing Starter Kit with 2 Foil Colors and Optional Foil Cutter & Work Station


SWIPE FOR MORE IMAGES
- 0
- 1
- 2
- 3
- 4
- 5

Product Description
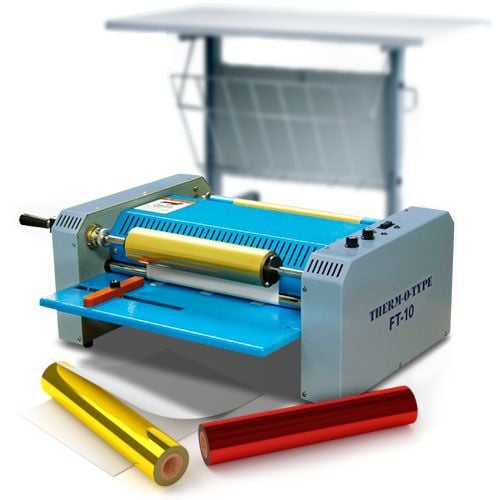
Description of Therm-O-Type Foil Fusing Starter Kit with 2 Foil Colors and Optional Foil Cutter & Work Station
- Therm-O-Type FT-10 Foil Fuser
- Laminating Foil (Choose Color Above)
- Foil Cutter and Workstation (Choose Above)
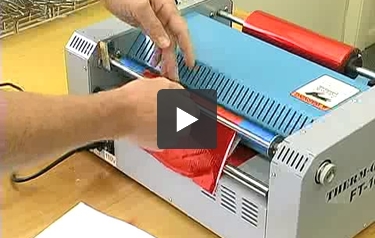
Demonstration Video
Transcript:
Attach the infeed tray. Make sure the main power is off. Forward/Off/Reverse should be Off. Impression lever in off position. Turn on main power. Set speed to 20%. Set temp. to 80%. Allow 15 min. to heat up. Loosen hubs on foil shaft. Remove foil support shaft. Install foil on support shaft. Be sure: Foil is oriented correctly, hub blades are engaged with foil roll, roll positioned correctly side to side. Do not overtighten screws. Pull about 15" from foil roll. Use card stock to push foil through fuser. Foil must be under stripper roller. Move switch to forward. Lower impres ...
Read More
Attach the infeed tray. Make sure the main power is off. Forward/Off/Reverse should be Off. Impression lever in off position. Turn on main power. Set speed to 20%. Set temp. to 80%. Allow 15 min. to heat up. Loosen hubs on foil shaft. Remove foil support shaft. Install foil on support shaft. Be sure: Foil is oriented correctly, hub blades are engaged with foil roll, roll positioned correctly side to side. Do not overtighten screws. Pull about 15" from foil roll. Use card stock to push foil through fuser. Foil must be under stripper roller. Move switch to forward. Lower impression lever. Allow foil to ?track" through fuser. Raise lever. If foil does not stop, increase tension here. Set paper side guide. Run a test sheet and check for quality. Thin papers require less heat at a given speed. Thick papers require more heat at a given speed. 80 lb. sample sheet being run. If tips of letters missing foil ? machine is going too slow or temperature too high. Incomplete foil transfer in solid areas ? running too fast or temperature too low. Check quality from lead edge to tail edge of sheet. Speed may need to be reduced to ensure quality across the sheet. To remove waste foil, cut foil & remove rewind shaft. Remove clamping bar, slide waste foil off shaft. Re-install the rewind shaft. Re-install the clamping bar.
How to Foil Laminate
Transcript:
This is How to Foil Laminate!
For those who are new to this, we’ll first go over the basic steps. We also highly encourage everyone to view our written knowledge base article.
Here’s the supplies you’ll need: your laminating foil, some scissors, a project printed with a laser printer, a carrier, and finally a pouch laminator.
First, open your carrier and place your project inside. Now take your foil and cut it appropriately to cover the correct portion of your project.
Take that piece and rest it in its position.
If you have other colors and places to fill, continue to do so.
... Read More
This is How to Foil Laminate!
For those who are new to this, we’ll first go over the basic steps. We also highly encourage everyone to view our written knowledge base article.
Here’s the supplies you’ll need: your laminating foil, some scissors, a project printed with a laser printer, a carrier, and finally a pouch laminator.
First, open your carrier and place your project inside. Now take your foil and cut it appropriately to cover the correct portion of your project.
Take that piece and rest it in its position.
If you have other colors and places to fill, continue to do so.
It’s important to cover the printed portions of your project that you do not want to foil. If you don’t then some of the print will transfer onto your carrier and make a mess on other later projects.
Now insert the carrier into the laminator. It’s best to either hold or get something to keep the project flat so that the foil does not fall from within the carrier.
When it’s done, remove the carrier from the back, open it up and proceed to peal off the foil and uncover your project.
Now chances are you’ll see spots in your foiled project, which means we have to go over steps for quality control.
I wish there was an easy one-and-done way to get the best quality—but there are so many factors in play that it’s going to take some trial and error on your part.
So first, when printing you have to print on a laser printer, no other printers will work. The foil adheres best with solid black projects—if you have colors, convert them to black or don’t laminate them. This also means no gradients or opaqueness. And it’s best to use vector based images—texts are vector based, and programs like Adobe Illustrator create vector based art.
The smoother the paper, the better your results. And as long as you can print it in your printer you will be able to foil it.
For choosing a laminator, it should have temperature controls for 10 mil, but preferable one that you can set the actual temperature manually to 300 degrees fahrenheit or higher. Slow down your laminator, too. And make sure the throat of your laminator is large enough to fit your projects!
When you choose not to foil part of your project, cover it with paper to avoid ink transferring onto your carrier and ruining future projects. And we’ve found that for some reason, some foils just adhere better than others.
Not every printer toner provides the best results. Some toners adhere better than others, and printers with a high dots per inch(DPI) will provide smoother edges and nicer results.
For serious professional foiling, check out foil fusers and foil stamping machines—these are expensive, commercial usage machines. Follow this information and you should be able to achieve some great looking foil laminated projects!
Item Specifications
Therm-O-Type FT-10 Foil Fuser Details:
Laminating Foil Details:
Letter Size Laminating Pouch Carrier 9" x 11.5" Details:
Therm-O-Type Foil Cutter Details:
Laminating Stand Details:
- Maximum Sheet Size: 12.6" Wide
- Maximum Foil Roll Size: 24" W x 500' L
- Adjustable Speed:Yes
- Adjustable Temperature: Yes
- Core Size:1"
- Compatible Foil Rolls: 24" x 500' Metallic Foil,Holographic Foil and Gloss Pigment Foil
- Foil Unwind/Rewind Tension Control:Yes
- Jam Sensor:No
- Power Requirements: 110V
- Dimensions: 24" L x 16" W x 12" H
- Weight: 44 lbs
- Shipping Weight: 48 lbs
- Manufacture's Warranty:1 Year Limited Parts
Laminating Foil Details:
- Color: Gold, Silver, Copper, Blue, Green, Purple and Red
- Width: 8" or 12"
- Roll Length: 100'
- Core Size: 1/2"
Letter Size Laminating Pouch Carrier 9" x 11.5" Details:
- Compatible with all major brands of laminators on the market
- Coated stock helps ensure that laminating pouches do not stick inside the carriers.
- Pouch Carriers can easily be cut down for smaller pouches or custom sized pouches
- For LetterSize Laminating Pouches (9" x 11.5")
- Part Number: AKLPCLETTER
Therm-O-Type Foil Cutter Details:
- Maximum Foil Roll Size: 24" W x 1000' L
- Power Requirements: 110V
- Dimensions: 43" L x 13" W x 13" H
- Weight: 40 lbs
- Shipping Weight: 45 lbs
- Manufacture's Warranty:1 Year Limited Parts
Laminating Stand Details:
- Heavy duty work table
- Metal racks to hold your laminating roll film (up to 27" film)
- Holds up to 27" wide laminators
- Also holds your finished laminated item
- Heavy duty wheel casters with locking switch
- 4 bumper plastic guards
- Dimension: 107cm x 66 cm x 75 cm (42 inch x 26 inch x 29-1/2 inch)
- Weight: 59.3 Lbs (26.9 Kgs)
- Warranty: 1 Year Manufacturer Warranty
Questions & Answers
▶
Asked by Muhammad Mairaj
Thank you for your question. We are able to order a 220v version of the FT-10 at the same cost. As a non-stock item we would just need to manually process the order for you. Give our customer service department a call at 1-800-944-4573 and we can help get that ordered for you.
Answered by MyBinding

