How to use a Pouch Laminator for School Projects
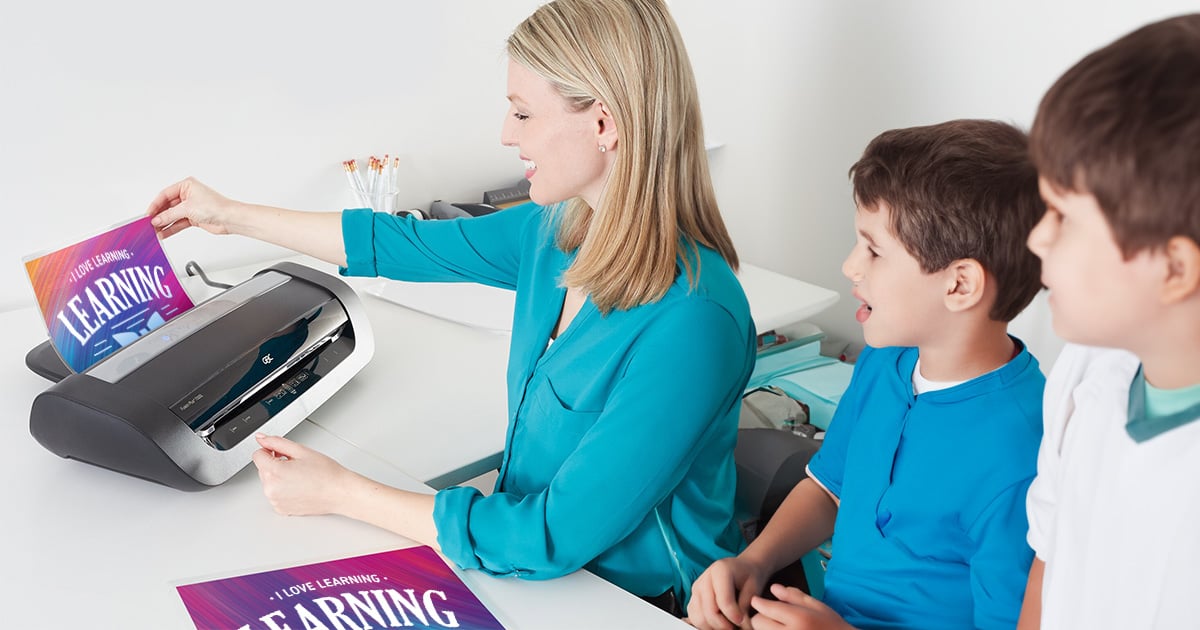
As we all know, teachers love hacks! And that’s why we’re here to share some fun laminating hacks for teachers! We know that educators are always looking for ways to foster creativity and make their resources more durable, professional, and reusable. That’s where a pouch laminator comes in handy.
In this guide, we’ll walk you through the ins and outs of laminating machines, including:
- The benefits of using a pouch laminator
- Types of school projects perfect for lamination
- A step-by-step guide to using a pouch laminator
- Tips and tricks for optimal laminator usage
- Inspirational examples of laminated school projects
Once you’re through, you’ll have all the info you need to know how to use a pouch laminator effectively and creatively in your classroom.
Why Use a Pouch Laminator?
Ever wondered how laminating pouch machines for schools can be a game-changer? From longevity of materials to enhanced visual appeal and reusability, there’s a lot to love about laminating.
Longevity of Materials
Laminating your teaching materials extends their lifespan. No more worn-out flashcards or torn worksheets! With lamination, your resources can withstand the test of time (and your energetic students).
Enhanced Visual Appeal
Laminated materials have a professional finish that enhances colors and makes images pop. Your visual aids will be more engaging, helping to capture and keep your students’ attention.
Reusability
You and your students can write on laminated items with dry-erase markers and then wipe them clean. So they’re perfect for things like reusable worksheets or signage.
Types of School Projects Perfect for Lamination
With all those benefits in mind, let’s explore the types of school projects where a pouch laminator can shine! From visual aids, flashcards, bookmarks, and certificates to student artwork, the possibilities are endless!
Visual Aids
Visual aids are a powerful tool in teaching. Imagine a laminated solar system poster that you can use year after year or a durable timeline of historical events that can withstand countless class discussions. Laminating machines make it possible.
Flashcards
Flashcards are a staple in any classroom. With lamination, your flashcards for vocabulary, math facts, or science terms become reusable and resilient. Laminated flashcards are perfect for group activities or individual study and cut down on waste.
Bookmarks
Encourage your students’ love for reading by creating custom laminated bookmarks. They could even design their own, making it a fun art project that results in a useful tool they can take pride in.
Certificates
Celebrate your students’ achievements with laminated certificates. Whether it’s for perfect attendance, mastering multiplication tables, or being a great team player, a laminated certificate is a keepsake your students will cherish. You can even add a pop of pazazz to them with laminating foil!
Student Artwork
Finally, you can preserve your students’ masterpieces with lamination. Not only does it protect the artwork, but it also gives it a professional finish. Plus, you can display laminated artwork in the classroom or send it home as a durable keepsake.
Step-by-Step Guide to Using a Pouch Laminator:
So, are you ready to get started with your pouch laminator? You can use your machine in six easy steps:
- Turn on your laminator and select the right temperature. The best temperature for your lamination project depends on the thickness of your laminating pouches. It’s best to follow manufacturer instructions here.
- Place your document in the laminating pouch. Make sure it’s centered and straight.
- Allow your laminator to heat up fully. Most have a light or sound indicator to let you know when it’s time.
- Carefully feed the pre-sealed end of the pouch into the laminator, making sure it’s straight and aligned.
- Wait for the laminator to pull the pouch through. Be sure not to pull it out the other end to speed it up, as you will disrupt the heating process and could damage the laminator.
- Let the laminated document cool on a flat surface to finish curing and remain straight – you’re done!
Top Tips and Tricks
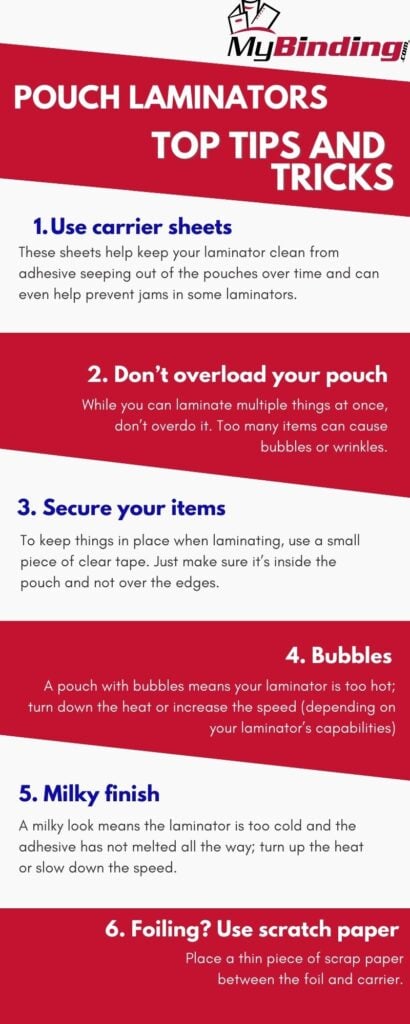
Every teacher loves a good hack, and we’ve got some great ones for you! Check out this infographic, or view below some top tips and tricks to help you get the most out of your pouch laminator and take your lamination game to the next level:
- Use carrier sheets: These sheets help keep your laminator clean from adhesive seeping out of the pouches over time and can even help prevent jams in some laminators.
- Don’t overload your pouch: While you can laminate multiple things at once, don’t overdo it. Too many items can cause bubbles or wrinkles.
- Secure your items: To keep things in place when laminating, use a small piece of clear tape. Just make sure it’s inside the pouch and not over the edges.
- Bubbles: A pouch with bubbles means your laminator is too hot; turn down the heat or increase the speed (depending on your laminator’s capabilities)
- Milky finish: A milky look means the laminator is too cold and the adhesive has not melted all the way; turn up the heat or slow down the speed.
- Foiling? Use scratch paper: Placing a thin piece of scrap paper between the foil and carrier is the easiest hack to ensure foil does not transfer onto the carrier so you can use them many times before wearing out.
Inspirational Ideas and Examples
Now, let's spark that creativity! We'll share some wonderful examples of laminated school projects and school teaching hacks that can inspire you and your students.
DIY Dry-Erase Worksheets and Boards
You can use a laminator to turn any worksheet into a reusable resource. This project is perfect for practice problems, handwriting exercises using dry-erase markers, or even classroom games..
You can also laminate a blank sheet of paper to create a reusable dry-erase board for quick quizzes, drawing diagrams, or brainstorming ideas.
Laminated Bulletin Board Lettering
Laminated letters are a fun way to jazz up your bulletin board, but you can make it even better. Start by laminating a sheet of letters and cutting them out. Next, arrange the letters on a clear strip of tape. This way, you can play around with the placement without any commitment.
Once you’re happy with the arrangement, stick the tape onto your bulletin board, staple the letters in place, and then gently peel off the tape. Voila! You’ve got a perfectly arranged, laminated bulletin board that’s sure to be the envy of the school.
Interactive Wall Maps
Laminate a world map and use it as an interactive teaching tool. You can write on it, stick pins into it, or even let students place stickers on countries they’ve researched.
FAQs
Let’s tackle some of the most frequently asked questions about lamination. You’ll be laminating like a pro in no time!
What can you use laminating pouches for?
You can use laminating pouches for a variety of things, from preserving student artwork to creating durable flashcards and signs.
Can you laminate multiple things in one pouch?
Yes, you can, as long as they don’t overlap and there’s a 1/2" border around each item (1/4" for each item). You also need to avoid overloading the pouch so you don’t get any unwanted wrinkles or bubbles.
What's the best temperature for your lamination project?
The best temperature for your project depends on the thickness of your pouch and the speed setting of your laminator. Thicker pouches require higher temperatures.
How do you keep things in place when laminating?
You can use a small piece of tape inside the pouch to secure your items within it. Just make sure it’s not on the edges!
Can you laminate with Ziploc bags?
No. Attempting to laminate with zip lock bags is dangerous and could break your laminator. They also would not protect your page like a laminating pouch.
What is the difference between thermal laminating pouches and laminating pouches?
“Laminating pouches” is simply a more general term while “thermal laminating pouches” refers to a subset of products designed specifically for heated pouch laminators. Thermal pouches are actually considered standard and are the most popular option.
Creativity in the Classroom
You unlock so many creative classroom DIY ideas when you embrace the world of lamination. With a pouch laminator, you can create durable, reusable, and professional-looking materials that will enhance your teaching, engage your students, and stimulate endless creativity.
MyBinding provides high-quality laminating machines and supplies for classrooms of all budgets and sizes. Are you ready to start exploring the creative possibilities of lamination for your classroom?
Browse more of our fun school lamination supplies.
Call 800-631-3572 with questions, and happy laminating!
Top Tips and Tricks Infographic
