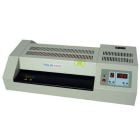
Easy Foiling with a Pouch Laminator
If you want to take your lamination game up a few notches, you can grab some toner reactive foil for your crafts or professional projects. Add a sheen lamination to your business cards or gold foil lamination The best part is that you don't even need special equipment, just a pouch laminator!
I will go over, in depth, how you can apply laminate foil to your documents step-by-step.
What you're going to need:
- Toner reactive foil. Pick from a wide selection of toner reactive foil rolls, all of which are offered in three distinct roll sizes. For those who want to check out the various finishes, check these out:
- A pouch laminator machine. The most crucial features for the laminator to have are adjustable heat and customizable speed settings. There are several pouch laminators which will work well for foiling. It must be able to handle at least a 10 mil lamination bag and achieve temperatures of at least 300° Fahrenheit. However, higher temperatures are unquestionably preferred. It has a sturdy construction and consistently produces quick, clean foil lamination.
- Your design that you will add the foil to. Your design should be printed on uncoated, smooth paper with a dry toner.
- Laminating pouch carriers. MyBinding has a large selection of laminating pouches in various sizes to meet your needs. Keep a few on hand, so you don't find yourself without them after you print your design! Something to cleanly cut your foil off the rolls. You can use scissors or a rotary trimmer for your foil and slim down your projects if necessary. You might have some scrap papers around that are larger than your print. These can be just regular 20 lb. paper from your printer.
Foil Lamination Steps
- Prepare the necessary supplies, including a pouch laminating machine, foil lamination pouches, and the papers or cards you want to add foil to.
- Place the entire item into a laminating pouch carrier with the color side of the foil facing up and away from the design. The pouch should be put into the laminator with the foil side down. The carriers protect the document, ensuring the foil doesn't warp or wrinkle.
- Place the creased end of the carrier into the laminator first when it is ready and set to the proper temperature.
- For laminating foil, adjust the laminator to the proper heat setting. According to the type of laminating machine and pouch you are using, this will differ; therefore, for help, refer to the manufacturer's instructions.
- Follow the laminator's directions while running through the pouch. Usually, this entails passing it through the rollers and watching for it to come out the other side.
- Let it finish processing entirely for the best results, then lay it flat and cool for a few minutes.
- Open the pouch carefully once it has cooled, then take out the card or paper. The card or document's surface will have the foil laminated.
Remember that laminating with foil may be a delicate procedure, so it's crucial to carefully follow the instructions to prevent ruining the pouch, laminating machine, or documents.
Troubleshooting Common Problems
If you find that your foil lamination is not transferring quite the way it should, here are some possible solutions for you to try out.
- Make sure the laminator is set to the correct temperature. Double-check the machine manual and the information on the lamination. It could be that the heat setting is not high enough to seal the foil to the document.
- Ensure the pouch is placed in the laminator with the foil side facing down. Since the rollers are what really transfer the foil to the page, they should be in touch with the foil.
- Check the foil lamination pouch for damage. The foil may not transfer correctly if the pouch is punctured or has a loose seal.
- Examine the rollers in the laminator for damage. The ability of the rollers to effectively transfer the lamination foil onto the document may be affected if they are dirty or broken. If the rollers are damaged, consider replacing them or cleaning them in accordance with the manufacturer's recommendations.
- Ensure the card or document is centered and flat within the lamination pouch. If it isn't, there's a chance the foil won't transfer at all or not evenly.
If these troubleshooting procedures do not resolve the issue, a faulty laminator or foil lamination pouch may be to blame. You can reach our customer service department for more information on this situation to help with the issue.
That's a wrap!
Now you'll be able to add some pizazz to your cards or documents without adding a ton of extra work on yourself. If you're ready to start, check out MyBinding's foil lamination selection, available for everyone, from schoolteachers to corporations.


