


-
Product NameModelMax Creasing ThicknessMax Creasing WidthMachine Dimensions (W x D x H)Box Dimensions (W x D x H)Need of Table SpaceNet WeightWarranty
-
Fastbind Rollo Photographic Creaser
 400 g/m2 / 225 index (Depends on user)475 mm / 18.7 inches610 x 690 x 200 mm / 24.0 x 27.2 x 7.9 inches680 x 790 x 280 mm / 26.8 x 31.1 x 11.0 inchesN/A14.5/17 kg / 32/37.5 lbs1 Year On All Parts
 -
Fastbind C400 Manual Creaser
 400 g/m² / 225 index (Depends on Material Characteristics)400 mm / 15.75"590 x 690 x 170 mm / 23.2 x 27.2 x 6.7"610 x 600 x 130 mm / 21.3 x 24.0 x 5.0"540 x 610 mm / 21.3 x 24.0"13 kg / 28.7 lbs1 Year On All Parts
 -
Fastbind C500 Heavy-Duty Manual Creaser
 400 g/m² / 225 index (Depends on Material Characteristics)510 mm / 20.1"570 x 650 x 320 mm / 25.4 x 22.4 x 7.3"740 x 660 x 280 mm / 29.0 x 26.1 x 11.0"N/A15.7/17.9 kg / 34.6/39.5 lbs.1 Year On All Parts
Fastbind C500 Heavy-Duty Manual Creaser
1495.00
NewCondition
InStock
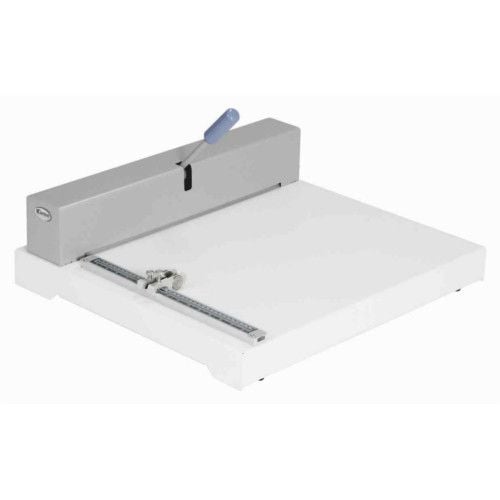
Fastbind C500 Heavy-Duty Manual Creaser
SWIPE FOR MORE IMAGES
- 0
- 1

Product Description
The Fastbind C500 is heavy-duty creaser with new innovations to make large format creasing easy. A new creasing mechanism means you need even less manual force to make a perfect crease. Regardless of the stock, the handle lifts and creases easily and consistently. C500 has several new innovations to ensure steady, accurate placement of your materials. New paper guards help optimize soft cover production. The table surface has been specially machined to ensure smooth, easy movement of the material into the correct position.
Product Details
- Two Alignment Guides. The Fastbind’s C500 is developed specially to crease book soft covers and cards for Print On Demand environment. With two alignment guides, you can make two different set-ups for the dimensions you want to use. (For example to fold letter size sheet into a three-sided pattern, or to make four creases for a book cover).
- Adjustable Creasing Power.Although manually operated, you can adjust the C500 to consistently give a deeper or shallower crease using the adjusters located under the creasing bar.
- Manual Creasing for Large Formats.
- 1-4 Creases with One Setup.
- Precise Creases.
- Creases up to 400 g/m² (225 index) Carton.
Item Specifications
- Max Creasing Thickness: 400 g/m² / 225 index (Depends on Material Characteristics)
- Max Creasing Width: 510 mm / 20.1"
- Machine Dimensions (W x D x H): 570 x 650 x 320 mm / 25.4 x 22.4 x 7.3"
- Box Dimensions (W x D x H): 740 x 660 x 280 mm / 29.0 x 26.1 x 11.0"
- Net Weight: 15.7/17.9 kg / 34.6/39.5 lbs.
- Warranty: 1 Year Manufacturer's Warranty On All Parts
- Part Number: FBC500
Demonstration Video
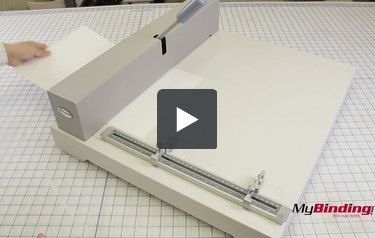
Fastbind C500 Heavy-Duty Manual Creaser
Transcript:
This is the Fastbind C500 Heavy-Duty Manual Creaser.
To begin, we're going to set the second guide out of the way. Next, adjust your guide to the appropriate distance. Align it to the inside of the guide. I'm using 8.5" paper, so I'll set my guide to that.
Next take your softcover with the front to the right. Flip the cover over, insert it into the creaser, and align it to the guide on the right. Make your crease. To position the page to the right guide, slide it under the left guide as demonstrated here.
Now flip the cover over and with the front still to the right, re-insert the cov ... Read More
This is the Fastbind C500 Heavy-Duty Manual Creaser.
To begin, we're going to set the second guide out of the way. Next, adjust your guide to the appropriate distance. Align it to the inside of the guide. I'm using 8.5" paper, so I'll set my guide to that.
Next take your softcover with the front to the right. Flip the cover over, insert it into the creaser, and align it to the guide on the right. Make your crease. To position the page to the right guide, slide it under the left guide as demonstrated here.
Now flip the cover over and with the front still to the right, re-insert the cover, this time aligning it to the left guide. Make the crease, and it's ready to be bound in a Fastbind machine.
Using this method creates a binding edge crease and an inside hinge crease, so your glued cover opens easily.
Now, you can also use the second guide for either a back spine crease (though Fastbind perfect binding machines do not need this), or use it to create a tri-fold project.