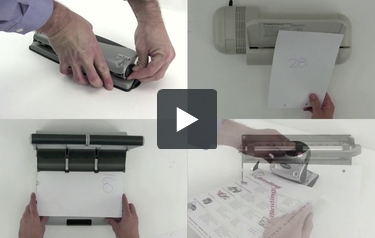
How to Book Bind-Popular Methods for Business Projects
Estimated Reading Time
4 Minutes
TLDR
The type of binding you choose can make or break your business presentations. Discover seven different popular binding methods, steps to complete them, and how they can elevate your projects.
Are you looking for effective bookbinding methods for your business projects? The type of method and binding system you choose can transform your business presentations from average into aesthetic, professional documents that captivate and impress. Even better, there are a variety of popular binding styles, each with unique uses and benefits.
In this article, we’ll cover:
- Coil binding
- Comb binding
- Wire binding
- Tape binding
- Thermal binding
- Book rings
- Screw posts
Coil Binding Method: Durable & Practical
First up is coil binding, also known as spiral binding. This method is one of the most popular binding styles, and for good reason. It uses a durable, flexible, coil-shaped PVC plastic spine that threads through holes punched along the edges of your pages. The coil allows you to turn pages 360 degrees easily, and they come in a variety of colors to really make your presentations pop. It’s also relatively inexpensive, only costing about $2-$5 per book, completed.
Spiral binding a book is really easy:
- Use a coil binding machine to punch uniformly spaced holes along the edge of your perfectly aligned documents.
- Begin spinning the coil binding by hand onto the punched document at least an inch, then hold it gently against the spiral binding machine’s inserting rollers to finish winding it through. If your machine doesn’t have an inserter, separate inserting modules are available or you can insert it by-hand. .
- Cut and crimp the excess coil with cut/crimp pliers.
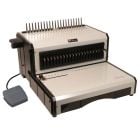
Comb Binding: Easily Editable
Comb binding is another popular choice for business documents thanks to its affordability, accessibility, and ease of editing. It has plastic binding combs available in a variety of sizes and over a dozen colors, making for attractive presentations anywhere from just a few pages long up to 400 sheets of paper. You can also open and close the combs after binding, allowing for easy addition or removal of pages, making this a great editable binding option for reports that require frequent updates.
You can comb bind in three steps:
- Use the comb binding machine to punch holes through your aligned papers.
- Select your comb based on the built-in measuring tools and feed it onto the teeth of the comb opener.
- Use the machine’s lever to open the teeth, thread your project over them, and use the lever again to close them. Voila! You’re done!
Wire Binding: Professional & Clean
Wire binding is a great option if you’re looking for a high-end, professional look that’s perfect for business proposals, executive summaries, and any other presentations that need a sleek, elegant appearance. And much like coil binding, wire-bound documents can open completely flat and rotate 360 degrees.
To make a wire binding document, follow these simple steps:
- Use the Wire-O punching machine to punch holes in your project.
- Place your wire onto the wire hanger on your machine (if applicable).
- Thread the pages into the binding face down until they’re all in place.
- Place the wire with the opening face down into the wire closer and use the lever to clamp the binding together.
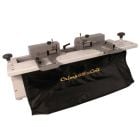
Tape Binding: Low Maintenance & Low Consumable Cost

If you’re looking for an efficient, low-maintenance binding solution, tape binding is an excellent choice! Also known as fastback binding, it uses a strip of tape with a specialized heat-activated adhesive to bind the document. The adhesive is very strong, binding up to 350 sheets of paper at a time. The finished projects also lay flat for easy reading, giving a neat, professional look with minimal effort. It’s not only simple but has low consumable costs, making it perfect for binding on a budget. This is because there are only three sizes to accommodate the full range of document thicknesses; what differs is how much excess strip appears on the back of your document.
Tape binding is as easy as 1-2-3! All you have to do is:
- Place your pages into the Fastback tape binding machine. It will tell you what size binding spine to use.
- Insert the strip tape for book binding into the machine and press start.
- The machine will tell you when it is done and you can remove your finished book. Allow the adhesive to cure for a couple minutes before opening!
Thermal Binding: Fast & Professional

Thermal binding is another great option for a sleek and professional project, with the added bonus of being exceptionally fast. It uses heat to adhere a pre-glued thermal binding cover to the document’s spine. Plus, the highly polished, book-like finish makes it excellent for proposals and reports. And you can make both softcover and hardcover documents, really adding to the versatility and cost of each finished presentation. Our preferred brand is called Coverbind with their unique, quality binding adhesive and easy-to-use, durable machines.
Here’s how to do it:
- Jog your papers thoroughly so they’re perfectly aligned within the thermal binding cover’s spine, making sure the first and last pages are touching the adhesive.
- Place the project in the thermal binding machine and let it sit for the manufacturer-recommended amount of time.
- Remove the finished product and firmly tap the spine on a hard surface a few times. Allow the glue to fully cure for several minutes before opening or handling.
Book Rings: No Binding Machine Needed + Cost Efficient
There are two binding methods you can do even if you don’t have a binding machine! The first is to use book rings. They use metal or plastic rings that loop through holes punched in the pages, making projects easy to assemble and disassemble. You can add or remove pages as needed, allowing for quick customization and easy updates. They can also open flat and come in various sizes, making them an ideal choice if you’re looking for a flexible, low-cost option for documents, manuals, and presentations. Plus, you don’t need to invest in an expensive binding machine; just a hole punch (or pre-punched paper) is all you need to bind with book rings.
To use book rings:
- Use a standard hole puncher to punch holes along the book edge of your documents.
- Open the book rings and thread them through the holes.
- Close the book rings together, and you’ve got a neatly bound document!
Screw Posts: Easy, No-Machine, & Versatile
Screw posts are another machine-free option if you’re looking for something a bit more simplistic and elegant. Also known as Chicago screws or binding posts, they use a set of posts that screw together to hold the pages in place. They’re suitable for both thin and thick documents, come in various materials, and add a sophisticated touch to any project. So they’re perfect for creating professional-looking portfolios, presentations, architectural plans, and more.
Screw post binding has a few simple steps:
- Use a standard hole punch to create holes at your document’s binding edge.
- Unscrew the screw post and thread it through the pre-punched holes.
- Tighten the posts by hand.
Choose Your Binding Style Today
How you present your documents can be just as impactful as the content within. Each of the above methods demonstrates your brand’s attention to detail and commitment to quality.
MyBinding provides high-quality bookbinding equipment & supplies for any binding method you need. View our wide variety of binding products today to elevate your projects.
Have questions? Contact us at 1-800-944-4573.