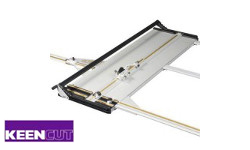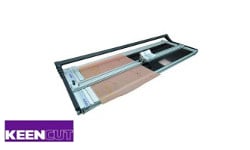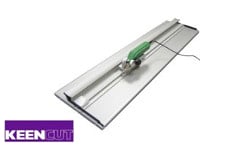
Keencut Multi Angle Cutting Gauge - UGMAG
- Work with Flexo Futura, Ultimat Futura and Gold Mat Cutters
- Cut is Straigth
- 1 Set / Box
- 5 Year Warranty
ProductDescription
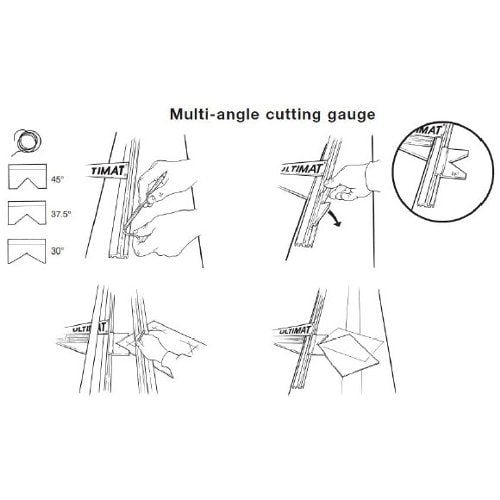
The three piece Keencut Multi Angle Cutting Gauge is used for creative mat cutting in many styles and shapes, including, hexagons, octagons, chamfered corner mats, and more. The three gauges enable the mat to be accurately positioned, marked, and cut at angles of 30°, 37.5°, 45°, 52.5° and 60°. The three angle gauges come with a length of silicon rubber cord, this is fitted into the Mat Guide and holds the gauges in their set position. They can be paired with the UltiMat Gold Mat Board Cutters.
To fit your cutter, use a smooth but firm object to push the silicone cord into its recess, & then trim the ends. Insert the long edge of the gauge into the recess at an angle of about 45°, then hinge it down. Having decided upon your design, use the Multi-angle gauge and MatGuide to position the mat for marking out. When using the 30° and 37.5° gauges the mat board can be positioned in one of the two positions.
Cutting Steps:
- Set the Start of Cut (green) Limit Stop to zero.
- Place the mat board under the cutter bar, again using the Multi-angle gauge or Matguide to align it ready for cutting.
- Depress the Start of Cut Finger and move the Cutter Head until the tip of the finger reaches the line at the beginning of the marked aperture.
- Insert the blade fully, release the Start of Cut Finger, cut until the Finger reaches the marked line at the end of the aperture.
- NOTE: When using this method to judge the start and end of cut a small allowance needs to be made in corners that are not at 90° to each other. This should not cause problems after a small amount of practice.
Product Details
- Work with: Flexo Futura, Ultimat Futura and Gold Mat Cutters
- Cut: Straight
- Quantity: 1 Set / Box
- Warranty: 5 Years
- Old Part Number: 61220
- New Part Number: UGMAG
Demonstration Video

Straight Cut Using the Keencut Ultimat Futura
I am showing you specifically the 40 inch version. There is also a 48 and 62 inch version.
There are two main functions with this cutter—and that is straight cuts and window cuts. A primary function, but not exclusive, is for picture framing mat boards.
If you’re framing, usually you need to cut the board to size, or square it up. You can also cut other materials, which I’ll show.
Before using, always read the manual This video will assist you, along side reading it.
Before we start, there is really only one piece to assembl ...
I am showing you specifically the 40 inch version. There is also a 48 and 62 inch version.
There are two main functions with this cutter—and that is straight cuts and window cuts. A primary function, but not exclusive, is for picture framing mat boards.
If you’re framing, usually you need to cut the board to size, or square it up. You can also cut other materials, which I’ll show.
Before using, always read the manual This video will assist you, along side reading it.
Before we start, there is really only one piece to assemble. and it simply screws in on the side.
Now you can use the lift to bring the cutting bar up just enough to slip in your project using both hands.
For straight cuts, we’ll be using the longest measuring arm.
Next attach the measure arm into the side rail. With it angled up, slip it in, then shift it to the side.
There are two blades on the cutting head. The vertical blade holder has a lock on it to avoid cutting while using the other bevel blade.
Before you make your cut, set the limit stop to the amount you want to cut off. At this current point, it’s set to cut off about two inches.
You can also lift the entire handle up and place in your project.
Before cutting, make sure the blade is long enough to cut through the entire thickness. If it’s not, or if it’s even too long, take the blade out and adjust it. This black screw controls the depth. I’ll also note, that there are several blades to choose from, each optimized for specific materials, I will go over these.
But now that it’s ready, bring the blade down, and push it through the entire project. Then remove the extra
The cutter bar freely rotates to lay flat on any project, you do want to insure that it is in fact parallel with the base before every cut.
Now, with the blades, the TECH S blades are only suppose to be used on one side as they are marked. The TECH 12 blades are for harder boards under 3mm thick, and the TECH S 15 are better for harder thicker boards.
Provided are some higher quality standard blades, which should only be used for vertical cutting. Though the 080 are higher quality than most off brand blades, it is still said to be lesser quality than the TECH blades.
TECH D blades are better general purpose cuts, with the 15 again being for thicker, and soft materials.
If I still have your curiosity at this point, you can continue watching the next video on how to make a bevel cut using the Ultimat Futura mat cutter.

Bevel Cut Using the Keencut Ultimat Futura
I’ll be making a beveled window in my mat for a picture frame as seen here. This is a great supplement to the written instructions—always read the instructions.
For this process we’ll be using the smaller mat guide, and the T-bar slides onto that piece. It slides into place like so.
If you don’t want the mat guide to move from side to side, adding thi ...
I’ll be making a beveled window in my mat for a picture frame as seen here. This is a great supplement to the written instructions—always read the instructions.
For this process we’ll be using the smaller mat guide, and the T-bar slides onto that piece. It slides into place like so.
If you don’t want the mat guide to move from side to side, adding this lock piece will help it stay in place.
When you are starting out, it may help to mark where you want your window to be as an added guide.
Next measure out the end of cut limit stop for the size you want your mat window. I will note that I am doing a uniform window. I’m setting them all to 3/4”.
Now for the start of cut limit stop.
And finally the mat guide limit stop.
Next put in a larger scratch sheet, referred to as a slip sheet, and then the real project lined up in the corner on top of the slip sheet.
Bring the cutter bar down and adjust the blade just to the point it is slightly cutting into the slip sheet. If it is too long or too short, adjust the blade depth and put it back into the cutter head. Also note that you should choose the right blade, which I will discuss at the end of the video.
With the blade and project ready push down on the edge stopper and slide it to your project until it comes up to the side of your project, stopping the cutter head from moving and more. Now bring the blade down into your project, let go of the edge stopper, and proceed to make the first cut. Notice how the cutter head is stopped short by the end of cut limiter?
Now do the same process for all four sides of the project. If done correctly you will come out with a nice windowed board.
You may find that the corners are still slightly attached. Like on this framing mat board. If you pull it apart then you’re going to have some unsightly and unprofessional corners. To avoid this you can make micro-adjustments on the appropriate stops, which are color coded with blue, green, and red.


