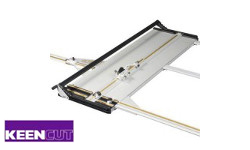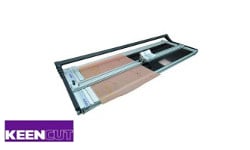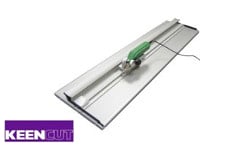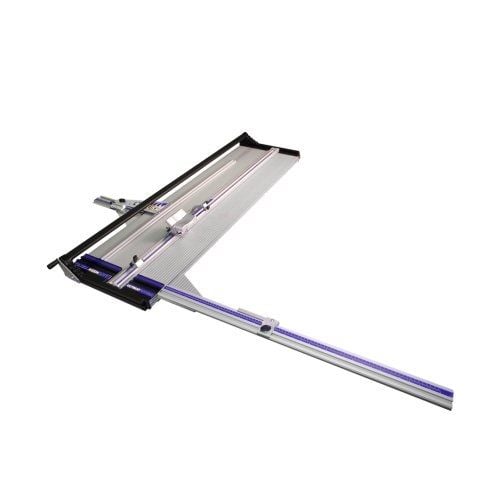
Keencut Ultimat Futura 48" Mat Cutter - UF120
- Consistent perfect mounts
- No more over or under cuts
- Robust construction
- Versatile and flexible
ProductDescription
Product Details
- Consistent perfect mounts
- No more over or under cuts
- Robust construction
- Versatile and flexible
- Bevel and vertical blade cartridge system
- Quick fitting interchangeable guides
- Unequalled blade control and guidance
- Simple and instinctive operation
- Perfect ergonomics
- Manufactured with premium quality materials
- Guaranteed for 5 years
 Consistent faultless mounts The Ultimat Futura performs perfectly on even the thickest conservation mountboard. The blade cartridge system provides accurate blade depth control and a measuring stop ensures flawless v-grooves. Everything is squared and calibrated ready for you to use straight out of the box. |
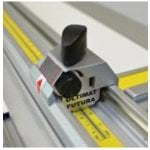 No more overcuts or undercuts The micro stop adjusters fitted to the start of cut, end of cut and margin guide stops, allow you to dial out overcuts or undercuts in seconds. It’s so simple, any overcut is eliminated by turning the stop thumbscrew towards minus (-) and any undercut is eliminated by turning the thumbscrew towards plus (+). A rigid self-aligning margin guide ensures consistent accurate parallel borders |
 Unequalled blade control and effortless cutting The Ultimat Futura cutting head has built-in self-adjusting ball bearing rollers operating on twin stainless-steel tracks, to deliver a sliding action that is smooth, precise and with no discernible friction. The blade holders are mounted on large thrust and radial bearings for precision blade control with zero side-play. The heavy-duty, one-piece aluminium extruded base gives absolute stability. Maximum operator effort is transmitted to the blade, to allow easy cutting of even the thickest boards. |
|||
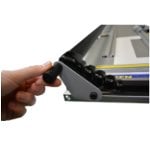 Hands free The unique roller lift and hold system frees your hands so that you can precisely position the mountboard |
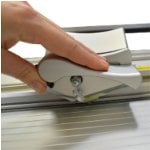 Perfect ergonomics Shaped blade holders perfectly fit the hand to prevent finger strain when cutting even the toughest board. The head is comfortable to use for right or left-handed users and the cutter allows both hands to pull the blade holder when cutting. |
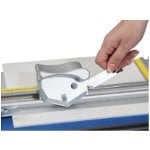 Bevel & vertical blade holders The switchable, magnetic blade holders make changing the blades for different depths of cut a simple and fast process. The vertical blade may be locked in the up position for safety, down for cutting regular board and left off for multi-stroke cutting of tough board. |
|||
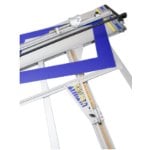 Quick fitting interchangeable guides The margin guide, squaring arm and optional board support are instantly removable for space-saving, or safety, when the machine is not in use. The instant clip-on/clip-off right squaring arm with repetition stop, is provided to accurately size all mountboards from 90cm (36”) down to 4cm (1.5”). Optional board supports are available to clip onto the base to hold large boards flat and square. The rigid T-bar margin guide is extendable up to 75cm (30”). The margin guide extension kit gives an accurate all-round location for the title box and multiple aperture cutting. |
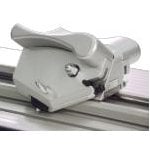 Five year guarantee By manufacturing in-house, with only the highest quality materials, Keencut can guarantee that the Ultimat Futura will provide reliable long-lasting and accurate service. All Keencut products are offered with a comprehensive five year guarantee. |
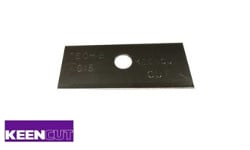
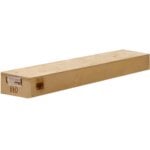 In the box 15 Tech-S .015 blades |
Item Specifications
- Cut Size: 48"
- Includes: Tech D .012 blades (30); Superior Quality utility blades (20); Tech S .012 blades (15); Tech S .015 blades (15)
- Dimensions:
- Cut Length cm ("): 120cm (48")
- A cm ("): 144cm (57")
- B cm ("): 39 cm (15.5")
- Packed Weight: 20kg (44 lbs)
- Packed Dimensions cm ("): 149 x 44 x 15cm (59" x 17" x 6")
- Manufacturer's Warranty:
- Guaranteed for 5 Years
- Old Part Number: 61312
- New Part Number: UF120
Demonstration Video

Straight Cut Using the Keencut Ultimat Futura
I am showing you specifically the 40 inch version. There is also a 48 and 62 inch version.
There are two main functions with this cutter—and that is straight cuts and window cuts. A primary function, but not exclusive, is for picture framing mat boards.
If you’re framing, usually you need to cut the board to size, or square it up. You can also cut other materials, which I’ll show.
Before using, always read the manual This video will assist you, along side reading it.
Before we start, there is really only one piece to assembl ...
I am showing you specifically the 40 inch version. There is also a 48 and 62 inch version.
There are two main functions with this cutter—and that is straight cuts and window cuts. A primary function, but not exclusive, is for picture framing mat boards.
If you’re framing, usually you need to cut the board to size, or square it up. You can also cut other materials, which I’ll show.
Before using, always read the manual This video will assist you, along side reading it.
Before we start, there is really only one piece to assemble. and it simply screws in on the side.
Now you can use the lift to bring the cutting bar up just enough to slip in your project using both hands.
For straight cuts, we’ll be using the longest measuring arm.
Next attach the measure arm into the side rail. With it angled up, slip it in, then shift it to the side.
There are two blades on the cutting head. The vertical blade holder has a lock on it to avoid cutting while using the other bevel blade.
Before you make your cut, set the limit stop to the amount you want to cut off. At this current point, it’s set to cut off about two inches.
You can also lift the entire handle up and place in your project.
Before cutting, make sure the blade is long enough to cut through the entire thickness. If it’s not, or if it’s even too long, take the blade out and adjust it. This black screw controls the depth. I’ll also note, that there are several blades to choose from, each optimized for specific materials, I will go over these.
But now that it’s ready, bring the blade down, and push it through the entire project. Then remove the extra
The cutter bar freely rotates to lay flat on any project, you do want to insure that it is in fact parallel with the base before every cut.
Now, with the blades, the TECH S blades are only suppose to be used on one side as they are marked. The TECH 12 blades are for harder boards under 3mm thick, and the TECH S 15 are better for harder thicker boards.
Provided are some higher quality standard blades, which should only be used for vertical cutting. Though the 080 are higher quality than most off brand blades, it is still said to be lesser quality than the TECH blades.
TECH D blades are better general purpose cuts, with the 15 again being for thicker, and soft materials.
If I still have your curiosity at this point, you can continue watching the next video on how to make a bevel cut using the Ultimat Futura mat cutter.

Bevel Cut Using the Keencut Ultimat Futura
I’ll be making a beveled window in my mat for a picture frame as seen here. This is a great supplement to the written instructions—always read the instructions.
For this process we’ll be using the smaller mat guide, and the T-bar slides onto that piece. It slides into place like so.
If you don’t want the mat guide to move from side to side, adding thi ...
I’ll be making a beveled window in my mat for a picture frame as seen here. This is a great supplement to the written instructions—always read the instructions.
For this process we’ll be using the smaller mat guide, and the T-bar slides onto that piece. It slides into place like so.
If you don’t want the mat guide to move from side to side, adding this lock piece will help it stay in place.
When you are starting out, it may help to mark where you want your window to be as an added guide.
Next measure out the end of cut limit stop for the size you want your mat window. I will note that I am doing a uniform window. I’m setting them all to 3/4”.
Now for the start of cut limit stop.
And finally the mat guide limit stop.
Next put in a larger scratch sheet, referred to as a slip sheet, and then the real project lined up in the corner on top of the slip sheet.
Bring the cutter bar down and adjust the blade just to the point it is slightly cutting into the slip sheet. If it is too long or too short, adjust the blade depth and put it back into the cutter head. Also note that you should choose the right blade, which I will discuss at the end of the video.
With the blade and project ready push down on the edge stopper and slide it to your project until it comes up to the side of your project, stopping the cutter head from moving and more. Now bring the blade down into your project, let go of the edge stopper, and proceed to make the first cut. Notice how the cutter head is stopped short by the end of cut limiter?
Now do the same process for all four sides of the project. If done correctly you will come out with a nice windowed board.
You may find that the corners are still slightly attached. Like on this framing mat board. If you pull it apart then you’re going to have some unsightly and unprofessional corners. To avoid this you can make micro-adjustments on the appropriate stops, which are color coded with blue, green, and red.

Keencut Ultimat Futura Mat Cutter Demo Video
Replacement Blades, Accessories and Upgrade Kits
| Product Name | Item Number |
| Medium-duty blades (Box of 100) | CA50-019 |
| Superior Quality blades (Box of 100) | CA50-010 |
| Tech S .012 blades (Box of 100) | CA50-021 |
| Tech S .015 blades (Box of 100) | CA50-030 |
| Tech D .012 blades (Box of 100) | CA50-017 |
| Tech D .015 blades (Box of 100) | CA50-020 |
| 2x Support arms, 60cm long for Ultimat Futura | SUP60 |
| Multi Angle Cutting Gauge for Ultimat Futura | UGMAG |
| 30" Extended margin guide kit for Ultimat Futura | UGMG |
| Reverse Bevel Stop for Ultimat Futura | UGREV |
| Yellow 'T' shape silicon cord (x 33ft) | SILYT |


