MyBinding Knowledge Base
- Binding (248 Article)
- General Binding (42)
- Plastic Comb Binding (57)
- Fastback Binding (59)
- Perfect Binding (2)
- Modular Punching (8)
- Zipbind (3)
- Twin Loop Wire (13)
- Coil Binding (22)
- Thermal Binding (14)
- Strip Binding (1)
- VeloBind (4)
- Binding Covers (14)
- Proclick Binding (10)
- SureBind (4)
- Screw Post (2)
- Hole Punches (2)
- Staplers (4)
- Komtrak Insprial Binding (2)
- Paper (1)
- Rhin-O-Tuff (5)
- Binding Machines Comparison (17)
- Laminating (109 Article)
- General Laminating (26)
- Roll Lamination (16)
- Pouch Lamination (36)
- Pouch Board Laminator (3)
- School Laminator (3)
- Foil Laminating (3)
- Royal Sovereign Laminators (10)
- Laminators Comparison (3)
- Boards (11 Article)
- Bulletin Boards (3)
- Whiteboards (5)
- Chalkboards (1)
- Paper Shredders (44 Article)
- General Shredding (35)
- Industrial Shredders (1)
- Cross-Cut Shredders (2)
- Cardboard Shredders (1)
- Multimedia Shredders (1)
- Personal Shredders (1)
- High Security Shredders (2)
- Ring Binders (9 Article)
- Specialty Binders (2)
- Reinforced Paper (1)
- Health Care Punched Paper (1)
- Perforated Paper (2)
- View Binders (1)
- Index Tabs (9 Article)
- Index Tab Dividers (2)
- Copier Tabs (4)
- Pocket Folders (1)
- Custom Index Tabs (1)
- Pre-Printed Index Tabs (1)
- Paper Handling (37 Article)
- Paper Folders (9)
- Paper Joggers (2)
- Guillotine Cutters (4)
- Rotary Trimmer (3)
- Electronic Paper Cutters (1)
- Corner Rounders (2)
- Paper Scoring (2)
- Paper Drill (2)
- Booklet Makers (3)
- Stack Cutters (1)
- Paper Handling Equipment Comparison (5)
- ID Accessories (12 Article)
- Badge Holder (1)
- Lanyards (8)
- Badge Reels (1)
receive
$5off
*On order $25 or more.
How should I use my pouch laminator?
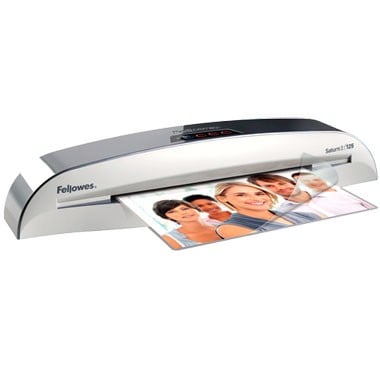
One of the best ways to make your documents last a good long time is by processing them with a pouch laminator. There are many such devices on the market and there are ones that are good for different environments including the office, print shop, and classroom. If you’ve never used one of these machines before, you’re probably wondering how to do so. It’s actually pretty easy for beginners and professionals alike. Here’s how to use a pouch laminator in five easy steps.
1.) First of all, plug in your laminator and then turn it on. Depending on which machine you have, you might need to let it warm up for a few minutes before you can use it. (The device’s instruction manual will have information regarding this.) You should pick out the laminating pouches you plan to use. Keep in mind that pouches range in thickness from 1.5 to 10 mil. Thicker pouches will give your document more protection.
2.) You should now choose the appropriate temperature setting. The setting you choose will be based on how thick the pouch is. Thicker supplies require more heat so all the adhesive will melt. Some machines have a Celsius and/or Fahrenheit scale while others have settings marked by pouch thickness. If you have any trouble deciding on which setting to use, refer to the machine’s instruction manual. When you know which setting to use, select it and wait for the machine to reach the appropriate temperature.
3.) Place your document or photograph in the laminating pouch. Center it appropriately, ensuring there are equal borders around the item. Then place the pouch in a carrier so adhesive doesn’t seep out of it and damage the device while it’s running through the machine. Insert the carrier into the machine with the folded edge going in first. The machine will grab hold of the carrier and begin laminating your item.
4.) The carrier will exit at the back of the laminator. Set the item aside for a few minutes to let it cool off. Make sure you don’t handle your document too much. This can cause damage the finished product. When your work has cooled off, remove it from the carrier. Be sure to save the carrier for future use as a single one can be used dozens of times.
5.) If you have anything else you need to laminate, just go through steps one through four again. (Although you don’t need to turn the laminator on again unless you already turned it off.) When you’re all done, let the laminator cool off before shutting it down.
Those are the five steps you need to follow when using a pouch laminator. As you can see, using this type of machine is really quite easy even if you’ve never laminated a single thing before. Best of all, this process will help you protect those important documents and photographs so you can get a lot of use out of them. Trying going through these five easy steps with your pouch laminator today.
Here is the transcript of this video:
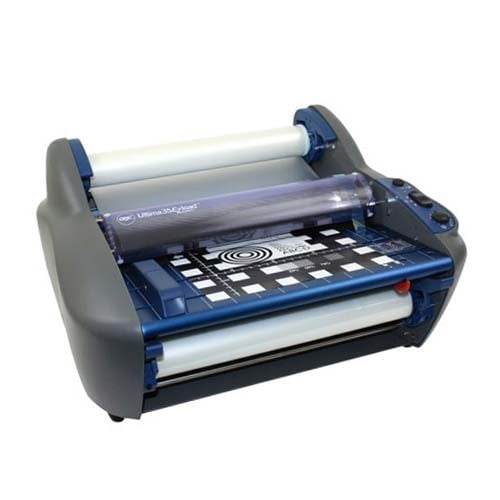
Welcome to MyBinding How To videos. Today's question, how to use a laminator. Even though there are plenty of different styles and types and makes of laminators on the market today, there are a few basic things to understand just how a laminator works. For this demonstration, we'll be using the ProLam Ultra by Akiles. This is a higher end laminator but it will help us to understand all the parts and the process of lamination.
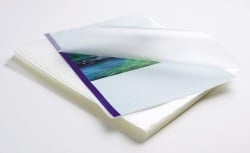
First off are the materials. Not only what you're laminating, but also laminating pouches. Laminating pouches are prolific, they are everywhere. And most machines use only these to laminate. Since laminating pouches are made from very long lengths to very short lengths, you'll need to consider what size you'll need and make sure that your laminating machine is wide enough to accommodate that pouch. And then there's pouch thickness, depending on what you're laminating and what kind of protection you want. Laminating pouches are made from 3 to 14mil in thickness. Fourteen is pretty thick and not all machines can handle all thicknesses of pouches. Some laminators automatically adjust their heat according to the pouch that you're using. Many laminators, you need to make those selections yourself according to thickness or temperature as well as speed of the rollers in the processing. Reference charts are generally available right on the machine itself. Once your selections are made and all your materials are inside the laminating pouches nice and even, the crease end of the laminating pouch goes into the throat of the machine first. Always wait for your document to be completely finished and to come out the back of the machine. Then remove it and place it flat on a flat surface so it can cool correctly. All sizes are done the same way. Nice and even margins, the crease end in first, and remove from the back. Although manual machines are more difficult to learn at first, they have the advantage of being able to make adjustments in the middle of a lamination or in the middle of a project at any point.
It's that simple. That's how to use a laminator. For more articles, demos, how to's, and reviews of all things binding and office, check out MyBinding.com.
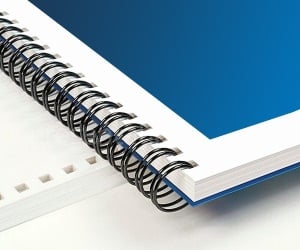
< Over the years, a number of customers have asked me whether they can use twin loop wire with their plastic comb binding machine. These customers often don’t want to have to buy a brand new machine but like the look and feel of twin loop wire binding. However, the answer to their question isn’t as simple as it seems. You see, they actually do make twin loop wire that is designed to work with the plastic comb binding hole pattern. With that said, if you want to use these wires you are going to need a way to close the wires. What is Spiral-O Wire? Let me explain a little bit more…There is a product that we carry called Spiral-O Wire. This wire has 19 loops and is designed to work with the hole pattern from a plastic comb binding machine. Spiral-O Wire is sometimes called Wire Combs or Ibico Wire and was originally designed for use with some of the older Ibico binding machines. A number of the older Ibico plastic comb binding machines also included a twin loop wire closer on the front of them to allow users to use both plastic combs and wire. This 19 loop wire was designed for this purpose. What Equipment is Needed? As the Ibico brand has been phased out by GBC and all of the older Ibico plastic binding machines have been replaced with new models, they no longer have the twin loop wire closer on the front of them. This presents a problem in trying to use these spiral-o wires since you can’t use the wires without a way to close them. One of the only options left is to purchase a Twin Loop wire closer. However, since twin loop wire closers are not incredibly cheap this option usually only appeals to users who have larger electric plastic comb binding machines. Otherwise, it is often advisable to simply buy a low end 3:1 pitch twin loop wire binding machine (the supplies are cheaper). This being said, if you have one of the older Ibico binding machines that has a wire closer included you are in luck. The Spiral-O binding supplies that we carry will work perfectly with your machine and you will be able to use both plastic combs and wire depending on your needs. These Spiral-O binding supplies are available in Black, Silver, White, Blue and Red and in sizes up to 1″ in diameter. If you aren’t sure what type of wire binding supplies that you need to work with your machine simply give us a call. Our trained sales representatives will be glad to help you find the correct supplies for use with your machine.(Read More)

Loading...


