MyBinding Knowledge Base
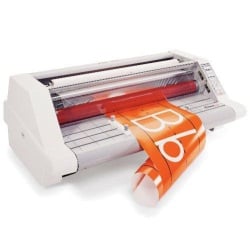
How to Load the Laminating Film on a Royal Sovereign Cold Laminator?
Congratulations on the purchase of your Royal Sovereign Cold Laminator. Following are step-by-step instructions to get you started – how to load the laminator and how to normally laminate your graphics.
Remove the upper laminating supply strap from the laminator. Orient the roll of laminating film so that the film is coming off the bottom of the roll towards the front of the laminator. Take the roll feed shaft and slide it into the laminating roll. Put the loaded laminating roll film shaft back in place. You must remove the safety devices from the machine to allow easy access for loading the film. Remove the safety guard, the finger guard and the feed table. Make sure your roll of laminating film is centered on the laminator. Bring the laminating film underneath the large chrome idle bar and pull out approximately a foot, foot and a half of film. Separate the release liner from the laminating film. Take the release liner to the backside of the take up core. Tape the release liner to the take up core. It’s also a good idea to make sure you’ve got at least one full revolution of release liner around the take up core to prevent it from accidentally slipping off when you start up the laminator. Take a sheet of backing paper. This can be a release liner, kraft paper or any scrap material that you have in your shop. It should be wider than the laminating film that you’re using. Take this backing paper and attach it to the exposed laminating film. Make certain that you are on the upper roller above the centered nip point of the laminating roller. Replace the feed table, the finger guard and the safety guard.
We’re going to use what’s called a leader board to get the film loaded through the laminator. Use any off cut of any rigid substrate. It should be approximately the width of the laminating film by approximately 8 to 10 inches in depth and should have at least one straight machine cut leading edge. Make sure the laminating rollers are in the fully open position. With the rollers open, take the straight leading edge of your leading board and use this to put the film and backing paper into the laminator. Close the rollers now until you feel pressure, which will vary depending on the thickness of the leader board. We suggest all new users to start everything at speed one. With the leader board now in place, we’re going to run the laminator and apply pressure towards the laminating position so that when the rigid substrate clears the rollers, the gap will close to continue to drive the film through. Once the leader board clears the front rollers, close the rollers to the full laminating position. This will allow the laminator to continue to drive the film through the laminator. Once the leader board clears the rear cut line of the rear of the laminator, you can stop the laminator. Use the built-in cutter to remove the leader board from the rear of the machine. Visually inspect the film to make sure that it’s flat and wrinkle-free on the rollers.
Make certain when you’re feeding your graphics, you have a nice, taut, flat leading edge by applying outside pressure with both hands. Use the foot pedal or the start button to start the laminator and ease the graphic into the rollers. Take a strip of release liner or scrap paper, slide it underneath the trailing edge of the graphic. This will prevent the full width of laminating film from hitting the roller when the graphic exits. Once the graphic exits the nip point of the rollers, stop the laminator. Remove the excess from the front of the feed table. Take your next graphic, lay it down on top of the hanging piece of slip sheet and feed the graphic in. Keep repeating this process until all of your graphics are done. When you get to your final graphic to be laminated, take a backer paper of approximately two feet long. Slide this slip sheet underneath the trailing edge of your graphic. This longer slip sheet at the final graphic will allow you to have your graphic exit the rear of the laminator while still providing protection from the adhesive hitting the bottom roller.
Thank you for purchasing your Royal Sovereign Laminator. We hope that this brief instruction will help get you started quickly. Thanks again.
Here is a transcript of this video:
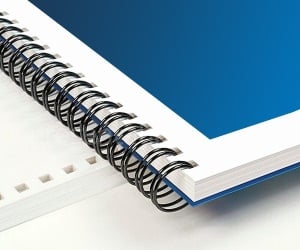
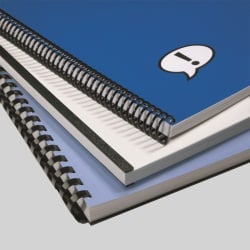
< Over the years, a number of customers have asked me whether they can use twin loop wire with their plastic comb binding machine. These customers often don’t want to have to buy a brand new machine but like the look and feel of twin loop wire binding. However, the answer to their question isn’t as simple as it seems. You see, they actually do make twin loop wire that is designed to work with the plastic comb binding hole pattern. With that said, if you want to use these wires you are going to need a way to close the wires. What is Spiral-O Wire? Let me explain a little bit more…There is a product that we carry called Spiral-O Wire. This wire has 19 loops and is designed to work with the hole pattern from a plastic comb binding machine. Spiral-O Wire is sometimes called Wire Combs or Ibico Wire and was originally designed for use with some of the older Ibico binding machines. A number of the older Ibico plastic comb binding machines also included a twin loop wire closer on the front of them to allow users to use both plastic combs and wire. This 19 loop wire was designed for this purpose. What Equipment is Needed? As the Ibico brand has been phased out by GBC and all of the older Ibico plastic binding machines have been replaced with new models, they no longer have the twin loop wire closer on the front of them. This presents a problem in trying to use these spiral-o wires since you can’t use the wires without a way to close them. One of the only options left is to purchase a Twin Loop wire closer. However, since twin loop wire closers are not incredibly cheap this option usually only appeals to users who have larger electric plastic comb binding machines. Otherwise, it is often advisable to simply buy a low end 3:1 pitch twin loop wire binding machine (the supplies are cheaper). This being said, if you have one of the older Ibico binding machines that has a wire closer included you are in luck. The Spiral-O binding supplies that we carry will work perfectly with your machine and you will be able to use both plastic combs and wire depending on your needs. These Spiral-O binding supplies are available in Black, Silver, White, Blue and Red and in sizes up to 1″ in diameter. If you aren’t sure what type of wire binding supplies that you need to work with your machine simply give us a call. Our trained sales representatives will be glad to help you find the correct supplies for use with your machine.(Read More)