


SEAL 1mil Gudy Window Pressure-Sensitive Mounting Adhesive
FAQ: 0 Questions, 0 Answers
0 Q&As


Item# SPMA-1GWPSMA
- Pressure sensitive roll film
- 1mil laminate roll on 3" core
- Mounting adhesive finish
- Great for prepping signs & other graphics for mounting projects
Product Name
Item Number
Price
Qty
ProductDescription
These SEAL 1mil Gudy Window Pressure-Sensitive Mounting Adhesive are water-based mounting adhesive that can be applied to the face of a graphic and then face-mounted on interior windows. Its 1 mil clear polyester carrier has a permanent adhesive on one side and a removable adhesive on the other. It is ideal for bubble-free manual applications and can be easily removed without residue - perfect for store front promotions. Get 1 roll on every order.
Product Details
- Water-based mounting adhesive that can be applied to the face of a graphic and then face-mounted on interior windows.
- Permanent adhesive on one side and a removable adhesive on the other.
- Ideal for bubble-free manual applications.
- Can be easily removed without residue - perfect for store front promotions.
- Get 1 roll on every order.
Item Specifications
- Adhesive Type: Water-based (Pressure Sensitive)
- Thickness:1mil
- Width: Choose Above
- Length: Choose Above
- Quantity: 1 roll
- Compatible Equipment: 3" Core Pressure Sensitive Roll Laminators
Demonstration Video
SEAL Gudy Window Pressure-Sensitive Mounting Adhesive Demo
Transcript :
The easy to apply solution for advertising behind glass. Gudy window. Create or select graphic. Printing. Drying time. Prepare lamination film. Prepare the laminating machine. Adjust roll pressure. Optional: Antistatic roller. Laminate graphic with Gudy Window. Cutting marks. Simple to cut. Clean surface in advance. Simple application with squeegee. Gudy window. Double side adhesive. Ultra clear. Easy to apply. Ideal for POS/POP, removable without leaving residue.
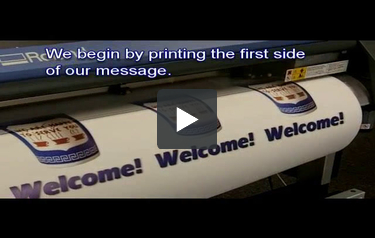
SEAL Gudy Window Pressure-Sensitive Mounting Adhesive - How to Use
Transcript :
This is Mark Rubin, Training Manager for National Americas. What we're gonna do here is we're going to actually add the Gudy Window. I've got that on the laminator here, and we're ready to actually apply that to our paper product. Here we're actually using a convert blocks light, which is double sided printing with a light blocker in the middle, so you can actually make images on both sides we saw a little earlier. My printing, this is the front side. We're just going to go on the inside of the window, and then on the back side of this is the messaging for when people leave the building. So we ...
This is Mark Rubin, Training Manager for National Americas. What we're gonna do here is we're going to actually add the Gudy Window. I've got that on the laminator here, and we're ready to actually apply that to our paper product. Here we're actually using a convert blocks light, which is double sided printing with a light blocker in the middle, so you can actually make images on both sides we saw a little earlier. My printing, this is the front side. We're just going to go on the inside of the window, and then on the back side of this is the messaging for when people leave the building. So we have welcome then we have come back soon. So I'm going to do is just laminate this apply just like a normal laminate. We're going to get this started, slow it down a little bit, just to make sure that the adhesion is good on there. I usually run about two to three foot per minute, something like that. So that's what we want to do. That'll go through nice and straight. By the way, this is the 62 or the base, bit more base. Actually, it's a very nice product. You can see how it's actually keeping everything nice and straight. I would have to manage it too much. I So there, it's just about through. You probably can't see it on camera. I'll take a close up picture here in a minute, but it actually will have a little grid on it. There's actually a grid that's right on top of the Gudy. And what that does is that gives you, like, a one inch square so you can actually use it for cutting if you want it to. We're just going to run a little bit more here just to get it through the laminator. Just about done, and there we go. Now, on the backside, we're actually going to take this off. I'm going to take it to my cutting table and trim it up, and we'll be right back to show you that process. As you can see, this is the backside. We still have the product in the laminator, but I'll zoom up a little bit on this. You can see that one inch grid that's on there that kind of helps you in cutting that's kind of a nice addition to the product. That's the release liner on top. We'll pull that off, and that will leave the repositionable adhesive behind, and then that'll go right on the on the door window. We're going to show you how to apply it do the whole works here. I think you'll enjoy seeing the whole process. Okay, well, it's very easy. You couldn't get any easier in terms of installing this particular graph. Remember, it's paper, it's convert paper. It's got, it's called block slide. So that means that when I put it up against here, the light's not gonna shine through it. So I can add messaging on both sides of this, which is kind of cool, and that's a totally recyclable paper, by the way. But anyway, that's another subject. Let's, let's just take a look at this. This is the side that's going to base out, and it has the Gudy, repositionable adhesion on there, along with the little release liner with the grid on. If you kind of scratch your finger over that or feel it, there's a, there's a little bit of a texture to that, and that leaves a texture in the actual Gudy itself, which makes it to bubble free. So all you got to do here is just pull off the liner. You can do this exactly the same way as you would vinyl, basically, if that's kind of business you're in, you know, position it on here, where you believe it should actually go, of course, I would probably measure, you know, just stick it on there, like that. We'll pull down the rest of this, stick it on there. You can see how three position. We'll just hold it on there. And this is good, because that way you can make measurements that you need to. Just pull off the rest of that Gudy. I'm just going to use my fingers here. I've got a little felt squeegee, just to kind of make sure that it's solid. All the way down. There we go. So this is actually the message that's on the inside. I'm gonna go ahead and show you the outside as well. So basically, if you're using this, you've got a nice little message here, which basically says, Welcome right on the outside, facing toward the outside. There repositionable, bubble free. And then you go in and get your coffee. If you need to do that, we'll open this door, it's got a little magnet on it. There we go, you finish with your coffee, and when you're leaving. Come back soon. That's Gudy Window. Easy to apply repositionable you can?t get any better.