8" x 10" Photo Card Laminating Pouches - 100pk
FAQ: 1 Questions, 1 Answers
1 Q&As
Item# MYLKLPPHOTO8X10
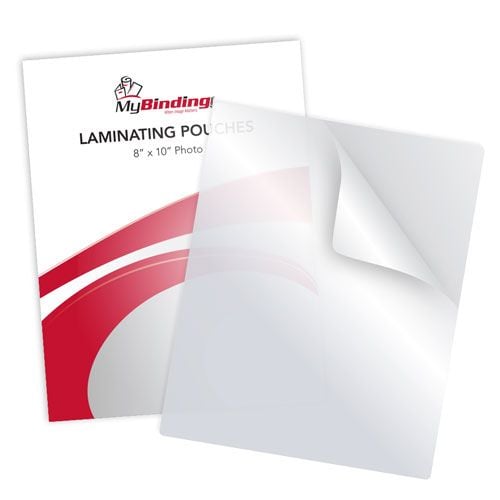
- 8" x 10" pouch laminate
- Available in 3 - 10mil thicknesses
- Gloss lamination finish
- Great photo laminate for durability & color preservation
Product Name
Item Number
Price
Qty
LKLP10PHOTO810
$11.01
Regular:
$147.45
ProductDescription
Our high quality 8" x 10" Photo Card Laminating Pouches help to improve the value of all printed materials. They enhance colors by turning dull prints into bright lustrous colors, help to prolong the life of printed materials and preserves them and protect them from outside elements. All of our pouches include one carrier per box. These pouches have superb clarity and offer exceptional value for reasonable prices.
Item Specifications
- Size: 8" x 10" Photo Size (8-1/4" x 10-1/4")
- Thickness: 3mil - 10mil
- Quantity: 100 Pieces
- Corners: Round (1/8" radius)
- Compatible Equipment: Pouch Laminators
Demonstration Video

8 x 10 Inch Laminating Pouches Overview
Transcript :
These are 8 x 10 inch Laminating Pouches! Compared to your average printer paper, it’s slightly smaller, but it fits large 8 x 10 photos nicely. It’s available in 3, 5, 7, and 10 mil thicknesses. Using a lamination pouch is simple: First open your pouch and insert your project, align all the edges so they are even. Then place the pouch into the carrier so they open the same way. The edge where the two sides meet is called the crease. Line up the carrier and pouch creases. With pouch in place, slide the carrier into your pouch laminator crease end first as seen here. When it’s done, remove the ...
These are 8 x 10 inch Laminating Pouches! Compared to your average printer paper, it’s slightly smaller, but it fits large 8 x 10 photos nicely. It’s available in 3, 5, 7, and 10 mil thicknesses. Using a lamination pouch is simple: First open your pouch and insert your project, align all the edges so they are even. Then place the pouch into the carrier so they open the same way. The edge where the two sides meet is called the crease. Line up the carrier and pouch creases. With pouch in place, slide the carrier into your pouch laminator crease end first as seen here. When it’s done, remove the carrier and unveil your beautiful new laminated project!
Specification
| Thickness | Part Number | Size | Corners | Quantity |
| 3mil | LKLP3PHOTO8X10 | 8" x 10" | Round (1/8" radius) | 100pk |
| 5mil | LKLP5PHOTO8X10 | 8" x 10" | Round (1/8" radius) | 100pk |
| 7mil | LKLP7PHOTO8X10 | 8" x 10" | Round (1/8" radius) | 100pk |
| 10mil | LKLP10PHOTO8X10 | 8" x 10" | Round (1/8" radius) | 100pk |
Questions & Answers
▶
Asked by Samantha B.
The standard laminating pouches range from 3 -10 mil in thickness. Some specialty items may be available in that thickness and so the machine allows for the greater range.
Answered by MyBinding.com


