


Fastback Easyback 8.5" x 11" Bright Blue Suede Hardcovers - 50 Pieces
FAQ: 0 Questions, 0 Answers
0 Q&As


Item# EBSHBB8511
- Create books of any thickness with one cover-set. Super easy & fast.
- Works with the Fastback Model 20 and Model 9 Binding Machines
- Cover Finish: Suede
- Hardcover Guide and endleaves not necessary.
ProductDescription
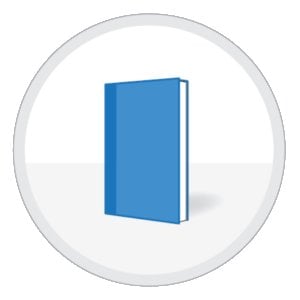
Create books of any thickness with one cover-set in just 20 seconds with Easyback 8.5" x 11" Bright Blue Suede Hardcovers. These covers are designed to save time and materials, as it can be used to create hardcover books by only using your Fastback Model 20 and Model 9 Binding Machines. Simply place the Easyback cover at the front and back of your document and bind as normal in the Fastback Model 20 to achieve a finished result rivaling that of our current Hardcover products. The Easyback is a versatile product, allowing you to choose whether or not to use one cover or both. It works just as well with a heat-resistant clear cover (sold separately). These Easyback Bright Blue suede wrapped hardcovers are silky to the touch, durable and beautiful. They are excellent for special presentations or any documents that need to exude an aura of elegance and exclusivity. Get 50 Pieces on every order of Easyback 8.5" x 11" Bright Blue Suede Hardcovers.
Product Details
- Create books of any thickness with one cover-set.
- Super easy & fast.
- Sleek, trim appearance.
- Attractive and durable.
- Hardcover Guide and endleaves not necessary.
- Works with the Fastback Model 20 and Model 9 Binding Machines
Item Specifications
- Color: Bright Blue
- Size: 8.5" x 11"
- Cover Finish: Suede
- Quantity: 50 Pieces
How to make hardback books with Easyback Hardcovers
 |
 |
 |
STEP 1: Add Easyback hardcover halves to book pages. |
STEP 2: Put book pages in, press the green button and insert strip. |
STEP 3: When finished, remove and let cool. That’s it! |