


Gold Matte Metallic 24" x 500' Laminating / Toner Fusing Foil


- 24" wide on 1" core
- Matte gold metallic foil laminate
- 500' laminating foil roll
- Add shiek matte gold foil to certificates, invitations, documents & more
ProductDescription
Item Specifications
- Item: GLD-90-24
- Color: Gold Matte Metallic
- Width: 24"
- Roll Length: 500'
- Core Size: 1"
- Compatible Equipment: Foiling Pouch Laminators (Requires adjustable heat & speed settings; minimum 300°F temperature)
Foil Fusing Machines (with compatible core sizes)
Demonstration Video
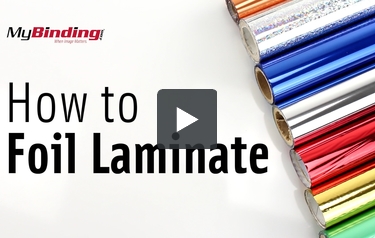
How to Foil Laminate
For those who are new to this, we'll first go over the basic steps. We also highly encourage everyone to view our written knowledge base article.
here's the supplies you'll need: your laminating foil, some scissors, a project printed with a laser printer, a carrier, and finally a pouch laminator.
First, open your carrier and place your project inside. Now take your foil and cut it appropriately to cover the correct portion of your project.
Take that piece and rest it in its position.
If you have other colors and places to fill, continue to do so.
...
For those who are new to this, we'll first go over the basic steps. We also highly encourage everyone to view our written knowledge base article.
here's the supplies you'll need: your laminating foil, some scissors, a project printed with a laser printer, a carrier, and finally a pouch laminator.
First, open your carrier and place your project inside. Now take your foil and cut it appropriately to cover the correct portion of your project.
Take that piece and rest it in its position.
If you have other colors and places to fill, continue to do so.
it's important to cover the printed portions of your project that you do not want to foil. If you don't then some of the print will transfer onto your carrier and make a mess on other later projects.
Now insert the carrier into the laminator. it's best to either hold or get something to keep the project flat so that the foil does not fall from within the carrier.
When it's done, remove the carrier from the back, open it up and proceed to peal off the foil and uncover your project.
Now chances are you'll see spots in your foiled project, which means we have to go over steps for quality control.
I wish there was an easy one-and-done way to get the best quality'but there are so many factors in play that it's going to take some trial and error on your part.
So first, when printing you have to print on a laser printer, no other printers will work. The foil adheres best with solid black projects'if you have colors, convert them to black or don't laminate them. This also means no gradients or opaqueness. And it's best to use vector based images'texts are vector based, and programs like Adobe Illustrator create vector based art.
The smoother the paper, the better your results. And as long as you can print it in your printer you will be able to foil it.
For choosing a laminator, it should have temperature controls for 10 mil, but preferable one that you can set the actual temperature manually to 300 degrees fahrenheit or higher. Slow down your laminator, too. And make sure the throat of your laminator is large enough to fit your projects!
When you choose not to foil part of your project, cover it with paper to avoid ink transferring onto your carrier and ruining future projects. And we've found that for some reason, some foils just adhere better than others.
Not every printer toner provides the best results. Some toners adhere better than others, and printers with a high dots per inch(DPI) will provide smoother edges and nicer results.
For serious professional foiling, check out foil fusers and foil stamping machines'these are expensive, commercial usage machines. Follow this information and you should be able to achieve some great looking foil laminated projects!
Related Categories you might also like


Foil Info
Foil Instructions
-
Step 1: With a laser printer, print the desired text or single color (line art) design onto your intended paper item or flat sheet.
-
Step 2: Cut a piece of laminating foil from the roll in a size proportional to the text or graphic you wish to appear in foil.
-
Step 3: With a substantial pouch laminator, slip your printed piece (with foil over the desired imprint area) within a paper carrier. A carrier such as a larger piece of folded paper or card stock is necessary to prevent the foil from directly contacting the rollers of the pouch laminator.
-
Step 4: Insert the carrier into pouch laminator.
-
Step 5: Once the carrier exits, pull the foil sheet off to reveal the foil imprint. The foil will only adhere to the toner printed areas of your paper (text or graphic).
Foil Details
-
It is suggested that the pouch laminator you use to produce foil lamination imprints have 4 laminating rollers, and controls allowing you specify temperature and speed. A slow speed with a temperature of 250F is recommended for best foil imprinting results. Textured papers are not recommended for use in the foil laminating process. A smooth, flat paper surface texture is necessary to achieve high quality results.
-
While many customers run foil fused sheets back through a laser printer after initial foil imprinting, it is important to note that some printers may pick up small pieces of foil off the sheet. These particles may become deposited on parts within the printer which would require additional maintenance to remove and/or require replacement of contaminated parts.
-
MyBinding.com accepts no liability for damage and/or repairs to customer's laser printer(s) and/or copy machine(s).
-
The Foil Laminating process can be used to produce a wide range of products. However, results will vary based on a wide range of factors.
-
Foil laminating is not compatible with all types of paper, toner or all types of toner based printers. Also note that foil laminating is not compatible with any offset or inkjet inks.
-
Customers are solely responsible for determining if their laser printer(s) and/or copy machine(s) are suitable for multiple pass, foil laminating applications.