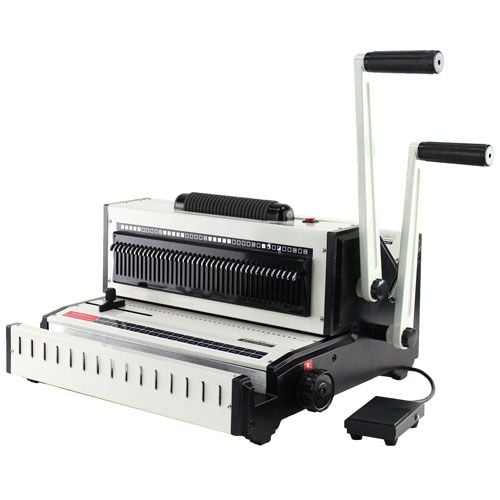
Tamerica Opticombo-341 3:1 Wire and 4:1 Coil Punch Binding Machine
- Manual punch for up to 20 sheets* at a time (3:1 rectangular wire & 4:1 round coil holes)
- Integrated coil inserter, wire closer & includes crimping pliers
- Best for moderate use in schools and offices
- 16.5" punching length with open throat & fully disengageable pins
ProductDescription
Product Details
- Manual Punch for 4:1 Coil & 3:1 Wire.
- Electric Coil Inserter via Foot Pedal Operation or switch.
- Wire Hanger & Closer.
- Punches up to 20 sheets per lift (20 lbs paper).
- 16.5" Punch Length with open throat.
- 4.5 mm Coil Hole Size.
- Horizontal and Inclined Paper Load.
- Disengageable Dies with Cover.
- Adjustable Punch Depth.
- Adjustable Edge Guides.
- Shipping Dims 23" x 21" x 15".
- Net Wt. 55 lbs.
- Gross Wt. 60 lbs.
- For Moderate Use.
- 1 Year Manufacturer's Warranty.
Item Specifications
- Punch Type: Coil (Oval) and 3:1 Wire
- Punch Method: Manual
- Max. Punching Capacity: 20 sheets
- Max. Binding Capacity: 120 for wire / 220 for coil
- Max. Diameter: 2"
- Max. Punching Length: 16.5" w/Open Throat
- Paper Load: Horizontal
- Usage: Moderate
- Interchangeable Dies: No
- Disengageable Dies: Yes
- Punch Depth Control: Adjustable
- Edge Guide: Yes
- Foot Pedal: No
- Comb Binder: No
- Coil Binder/Bind Channel: Electric Coil Inserter
- Wire Clamp/Hanger: Yes
- Wire Closer: Yes
- Shipping Length : 23
- Shipping Width: 21
- Shipping Height: 15
- Shipping (Web) Weight: 60 lbs
- Manufacturer's Warranty: 1 Year
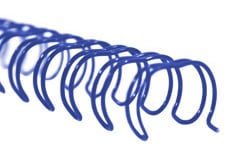
- Compatible Supplies: 3:1 Twin-Loop Wire
4:1 Spiral Binding Coils
Demonstration Video

Tamerica Opticombo-341 3:1 wire bind and 4:1 Coil Binding Machine Demo Video
On the front of the machine is a wire binding punch and bind, and you can alternatively bind coil in the back of the machine. I’ll go over both sections.
Each side has a depth of margin control, adjusting for smaller or larger bindings.
Adjust the edge guide on the left, then take a scratch paper and find where you need to disable any of the punch pins. Pull them out and do a test punch.
If you fold your page together and your holes align, then you are ready. Otherwise make some further adjustments un ...
This is the Tamerica Opticombo-341! A 3:1 wire bind and 4:1 Coil Binding Machine!
On the front of the machine is a wire binding punch and bind, and you can alternatively bind coil in the back of the machine. I’ll go over both sections.
Each side has a depth of margin control, adjusting for smaller or larger bindings.
Adjust the edge guide on the left, then take a scratch paper and find where you need to disable any of the punch pins. Pull them out and do a test punch.
If you fold your page together and your holes align, then you are ready. Otherwise make some further adjustments until it’s ready.
It is the same process for the coil punch in the back.
For binding wire, first select the correct size wire and hang it in the front of the machine.
Bring the front and back cover face to face and punch them. Immediately insert them into the wire with the back cover on the bottom. Now go through your pages, punching up to 20 sheets at a time, then place them into the wire face down.
On the right, adjust the clamp for the size wire you are using.
Pull the project off and insert the wire into the clamp. Pull the appropriate lever all the way down. Now flip the back cover around and your project is complete.
For coil, make all your punches, but properly combine them all together. Then spin your coil into about 4 holes by hand.
You can use the red button, or the foot pedal to control the roller, but now place the coil against the roller and the coil will spin through your project.
With the provided coil crimpers, cut off the extra coil. Make sure the red dot is facing toward you when you make this cut.
Now you have a coil bound project, and a wire bound project.


