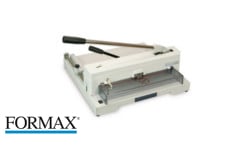
Replacement Blade for Formax Cut-True 29A and 29H Cutters
FAQ: 0 Questions, 0 Answers
0 Q&As
Item# FDCT29-10
- Product Type: Replacement Blade
- Designed for: Formax 29A and 29H
- Quantity: 1
- Product Number:FDCT29-10
Product Name
Item Number
Price
Qty
ProductDescription
Demonstration Video

Cut-True 29A Large Format Guillotine Cutter- Unboxing
Transcript :
29A Unboxing. To set up your Cut-True 29A begin by properly unpacking the cutter. To start, remove the top cover of the box and the foam packing from the container. Unscrew the metal strapping to remove the sides of the container. Remove the plastic wrapping from the 29A. Use a forklift to lift the machine off of the pallet. Next, open the box containing the legs. Use the corresponding numbers on the legs to properly assemble. Insert the bolts and use an Allen wrench to tight them in place. Now, place the legs onto the floor and install the bottom shelf. Once the bottom shelf is in place, use ...
29A Unboxing. To set up your Cut-True 29A begin by properly unpacking the cutter. To start, remove the top cover of the box and the foam packing from the container. Unscrew the metal strapping to remove the sides of the container. Remove the plastic wrapping from the 29A. Use a forklift to lift the machine off of the pallet. Next, open the box containing the legs. Use the corresponding numbers on the legs to properly assemble. Insert the bolts and use an Allen wrench to tight them in place. Now, place the legs onto the floor and install the bottom shelf. Once the bottom shelf is in place, use a forklift to carefully place the machine onto the legs. Being sure the inserts are align with the legs and that they are seated properly. Fasten each of the four legs with the Allen head bolts provided towards the top of the legs. With the legs properly attached, remove the black shipping handles on the front and rear of the machine. After removing the handles, re-screw the screws into the machine. Now that the machine has been unboxed and assembled use a hand truck to set the 29A into place.

Cut-True 29 A-H Large Format Guillotine Cutters- Blade Change
Transcript :
29 A and 29 H Blade Change. Start by removing the front cover directly underneath the touchscreen removing each screw. Entering knife change mode on the touch screen. Lower the blade and remove the fifth bolt. bNext, raise the blade position and remove the second and fourth bolts from the blade. Then, position the blade change tool over the removed bolt holes and tighten the two handles in position. Once the blade change tool is tightened, loosen the first and third bolts and remove each of them. Then, carefully loosen the two handles of the blade change tool just enough to remove the blade. S ...
29 A and 29 H Blade Change. Start by removing the front cover directly underneath the touchscreen removing each screw. Entering knife change mode on the touch screen. Lower the blade and remove the fifth bolt. bNext, raise the blade position and remove the second and fourth bolts from the blade. Then, position the blade change tool over the removed bolt holes and tighten the two handles in position. Once the blade change tool is tightened, loosen the first and third bolts and remove each of them. Then, carefully loosen the two handles of the blade change tool just enough to remove the blade. Safely set the old blade down and loosen the handles to remove the blade. Then, connect the blade change tool to the new blade and slide the new blade into position one side at a time. Being sure to align the corresponding second and fourth bolt holes and tighten. Replace the first and third bolts to hold the blade in place. Do not completely tighten at this time to allow for blade alignment. Remove the blade change tool by loosening the handles. Then, replace the second and fourth bolts but do not completely tighten at this time. Lower the blade and re-install the fifth bolt. At this time, completely tighten bolts two, three, four and five. Then raise the blade and then completely tighten the first bolt. To finish, exit knife change mode on the touch screen and then reattach the front cover.

Cut-True 29 A-H Large Format Guillotine Cutters- Installing Safety Curtains
Transcript :
Installing Safety Curtains. With the cutter in positions, install the safety curtains. Begin by removing the screws on the safety curtains. Next, cut the zip tie holding the yellow connection cable in place on the front of the machine. With the covers off, guide the yellow cable to the connector of the safety curtain and screw the cable into the connector on top of the sensor. With the cable screwed in, slide the sensor bar up and hand tighten the knot to hold in position. Unscrew the four connecting bolts on the side of the cutter and place the safety curtain into position using the screws th ...
Installing Safety Curtains. With the cutter in positions, install the safety curtains. Begin by removing the screws on the safety curtains. Next, cut the zip tie holding the yellow connection cable in place on the front of the machine. With the covers off, guide the yellow cable to the connector of the safety curtain and screw the cable into the connector on top of the sensor. With the cable screwed in, slide the sensor bar up and hand tighten the knot to hold in position. Unscrew the four connecting bolts on the side of the cutter and place the safety curtain into position using the screws that were removed. Repeat installation steps on the opposite side. With the safety curtains in position, check to be sure they're properly aligned and working. To test, place your hands between the sensors you should see a red light go on and off. If the curtains are in place correctly you should hear a click each time you place your hands between the sensors. If the sensor light does not go on and there is no click adjust the sensor bars up or down until they are align properly. When the sensors are correctly set up fasten each of the knots securely to ensure that the sensors will not move. Place the safety curtain covers back into position and carefully screw them back into place.


