-
Model NameModelCutting ActionMaximum Cutting WidthCutting CapacityMaximum Paper Stack HeightCutting Length Behind BladeLength in Front of BladeProgrammable JobsMinimum Cut w/False ClampMinimum Cut w/o False ClampNarrow CutLED Laser Cut LineClamp StyleBack Gauge AdjustmentBack Gauge ReadingBlade Change HandlesDimensionsWeightSafety CertificationsWarranty
-
Cut-True 31H
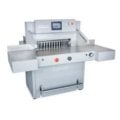 Dual-button electric28.7”1000 Sheets3.94”26.5”25”Up to 100 programs with up to 100 steps each2.36”1.18”N/AN/AAutomatic, hydraulicFully programmable using touchscreen, accurate to 0.1mmN/AIncluded73” W x 69” D x 56.9” H1,323lbs.N/A90 day limited warranty on parts. Excluding wearables and labor.
 -
Cut-True 31A
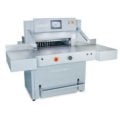 Dual-button hydraulic28.7”1000 Sheets3.94”26.5”25”Up to 100 programs with up to 100 steps each2.36”1.18”N/AN/AAutomatic, electronicFully programmable using touchscreen, accurate to 0.1mmN/AIncluded73” W x 69” D x 56.9” H1,279 lbs.N/A90 day limited warranty on parts. Excluding wearables and labor.
 -
Cut-True 29H
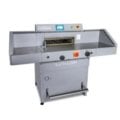 Dual-button electric20.5"700 Sheets3.15"20.5"18.25"Up to 100 programs with up to 100 steps each2.36”1.18”N/AN/AAutomatic, hydraulicFully programmable using touchscreen, accurate to 0.1mmN/AIncluded49.2" H x 36.75" W x 53.2" D1,014 lbs.N/A90 day limited warranty on parts. Excluding wearables and labor.
 -
Cut-True 29A
 Dual-button electric20.5"700 Sheets3.15"20.5"18.25"Up to 100 programs with up to 100 steps each2.36”.98"N/AN/AAutomatic, electronically adjustableeFully programmable using touchscreen, accurate to 0.1mmN/AIncluded49.2" H x 36.75" W x 53.2" D683 lbs.CE approved, UL pending90 day limited warranty on parts. Excluding wearables and labor.
 -
Cut-True 27S
 Dual-button electric18.9"700 Sheets3.15"N/AN/AN/AN/AN/AN/AYesAutomaticManual crankDigital readout, in both inches and metricIncluded51" H x 36" W x 39" D550 lbs.CE approved, UL pending90 day limited warranty on parts. Excluding wearables and labor.
 -
Cut-True 22S
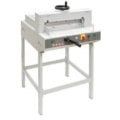 Dual-button electric16.9"440 Sheets1.75"N/AN/AN/AN/AN/AN/AYesSpindle-guided clamping wheelManual crankDigital readout, in both inches and metricIncluded46.75" H x 24.75" W x 33" D198.6 lbs.CE approved, UL pending90 day limited warranty on parts. Excluding wearables and labor.
 -
Cut-True 16M
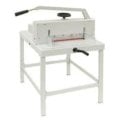 Manual lever handle18.7"700 Sheets3.15"N/AN/AN/AN/AN/AN/AYesSpindle-guided clamping wheelManual crankScale, in both inches and metricIncluded46.25" H x 39" W x 35" D199 lbs.CE approved90 day limited warranty on parts. Excluding wearables and labor.
 -
Cut-True 15M
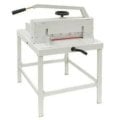 Manual lever handle16.9"600 Sheets2.15"N/AN/AN/AN/AN/AN/AYesSpindle-guided clamping wheelManual crankScale, in both inches and metricIncluded42.5" H x 26.8" W x 29.1" D133 lbs.CE approved90 day limited warranty on parts. Excluding wearables and labor.
 -
Cut-True 13M
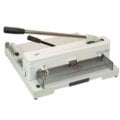 Manual lever handle14.5"370 Sheets.75"10.5"1.25"N/AN/AN/A1.25"YesLeverThumbscrewScale, in both inches and metricIncluded12.75" H x 18.75" W x 17.5" D38 lbs.CE approved90 day limited warranty on parts. Excluding wearables and labor.
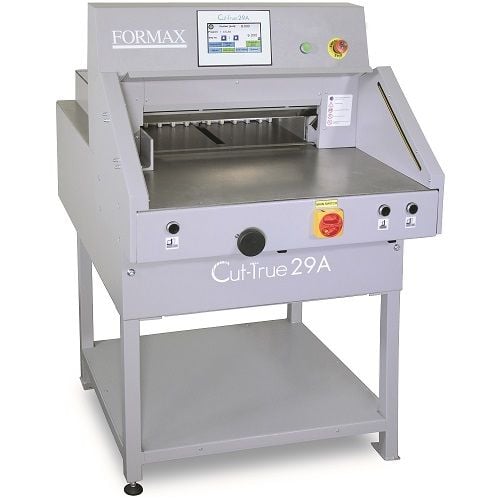
Formax Cut-True 29A 20.5" Electric Programmable Guillotine Cutter
FAQ: 0 Questions, 0 Answers
0 Q&As
Please Note: FREE Dock-to-Dock Shipping
Item# CutTrue 29A
- Cutting Action: Dual-button electric
- Maximum Cutting Width: 20.5" (520mm)
- Programmable Jobs: Up to 100 programs with up to 100 steps each
- Touchscreen Features: Program jobs, alternate between inches/mm, paper eject function, programming via cutting, business card cutting mode
Product Name
Item Number
Price
Qty
ProductDescription
The Formax Cut-True 29A Electric Guillotine Paper Cutter provides highly accurate cutting for stacks up to 3.15" high and 20.5" wide, featuring a touchscreen control panel, automatically adjusting back gauge, job memory for up to 100 programs, and a bright LED cutting line for precise alignment. Its electronically controlled two-hand operation and hardened steel blade deliver crisp, consistent results, while the infrared safety curtain, blade lock, key lock, transparent guards, automatic blade return, and included wooden paper push ensure operator protection. The anti-friction work surface with optional wide side tables makes handling large sheets easier, and the removable false clamp prevents marking delicate or bound materials. Ideal for high-volume finishing in print shops and in-plant operations, the Cut-True 29A combines power, productivity, and safety plus, replacement blades and cutting sticks are available as accessories to maintain peak cutting performance.
Product Details
- Hardened Steel Blade: Designed for accurate cuts and long life
- Electronically-Controlled: Paper clamp pressure and blade carrier
- False Clamp: Minimizes marking of sensitive paper stock, easily stores within the machine when not in use
- Touchscreen Control Panel: Easily set, adjust and program jobs
- LED Cutting Line: Bright red LED line indicates exactly where the blade will cut, allowing for precise adjustments prior to cutting
- Solid Steel Blade Carrier
- Fine-Tuning Knob: Allows users to precisely adjust the back gauge position
- Low-Friction Work Table: Makes it easy for operators to move and position large paper stacks
- Convenient Storage Shelf
- Programmable Jobs: Up to 100 jobs/100 steps
- Cutting Capacity: Accurately cuts through paper stacks up to 3.15" high, up to 20.5" wide
- Automatic Blade Return from Any Position
- Infrared Safety Curtain: Light beam curtain shuts down operation if the plane is interrupted
- Two-Hand Operation: Keeps hands out of the cutting area, electronically controlled for added safety
- Easy Blade Change from Front of Cutter: Blade change safety tool included
- Wooden Paper Push Tool: Helps to quickly and safely align the paper stack
- Main Switch and Safety Key Lock: Keeps cutter secure from unauthorized operators
- Transparent Rear Safety Guard
- Options: Wide Side Tables (Pair) - Provide additional space to maneuver larger paper stock
- Supplies: (29-10) Replacement Blade and (29-20) Replacement Cutting Sticks, pkg of 8
Item Specifications
- Cutting Action: Dual-button electric
- Cut Capacity: 700 Sheets
- Maximum Cutting Width: 20.5" (520mm)
- Maximum Paper Stack Height: 3.15" (80mm)
- Programmable Jobs: Up to 100 programs with up to 100 steps each
- Touchscreen Features: Program jobs, alternate between inches/mm, paper eject function, programming via cutting, business card cutting mode
- Length Behind Blade: 20.5" (520mm)
- Length in Front of Blade: 18.25" (464mm)
- Minimum Cut w/False Clamp: 1.6" (40mm)
- Minimum Cut w/o False Clamp: .98" (25mm)
- Table Size: 30.75" W x 15.75" D ( 781x 400mm) or 56" W x 15.75" D (1422 x 400mm) w/optional wide side tables
- Clamp Style: Automatic, electronically adjustable
- Back Gauge Adjustment: Fully programmable using touchscreen, accurate to 0.1mm
- Blade Change Safety Tool: Included
- Dimensions: 49.2" H x 36.75" W x 53.2" D (1250mm H x 934mm W x 1352mm D)
- Dimensions w/Optional side tables: 49.2" H x 61.5" W x 53.2" D (1250mm H x 1563mm W x 1352mm D)
- Weight: 683 lbs. (310kg)
- Power Supply: 230V, 50Hz, 20A dedicated line NEMA Plug: 6-20
- Manufacturer's Warranty:
- 90 day limited Manufacturer's Warranty on parts.
- Excluding wearables and labor.
Demonstration Video

Cut-True 29A Large Format Guillotine Cutter- Unboxing
Transcript :
29A Unboxing. To set up your Cut-True 29A begin by properly unpacking the cutter. To start, remove the top cover of the box and the foam packing from the container. Unscrew the metal strapping to remove the sides of the container. Remove the plastic wrapping from the 29A. Use a forklift to lift the machine off of the pallet. Next, open the box containing the legs. Use the corresponding numbers on the legs to properly assemble. Insert the bolts and use an Allen wrench to tight them in place. Now, place the legs onto the floor and install the bottom shelf. Once the bottom shelf is in place, use ...
29A Unboxing. To set up your Cut-True 29A begin by properly unpacking the cutter. To start, remove the top cover of the box and the foam packing from the container. Unscrew the metal strapping to remove the sides of the container. Remove the plastic wrapping from the 29A. Use a forklift to lift the machine off of the pallet. Next, open the box containing the legs. Use the corresponding numbers on the legs to properly assemble. Insert the bolts and use an Allen wrench to tight them in place. Now, place the legs onto the floor and install the bottom shelf. Once the bottom shelf is in place, use a forklift to carefully place the machine onto the legs. Being sure the inserts are align with the legs and that they are seated properly. Fasten each of the four legs with the Allen head bolts provided towards the top of the legs. With the legs properly attached, remove the black shipping handles on the front and rear of the machine. After removing the handles, re-screw the screws into the machine. Now that the machine has been unboxed and assembled use a hand truck to set the 29A into place.

Cut-True 29 A-H Large Format Guillotine Cutters- Blade Change
Transcript :
29 A and 29 H Blade Change. Start by removing the front cover directly underneath the touchscreen removing each screw. Entering knife change mode on the touch screen. Lower the blade and remove the fifth bolt. bNext, raise the blade position and remove the second and fourth bolts from the blade. Then, position the blade change tool over the removed bolt holes and tighten the two handles in position. Once the blade change tool is tightened, loosen the first and third bolts and remove each of them. Then, carefully loosen the two handles of the blade change tool just enough to remove the blade. S ...
29 A and 29 H Blade Change. Start by removing the front cover directly underneath the touchscreen removing each screw. Entering knife change mode on the touch screen. Lower the blade and remove the fifth bolt. bNext, raise the blade position and remove the second and fourth bolts from the blade. Then, position the blade change tool over the removed bolt holes and tighten the two handles in position. Once the blade change tool is tightened, loosen the first and third bolts and remove each of them. Then, carefully loosen the two handles of the blade change tool just enough to remove the blade. Safely set the old blade down and loosen the handles to remove the blade. Then, connect the blade change tool to the new blade and slide the new blade into position one side at a time. Being sure to align the corresponding second and fourth bolt holes and tighten. Replace the first and third bolts to hold the blade in place. Do not completely tighten at this time to allow for blade alignment. Remove the blade change tool by loosening the handles. Then, replace the second and fourth bolts but do not completely tighten at this time. Lower the blade and re-install the fifth bolt. At this time, completely tighten bolts two, three, four and five. Then raise the blade and then completely tighten the first bolt. To finish, exit knife change mode on the touch screen and then reattach the front cover.

Cut-True 29 A-H Large Format Guillotine Cutters- Installing Safety Curtains
Transcript :
Installing Safety Curtains. With the cutter in positions, install the safety curtains. Begin by removing the screws on the safety curtains. Next, cut the zip tie holding the yellow connection cable in place on the front of the machine. With the covers off, guide the yellow cable to the connector of the safety curtain and screw the cable into the connector on top of the sensor. With the cable screwed in, slide the sensor bar up and hand tighten the knot to hold in position. Unscrew the four connecting bolts on the side of the cutter and place the safety curtain into position using the screws th ...
Installing Safety Curtains. With the cutter in positions, install the safety curtains. Begin by removing the screws on the safety curtains. Next, cut the zip tie holding the yellow connection cable in place on the front of the machine. With the covers off, guide the yellow cable to the connector of the safety curtain and screw the cable into the connector on top of the sensor. With the cable screwed in, slide the sensor bar up and hand tighten the knot to hold in position. Unscrew the four connecting bolts on the side of the cutter and place the safety curtain into position using the screws that were removed. Repeat installation steps on the opposite side. With the safety curtains in position, check to be sure they're properly aligned and working. To test, place your hands between the sensors you should see a red light go on and off. If the curtains are in place correctly you should hear a click each time you place your hands between the sensors. If the sensor light does not go on and there is no click adjust the sensor bars up or down until they are align properly. When the sensors are correctly set up fasten each of the knots securely to ensure that the sensors will not move. Place the safety curtain covers back into position and carefully screw them back into place.
Replacement Blades and Accessories
| Product Name | Item Number |
| Replacement Blade for Formax Cut-True 29A and 29H Cutters | FDCT29-10 |
| Cutting Sticks for Formax Cut-True 29A and 29H Cutters - 12pk | FDCT29-20 |
| Side Tables for Formax Cut-True 29A and 29H Cutters - 1 Pair | STFCT29-30 |


