Zutter Bind-it-All V2.0 Punch and Bind Machine
65.37 NewCondition OutOfStock

We're sorry, but we no longer offer this item.

Call us at 1-800-944-4573 for personalized recommendations

or check out these similar items that may be a good fit:

Zutter Bind-it-All V2.0 Punch and Bind Machine

Part #: ZUT2811
Brand: Zutter
16 Questions, 16 Answers
  • Punch Capacity: 5 Sheets
  • Bind Capacity: 150 Sheets
  • Color: White
  • Punch Pattern: Wire
We're here for you!
Please call 1-800-944-4573 for help finding a comparable solution, or
Click to Chat

SWIPE FOR MORE IMAGES
  • 0
  • 1
  • 2
video

Product Description

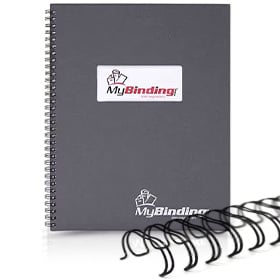
Pretty in pink, crafters and scrapbookers delight. Here is a must-have machine for your crafting station. Create your own books, calendars, journals and craft projects. The Bind-it-All is a dual action 2:1 pitch machine that will punch and bind a wide variety of craft and scrapbook materials. This Bind-it-All comes with your own O-wire measuring template. You might also want to pick up 1/2" or 3/4" O-wire in Baby Pink or Baby Blue .
***Note that small sized 2:1 wire may not work due to the punching margin unless you use the space bar that is available for purchase separately.

Product Details

  • Product Type: Punch and Bind Machine
  • Color: White
  • Quantity: 1
  • Warranty: 1-Year Limited Warranty
  • Product Number:ZUT2811

Demonstration Video

Transcript: Welcome to MyBinding video. This is a look at Bind-It-All by Zutter, a personal, portable wire binding machine. Perfect for crafting and scrapbooking, this Zutter Bind-It-All machine is great for the small project. It's solid, well-built, easy-to-use and has plenty of features to do a perfect job every time. It abounds with plenty of measuring tools and different ways to lock papers into position so the punch is consistent every time, not only a punch but a bind as well with easy step-by-step instructions. If you're new to wire binding, this is a great book filled with pictures and steps for d ... Read More
Welcome to MyBinding video. This is a look at Bind-It-All by Zutter, a personal, portable wire binding machine. Perfect for crafting and scrapbooking, this Zutter Bind-It-All machine is great for the small project. It's solid, well-built, easy-to-use and has plenty of features to do a perfect job every time. It abounds with plenty of measuring tools and different ways to lock papers into position so the punch is consistent every time, not only a punch but a bind as well with easy step-by-step instructions. If you're new to wire binding, this is a great book filled with pictures and steps for different sized projects as well as tips and tricks for perfection. This is an additional tool to help you measure your wire size and set your machine but we'll get to that later. Let's go step-by-step through binding a project. Both the right and left side have this lock. You pull it down and it holds your paper in place for consistent punching. This first example is an oversized book, larger than the punch itself, but once you turn the paper around, load it right into this little tray that can hold and lock your paper in perfect position, you make your second punch and you're all set with a complete row of punches across your paper. Another method for making sure you have consistent punches is to use this little pull bar. It pulls out, turns over and acts as a fence on the right hand side. Once you've got your settings in place, you can begin with your covers, punching one side, turning it around using that same fence and punch the other. Now everything is centered and the holes are perfect. It does take a little time to learn to navigate the whole machine and all of its measuring tools but once you get it down with plenty of scrap paper, you'll be set to make great projects. You can continue to punch through your entire project, both outside and inside in small batches. And when you're all punched, assemble your book together, it's time to bind. The Bind-It-All uses 3:1 pitch twin loop wire. That simply means there are three holes for every inch in the punching pattern. Zutter and other companies provide this wire. This tool is helpful in setting the closer stop. That way, you don't overclose your wire. With most projects you'll do on the Bind-It-All, your wire will come too long for the project itself. Simply cut it with wire cutters or a strong pair of scissors and you're on your way. When you close a wire, it's going to make a seam. If you take the back page and put it around to the front page so they're facing each other, then the end the seam will be hidden between the back cover and the back page. Slide your wire through the project and with the C-opening of the wire, place it down into the closer flat, and with the same lever for punching, you press to close the wire. Again, with this oversized book, you'll have to turn the project around and close the other side as well. And with that, you're all done. Flip the back page around to the front and you've got yourself a book, and that hidden seam is right here between your cover and the back page. Next, we'll do a project that uses all the holes and no more -- perfect for uniquely bound journals, diaries and photo books, this is very simple. All it takes is one-time centering and hold the fence right in place and you're ready to go through your entire project. Punch the covers, the inside, assemble your book together, you're ready to bind. You'll have to cut the trim with wire again, thread it right through, place it open ended down into the closer unit and make your close. If you'd like, there's a built-in foot on the back end of the machine. It makes one-handed closing possible. It holds it more stable and in place. You can just begin to see the possibilities for this simple bind project. And, finally, let's watch a very small project be done. This adjustable block is included with your purchase and hangs right over the fence. It folds into place, goes right into the gulley, doesn't interfere with the pins and can hold your paper in place perfectly so that your holes are centered and you don't use any more than you'd like. In this case, we're punching only four holes. We use a wireless four loops and we close it up. And that's it. Binding your personal book and project can be done easily with the Bind-It-All by Zutter. For more demos, reviews and how-tos, check out mybinding.com.

Zutter Bind-it-All - Chapter 3 Let's Punch Video

Transcript: Now that you know a little bit about the machine, let’s get started with punching. By far, this is the most stressful operation users face. How many holes do I punch? How do I make the holes not go off the edge? And how do I keep them even? All that will be answered right now. In order to punch like a pro, you need to understand the settings of the paper stop guide. Knowing how and when to use the settings can help you punch both small and large projects with ease.

First, there’s setting A or Open. This provides an open punching channel that allows the material to move freely in either dire ...
Read More

Now that you know a little bit about the machine, let’s get started with punching. By far, this is the most stressful operation users face. How many holes do I punch? How do I make the holes not go off the edge? And how do I keep them even? All that will be answered right now. In order to punch like a pro, you need to understand the settings of the paper stop guide. Knowing how and when to use the settings can help you punch both small and large projects with ease.

First, there’s setting A or Open. This provides an open punching channel that allows the material to move freely in either direction. This is used for long project punches and for when you want to punch beginning in the center of the project. Setting B is for continuous punching. When you’re punching project longer than 4 inches, engage the stop guide tab into a punched hole. This perfectly aligns the punchers no matter the length of the project. Setting C is for punching covers, and setting D is for punching inner pages. Why have two different settings for covers and pages? Zutter makes pre-cut covers and inner pages, and for professional quality binding, the inner pages are slightly smaller than the covers; smaller by about 3/16 of an inch. See how they provide an inner border around the pages? In order to have the punch holes align with these two different sizes, they need to be punched on these different settings, thus, C and D. However, if you’re using covers and inner pages that are exactly the same size, don’t use the D setting. Just punch everything on C for covers. Let’s start by punching a 4-inch mini-book cover and pages. For this sized book, the widths are the same as the Bind-it-All. You can set your paper stop guide on C for cover setting and place the chipboard in the punching channel, making sure the bottom is sitting flat and flush toward the stop guide. Hold it firmly and bring the handle down to punch. For the inner pages, repeat the same steps. However, change the stop guide to D for inner pages. Set them in the punching channel, make sure they’re flat and flush against the stop guide, bring down the handle and punch. Remember, this Bind-it-All version 2.0 has a greater capacity for material thickness, an additional 35% over the original model, giving you more flexibility. Try lining your covers with a variety of paper thicknesses or even fabric. You can stretch your creativity by punching covers from acrylic, thin wood, thin tin and plastic. Now, if you want to punch a longer album, in this case 8 inches, you will follow the same basic steps as before. However, because the Bind-it-All punches six holes at a time, depending on the width of the project, you will punch each cover multiple times.

Refer to your owner’s manual for detailed punching guide to tell you the number of holes needed for various widths. In this example, we are punching an 8-inch album and we’ll need 14 holes for the full length. Set the stop guide on C for cover setting, place the chipboard in the punching channel, make sure the bottom is sitting flat and flush toward the stop guide, hold it firmly and bring the handle down to punch. Move the stop guide to A, open setting, and slide the cover to the right, counting over to the fifth hole that you’ve punched. Engage the stop guide tab into the fifth hole. Bring the handle down to punch. Repeat the step again, this time engaging the seventh punched hole. Bring the handle down again, and you have perfect aligned even holes. For the inner pages, repeat these same steps. However, change the stop guide to D for inner pages for your first set of punches. Set them in the punching channel, make sure they’re flat and flush against the stop guide, bring down the handle and punch. All right, and then you have perfectly lined holes in your inner pages that correspond to your punched cover. Look at that, perfectly lined up. Here’s a tip. Make sure you punch the holes before you add any heavy or thick embellishment, especially if they’re near the spine of the edge of your project. Otherwise, it’s going to interfere with the punching action. Now that we have our two projects punched, let’s get ready to bind them.

Zutter Bind-it-All - Chapter 3 Let's Bind Video

Transcript: Now that the holes are punched, let’s get ready to bind. The first step is to prepare your O-wire. For this project, we need to count off the proper number of loops for our 4-inch book as well as our 8-inch book, in this case, six loops. You’ll just count the number of loops that correspond with the number of holes that you punched, in this case six for the mini-book and 14 this book. As you know, the O-wire comes in a variety of diameters, depending on what size book you’re working on. And in order to make sure your closing channel works properly for all the sizes, you need to make sure that ... Read More
Now that the holes are punched, let’s get ready to bind. The first step is to prepare your O-wire. For this project, we need to count off the proper number of loops for our 4-inch book as well as our 8-inch book, in this case, six loops. You’ll just count the number of loops that correspond with the number of holes that you punched, in this case six for the mini-book and 14 this book. As you know, the O-wire comes in a variety of diameters, depending on what size book you’re working on. And in order to make sure your closing channel works properly for all the sizes, you need to make sure that it’s adjusted properly. This is where the handy O-wire templates will come in very, very handy. Now, you can use the O-wires for two different forms of measurement. One is a visual guide; you can place the O-wire on the front so you know what size you have, but the most important method is to use it as a measuring tool in adjusting the closing plate here. Place it in the closing channel and adjust the knob this way to move it forward and back. That will ensure you get perfectly sized closing for your wires. Now, here’s a trick that most scrappers overlook when it comes to binding. In order for the seam of where your wires come together here to appear in the back of the book, not on the outside of the book, you need to follow a simple organizational tip. What you’ll want to do for step one is to place your project in the order that you want – your front cover followed by your inner pages and then your back cover. Then flip your back cover around to the front like so. So your back cover is facing your front cover. Then insert your wires into the inner pages like this. Now we’re ready to go. Now we’re going to place this in the binding channel flat down with the openings of the wires flat down and the loops facing the machine. Okay, and this is where the covers are in the center. Squeeze it gently. You’re going to flip it around. There are your inside pages and the seam is in the back. For the longer project, you’re going to follow the same steps as you did for the 4-inch. Now we’re going to bind our 8-inch book. As we did with the 4-inch book, we’re going to order the pages in the order that we want – with the front cover, followed by the inner pages and then the back cover. Flip the back cover around to the front so they’re facing and insert your wires into the holes from the inner pages. As we did with the punching, we’re going to need to bind in sections. In order to ensure that you have perfectly round holes, you’re going to want to make sure that you put your wires flat down with the small loops of the wire facing the Bind-it-All. Gently but firmly squeeze the handle down. The closing channel will stop on its own to give you perfect circles. Now we have our book – front cover, inner pages and the seam in the back of the book. As with punching, you’ll want to bind your project before you add any heavy or thick embellishments. That will prevent them from being damaged. Congratulations! You’ve done it. You can now punch and bind like a pro.

Questions & Answers

Unfortunately, we do not have access to the manual, but there are several instruction videos on our website.

Answered by MyBinding.com
3 years and 4 months ago ago
Thank you for your questions. It isn't recommended to punch more than 5 sheets of 20lb bond in this machine.

Answered by MyBinding
3 years and 9 months ago ago
That should work. We recommend only doing one sheet at a time for punching.

Answered by MyBinding
3 years and 4 months ago ago
The Zutter Bind-it-All V2.0 Punch and Bind Machine uses 2:1 twin loop wire, which you can find here https://www.mybinding.com/search?q=2%3A1+twin+loop+wire

Answered by MyBinding
3 years and 9 months ago ago
Thank you for your question. No, this machine would not punch through wood.

Answered by Mybinding
4 years and 1 months ago ago
Thank you for your question. Yes, it will punch through it, but you will have to punch 1 cover at a time.

Answered by Mybinding
4 years and 2 months ago ago
Asked by silvana
Unfortunately, the Zutter Bind-it-All V2.0 Punch and Bind Machine would not be the correct punching for plastic discs, and is something we do not carry.

Answered by MyBinding
4 years and 3 months ago ago
Thank you for your question. Unfortunately, the Zutter Bind-it-All V2.0 Punch and Bind Machine will not work with combs, as it has a different punching pattern. You would need a Comb Binding Machine that punches a 19 hole punch pattern.

Answered by MyBinding
4 years and 7 months ago ago
Thank you for your question. The Zutter Bind-it-All V2.0 Punch and Bind Machine would be able to close the Spiral O wire but punches a 2:1 hole pattern that is different than spiral O. The biggest drawback would be that the Zutter Bind-it-All V2.0 Punch and Bind Machine has a binding and closing width of about 3" so it would take 4 "closes" to complete a 11" book.

Answered by MyBinding
7 years and 1 months ago ago
Thank you for your question. The Zutter Bind-it-All V2.0 Punch and Bind Machine is 2:1 pitch wire binding machine and unfortunately there is not a coil that would work with it. We have a wide variety of coil binding machines that you can find here .

Answered by MyBinding
7 years and 2 months ago ago
Asked by G Thompson
Thank you for your question. The Zutter Bind-it-All V2.0 Punch and Bind Machine does not come with any wire. The Zutter Bind-it-All V2.0 Punch and Bind Machine use 2:1 twin loop wire.

Answered by MyBinding
7 years and 7 months ago ago
The Zutter Bind-it-All V2.0 Punch and Bind Machine use standard 2:1 twin loop wire. If you search "sizing guide" in the search window on our page it will take you to our Sizing Guide that will give you the recommended diameter based on the # of sheets paper in your book.

Answered by MyBinding.com
8 years and 1 months ago ago
We do have a few accessories from zutter on the site but don't carry all of them. That being said we are an authorized Zutter dealer and can get anything that they sell. Need something for your project? Give us a call and we will see about bringing it in for you.
Answered by Mybinding.com
8 years and 1 months ago ago
This machine is often used by crafters and can punch through card stock, chipboard and cardboard within reason. It can also punch through most standard thicknesses of plastic and poly covers.

Answered by Mybinding.com
8 years and 1 months ago ago
You can use this machine with any of the 2:1 pitch wire that we carry. We have a bunch of different colors and sizes. You can find them all here in the 2:1 pitch wire category.

Answered by Mybinding.com
8 years and 1 months ago ago
You can always punch longer sheets in multiple steps. In fact the machine has a guide built into it for making sure that your holes line up. That being said this machine is primarily made for crafting and if you are mostly binding documents you might want to consider a unit with a standard 11 inch punching throat.

Answered by Mybinding.com
8 years and 1 months ago ago

Submit a New Question