Fastbind Secura Hot Melt Perfect Binder - SEC110
4195.00
NewCondition
InStock
Fastbind Secura Hot Melt Perfect Binder - SEC110
SWIPE FOR MORE IMAGES
- 0
- 1
Product Description
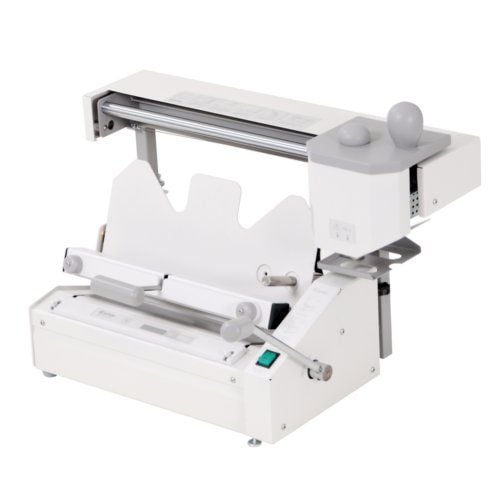
This Fastbind Secura Hot Melt Perfect Binder is a flexible binding system that can bind up to 9.3" x 12.5" sized books. This binder has a unique rotary binding method that makes it the most flexible system available in the market today. It quickly produces hard and soft cover books as well as manager covers, tear-off pads and strip binding. Plus, the end result is perfect binding that is strong, square and affordable.
This compact and full-featured Fastbind Secura Hot Melt Perfect Binder can make professional quality books and reports in minutes with no set-up times or book format adjustments. In fact, it self adjusts
for book thickness from 2 to 400 pages. For the best printed hard cover books and photo albums, Fastbind Secura can be combined with all Fastbind Casemakers.
Product Details
- Multiple Types of Bind: Hard Cover Binding, Soft Cover Binding, Strip Binding, Tear-Off Pads
- Affordable, compact and fully featured.
- Easy to Use. No set-up times or book format adjustments needed.
- Self adjusts for book thickness from 2 to 400 pages
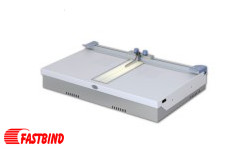
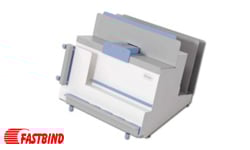
- Compatible with: Fastbind Case Makers, Fastbind Creasers, Fastbind Presso.
- Optional tools and Accessories: Cover Trimmer or Hard Cover Toolkit.
Item Specifications
- Capacity cycles/hour: Up to 450
- Capacity books/hour: Up to 180
- Min-max binding thickness: 0.1- 40 mm / 0.004- 1.6 inches
- Max. binding length: 235 mm / 9.3 inches
- Max. binding height: 320 mm / 12.6 inches
- Max cover thickness: 400 g/m² / 225 index
- Voltage: 220- 240 V / 110- 115 V
- Frequency: 50- 60 Hz / 50- 60 Hz
- Current: 3 A / 5.5 A
- Machine dimensions (W x D x H): 660 x 370 x 430 mm / 26 x 15 x 17 inches
- Box dimensions (W x D x H): 710 x 410 x 510 mm / 28.0 x 16.1 x 20.1 inches
- Net/gross weight: 28/31 kg / 62/68.4 lbs
- Manufacturer's Warranty: 1 Year On All Parts (Must use the approved Fastbind glue (type 5.2 from Fastbind) or it will void the warrantee on the glue pot.)
Demonstration Video
Making a Soft Cover Book - Fastbind Secura
Transcript:
Before we create a softcover book using the Fastbind Secura, first allow 20 minutes for the machine to heat the glue.
To begin, ensure you have the softcover bar in place. It is labeled with an "S."
We'll be using a cover that is already trimmed to the correct size for our project. Start by inserting the cover into the machine with the front toward the back of the machine, and align it to the edge guide.
Next, properly orient your pages to the cover and align them against the guide. Evenly tamp them.
The clamp uses strong magnets to hold it open. Push the clamp, then place one hand ... Read More
Before we create a softcover book using the Fastbind Secura, first allow 20 minutes for the machine to heat the glue.
To begin, ensure you have the softcover bar in place. It is labeled with an "S."
We'll be using a cover that is already trimmed to the correct size for our project. Start by inserting the cover into the machine with the front toward the back of the machine, and align it to the edge guide.
Next, properly orient your pages to the cover and align them against the guide. Evenly tamp them.
The clamp uses strong magnets to hold it open. Push the clamp, then place one hand behind the cover, holding it to the metal back, and bring the clamp in. Secure it in place.
Now, flip the project around using the side arm. Press the cover down to keep it from gluing the cover.
Run the glue over the project. Give a short pause, then run it over again. Immediately pull the cover three times.
Since the machine does not have a splitting wheel, you can only use uncoated paper.
Take the glue and run it over the edge of the pages. Give a short pause, and run the glue over once more. Immediately following, pull on the cover three times. Bring the lever arm back down and continue the downward motion to press the spine of the book for 5 seconds.
Release the clamp and remove your book.
You now have a completed soft cover book, immediately ready for use. For an even cleaner finish, take the book to a cutter and trim your edges.
Making a Hardcover Book - Fastbind Secura
Transcript:
Before we create a hardcover book using the Fastbind Secura, first allow 20 minutes for the machine to heat the glue.
To begin, ensure you have the hard cover bar in place. It is labeled with an "H." We will also need the hard cover edge guide. You can also use this guide when creating soft covers, if switching between the two types.
First, prepare your pages by placing on the end sheets. Make sure the exposed paper is on the binding edge. Place an end sheet on both sides.
Next, insert your hardcover into the machine with the front of the cover facing the back of the machine. Make sur ... Read More
Before we create a hardcover book using the Fastbind Secura, first allow 20 minutes for the machine to heat the glue.
To begin, ensure you have the hard cover bar in place. It is labeled with an "H." We will also need the hard cover edge guide. You can also use this guide when creating soft covers, if switching between the two types.
First, prepare your pages by placing on the end sheets. Make sure the exposed paper is on the binding edge. Place an end sheet on both sides.
Next, insert your hardcover into the machine with the front of the cover facing the back of the machine. Make sure the spine is flat to the bottom.
Then, slide the cover to the guide, pull the hardcover guide so it overlaps the cover's edge.
With the cover spine flat, place your pages in, confirming they are properly oriented to the cover. Tamp the ends evenly.
When clamping, place one hand behind the cover, holding it to the metal back, then bring the clamp in and secure it in place.
Now, flip the project around using the side arm.
Run the glue over the project. Give a short pause, then run it over again. Immediately press the cover over the glue and bring it back down three times--this spreads the glue evenly. Hold the cover to the spine for five seconds, pushing down.
With the glue drying quickly, bring the project back down, remove the clamp, and slide the project out. Then reinsert the entire book, spine down.
Then, press firmly down on the lever to crimp the spine of the book. Rotate the book and crimp the other side.
Questions & Answers
Please feel free to give our parts dept a call at 800-944-4573, with the part numbers of the parts you are needing, and they will check on availability with the manufacturer.
Answered by MyBinding.com
The Fastbind Secura Hot Melt Perfect Binder - SEC110 is made in Florida USA.
Answered by My Binding
▶
Asked by Michelle
Thank you for your question. The Fastbind Secura Hot Melt Perfect Binder unfortunately does not have the roughener feature. It would still be a great option if you will be binding primarily with a bond paper stock as it does not need to be roughened to get a secure bind. If you have any other questions, feel free to contact us at 800-944-4573 and we would be more than happy to help.
Answered by Mybinding.com


