MyBinding Knowledge Base
- Binding (248 Article)
- General Binding (42)
- Plastic Comb Binding (57)
- Fastback Binding (59)
- Perfect Binding (2)
- Modular Punching (8)
- Zipbind (3)
- Twin Loop Wire (13)
- Coil Binding (22)
- Thermal Binding (14)
- Strip Binding (1)
- VeloBind (4)
- Binding Covers (14)
- Proclick Binding (10)
- SureBind (4)
- Screw Post (2)
- Hole Punches (2)
- Staplers (4)
- Komtrak Insprial Binding (2)
- Paper (1)
- Rhin-O-Tuff (5)
- Binding Machines Comparison (17)
- Laminating (109 Article)
- General Laminating (26)
- Roll Lamination (16)
- Pouch Lamination (36)
- Pouch Board Laminator (3)
- School Laminator (3)
- Foil Laminating (3)
- Royal Sovereign Laminators (10)
- Laminators Comparison (3)
- Boards (11 Article)
- Bulletin Boards (3)
- Whiteboards (5)
- Chalkboards (1)
- Paper Shredders (44 Article)
- General Shredding (35)
- Industrial Shredders (1)
- Cross-Cut Shredders (2)
- Cardboard Shredders (1)
- Multimedia Shredders (1)
- Personal Shredders (1)
- High Security Shredders (2)
- Ring Binders (9 Article)
- Specialty Binders (2)
- Reinforced Paper (1)
- Health Care Punched Paper (1)
- Perforated Paper (2)
- View Binders (1)
- Index Tabs (9 Article)
- Index Tab Dividers (2)
- Copier Tabs (4)
- Pocket Folders (1)
- Custom Index Tabs (1)
- Pre-Printed Index Tabs (1)
- Paper Handling (37 Article)
- Paper Folders (9)
- Paper Joggers (2)
- Guillotine Cutters (4)
- Rotary Trimmer (3)
- Electronic Paper Cutters (1)
- Corner Rounders (2)
- Paper Scoring (2)
- Paper Drill (2)
- Booklet Makers (3)
- Stack Cutters (1)
- Paper Handling Equipment Comparison (5)
- ID Accessories (12 Article)
- Badge Holder (1)
- Lanyards (8)
- Badge Reels (1)
receive
$5off
*On order $25 or more.
Spiral Coil Binding Basics
Looking to bind with spiral coil, but not sure where to start? This quick guide will walk you through the coil binding basics. One key thing to note is that not every coil binding machine will have the same features and capabilities, but we are going to touch on those various differences and focus on the most popular spiral coil machines.
How to Spiral Coil Bind
- Choose a Coil Size — Selecting the right size is easy with our coil sizing guide. It offers both the document thickness measurement and approximate sheet count using 20 lb. copy paper. Keep in mind that if you are using report covers or thicker stock, you will need to convert the count or use the measurement instead. This is generally the more accurate way to go, and we recommend you add 4mm (1/4") to whatever thickness of document you have to determine the coil size spine you need.
- Adjust Machine Settings — Depending on your machine, it will likely have an edge margin and potentially even a depth margin, both of which are typically marked with simple stickers. Some machines will also have disengageable punching pins. This step is always important, but especially so if you are punching anything but standard letter size sheets.
- Side Margins: Most machines will have side margins that allow you to choose the length between the top and bottom of your page to the first hole. It is typically controlled by a dial.
- Depth Margins: Select machines will also let you set the hole depth, which is the space between the left side of the paper and your line of holes. The settings here are minimal, but can be helpful if you are making extra thin (calling for a more narrow setting to allow for easy page turning) or extra thick books (warranting a wider margin for added strength).
- Disengageable Pins: Some higher end machines will also let you prevent the machine from punching select or all of the holes using "pins" in the front of the machine. By puling a pin to the "out" position, the hole will not punch. This is a helpful feature when you have a unique page size or just want more spacing on the top and bottom.
- Punch Test Sheets — Punch some scratch paper and review the hole spacing and alignment. One spiral coil hack is to fold the paper in half and see if the holes line up. Fine tune the settings, if needed, and continue punching test sheets until everything is to your liking.
- Punch Covers and Filler — Begin by punching your cover sheets. Depending on your machine, you may need to do them one at a time. Set the front cover face down and continue to punch all of your project filler paper, placing them in-order on top of the cover. Then add your back cover to the pile.
- Shape the Spine — Many machines will have a spine shaper built in, which is a curved indentation that spans the width, typically right in front. Place your book here to get the pages to their ideal curve to match the curve of the coil. If your machine doesn't have one, you can use a spine former called a coil binding sleeve.
- Insert Your Coil by Hand — Start binding by inserting your coil through the first few holes by hand by simply rolling them through. If your book is thicker, we recommend doing a few extra. If your machine does not have an electric inserter, then continue rolling the coil all the way through until you have about 1/2" or more excess coil on both sides. If you do have a coil inserter, then turn it on and, holding the book by the pages firmly, gentle press the coil against the roller. Make sure you are holding it the right direction so it inserts instead of removes the coil. It can take a few tries to get the perfect pressure to really smoothly roll those coils in, but once you get the groove, it goes lighting fast. Stop when there is about 1/2" of coil sticking off each side.
- Crimp the Ends of the Spiral Coil — The final step is to crimp in the ends of the coil to prevent it from spinning out. You may use hand crimping pliers or an electric crimping machine to accomplish this. It will trim the coil to the edge of your book and fold in the edge. Here is a video for how to use coil cutting crimpers correctly. It explains that the red dot needs to be facing up and to trim just above the last hole on the right side, flip the book, and crimp again on the right side.
Noteworthy Spiral Coil Benefits
- Can be Bound By-Hand — While you will need a punching machine to punch the holes, the coil itself can be bound by hand. This keeps the entry level machine investment down by removing a binding module, though some of the best spiral coil machines will have an attached inserting machine.
- Flexible = Durable — The spiral coil spines themselves are incredibly flexible, which makes them durable as they can withstand bumps, drops, and even karate chops while still retaining their original shape.
- Endless Colors — Though most companies have a smaller collection of stocked colors, our spiral coil colors are vast, including all of the basics plus exciting additions like turquoise, glow in the dark, lilac, gold, and more.
- Consistent Pitch — The "pitch" of a coil is the spacing between each hole. Though plastic coils come in several pitches, the 4:1 (4 holes per inch) is the industry standard, making it easy to buy consumables.
- Huge Binding Capacity — Coils can bind from just a couple sheets of to thick books that are as many as 440 sheets thick.
Efficiency Boosting Features
- Electric Coil Inserter — Typically using one electric and one stationary roller, an electric inserter can significantly increase the speed at which your spiral coil books are bound. This makes them a key tool for anyone who binds more than a couple books at a time, in frequent volumes.
- Built-In Guides — Machines that have the guides printed directly on them are a simple, but noteworthy benefit. They eliminate the stress of losing the user manual for job setup and make it simple for any new user to start binding quickly.
- Electric Crimpers — A few select machines have an electric coil crimper built-in which, if you are binding in high volumes, can be a real wrist-saver. Cutting and crimping the coil by hand takes time and can strain the user over time, so we always recommend the efficiency of an electric one, when the volume calls for it.
Shop for Spiral Coil Basics
Spiral Coil Spines | Manual Coil Machines | Electric Coil Machines | Starter Kits
Still need help with spiral coil? Browse our coil binding help center for more articles, call our expert team at 1-800-944-4573, or email us at [email protected].
Video Transcript
Welcome to MyBinding's How To video. Today's question is how to spiral bind papers. Spiral binding, as it's commonly known, is actually referred to as coil binding in the binding industry. And that is simply taking papers and a cover, a spiral shaped bind, or a coil bind, and putting them all together for a great looking presentation. As you would imagine, there are many coil binding machines and systems on the market today. We'll use the iCoil 41 by Akiles to do a demonstration step-by-step of how to bind a book with a spiral, or a coil, bind. We picked this small scale machine to use because it contains all the steps of the process of coil binding, including an electronic coil inserter. The first step is to take the covers of your project, put the side that's to be punched into the punching throat of the machine on the back side. Here's where you adjust the side margin control to set the machine so that all punches are consistent throughout your entire project. And you make your punch by pulling the lever down. Some punching machines are electronic in this feature. Next, you punch through all the sheets of your project. You'll do this in smaller batches and according to the punch capacity of the machine you're working with. Once you've punched through all your sheets, assemble your book in order. Now it's time to bind. This is where you need to choose the right size coil or spiral bind for your project. Many of the coil binding machines on the market have very useful measuring tools built into the machine so that you can decide what is the right size coil for your size project. The binding process is generally begun by hand by threading or twisting the spiral bind through the first few holes of your book. And you'll continue to thread the bind of your book with the coil either by hand, or by an electronic coil inserter. As you could imagine, this feature is pretty handy and makes things much faster. The finishing touch with coil binding is used with coil crimping pliers. With a simple squeeze, the end of the coil is snipped off and the end is twisted in for a great looking finish. And there it is, the how to of how to spiral bind papers. For more articles, how to's, demos, and reviews on all things binding, check out MyBinding.com.
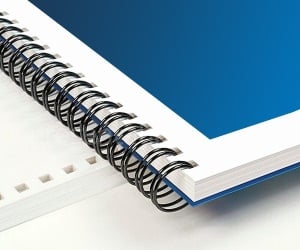
< Over the years, a number of customers have asked me whether they can use twin loop wire with their plastic comb binding machine. These customers often don’t want to have to buy a brand new machine but like the look and feel of twin loop wire binding. However, the answer to their question isn’t as simple as it seems. You see, they actually do make twin loop wire that is designed to work with the plastic comb binding hole pattern. With that said, if you want to use these wires you are going to need a way to close the wires. What is Spiral-O Wire? Let me explain a little bit more…There is a product that we carry called Spiral-O Wire. This wire has 19 loops and is designed to work with the hole pattern from a plastic comb binding machine. Spiral-O Wire is sometimes called Wire Combs or Ibico Wire and was originally designed for use with some of the older Ibico binding machines. A number of the older Ibico plastic comb binding machines also included a twin loop wire closer on the front of them to allow users to use both plastic combs and wire. This 19 loop wire was designed for this purpose. What Equipment is Needed? As the Ibico brand has been phased out by GBC and all of the older Ibico plastic binding machines have been replaced with new models, they no longer have the twin loop wire closer on the front of them. This presents a problem in trying to use these spiral-o wires since you can’t use the wires without a way to close them. One of the only options left is to purchase a Twin Loop wire closer. However, since twin loop wire closers are not incredibly cheap this option usually only appeals to users who have larger electric plastic comb binding machines. Otherwise, it is often advisable to simply buy a low end 3:1 pitch twin loop wire binding machine (the supplies are cheaper). This being said, if you have one of the older Ibico binding machines that has a wire closer included you are in luck. The Spiral-O binding supplies that we carry will work perfectly with your machine and you will be able to use both plastic combs and wire depending on your needs. These Spiral-O binding supplies are available in Black, Silver, White, Blue and Red and in sizes up to 1″ in diameter. If you aren’t sure what type of wire binding supplies that you need to work with your machine simply give us a call. Our trained sales representatives will be glad to help you find the correct supplies for use with your machine.(Read More)

Loading...


