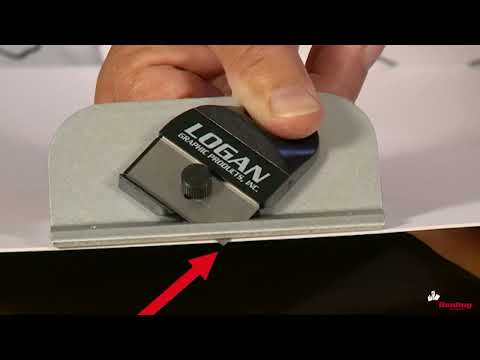
Achieve professional-quality bevel cuts with precision push-style design.
Adjustable cutting depth accommodates various mat thicknesses for versatile use.
Ergonomic handle reduces fatigue, ensuring comfort during extended cutting sessions.
Durable construction guarantees long-lasting performance for all your mat cutting projects.
SKU
PRODUCT NAME
PRICE
QUANTITY
Product Description
The Logan Push Style handheld mat cutter includes a retractable blade. The blade slot prevents blade flex, resulting in straighter cuts. A start-and-stop indicator helps to eliminate over cuts. Can upgrade for use on the Adapt-A-Rule straight edge and Compact or Simplex Series board mounted mat cutting systems. Uses Logan 270 blade.
Product Details
Push style cutter with retractable blade.
Start and stop indicator.
Fully upgradable to most Logan rail and board mounted systems.
The 2000 Push Style Bevel Cutter features a retractable blade holder and a start-and-stop indicator. To install the blade on the 2000 Push Style Bevel Cutter, first remove the blade knob and install one Logan 270 blade sharp side down onto the blade holder. Then replace the blade holding knob. To adjust the blade depth on the 2000 Push Style Bevel Cutter, find the blade depth adjustment screw on the bottom of the cutting head. Using a screwdriver, turning the screw clockwise will decrease the blade depth. Turning it counterclockwise will increase the blade depth. See that the blade depth is set so it barely passes through the mat board and only scores into the slipsheet. To bevel-cut an opening on a piece of mat board, first always use a slipsheet. You may find it easier to tape the slipsheet in position onto your work table. Using a ruler, mark out the borders on the back of the mat board and connect the lines. Mark all four borders on the back of the mat board. You may find it helpful to draw an X in the middle of the opening. This reminds you that the cutting head needs to ride on the inside of the lines. Using a suitable straight edge, align it alongside one of the four borders. Rest the bevel cutting head against the straight edge and align the start and stop indicator with the pencil line, pressing down on the straight edge and inserting the blade cut from line to line. Make sure you retract the blade after each cut.Repeat this process for all four sides, and you will have a perfectly beveled mat.