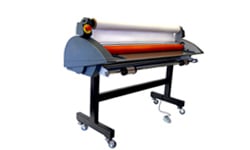
Tamerica Versalam 2700-HC 27" Hot and Cold Roll Laminator
FAQ: 0 Questions, 0 Answers
0 Q&As
Item# VERSALAM2700HC
- 27" thermal & cold roll laminator
- Compatible with film up to 10mil thick (1 or 3" core) & boards up to 1/4" thick
- Adjustable heat settings from 0°-320° F
- 60-105.6" per minute adjustable speed
ProductDescription
The Tamerica Versalam 2700-HC is a heavy-duty metal construction laminator suitable for school, office, or commercial printing use. This laminating machine performs either one or two sided lamination processes in addition to mounting. The Versalam-2700HC's heated silicone rollers and variable speed and temperature controls ensure a bubble and scratch-free result. The Versalam-2700HC is the newest addition to the Versalam series from Tamerica Products Inc.
Product Details
- Accommodates up to 10mil film thickness.
- Laminates up to 27" in width and mounts up to 1/4".
- Laminates up to 5' per minute.
- Allows for one sided and two sided laminating.
- Variable speed and temperature controls.
- Take up roller for cold lamination.
- De-curling bar.
- Back pull bar.
- On/Off Switch for bottom heat roller.
- Max OD for top film 11".
- 5 rear fans w/on and off switch.
- Auto shutoff.
- Feed tray and front shield sensors.
- Rear slitter.
- Guide plate for 8.5" x 11".
- Heavy duty all metal construction.
- Core size, both 1" and 3".
- Decurling bar included.
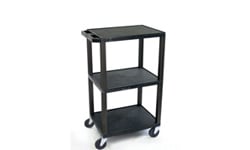
- Laminator stand included.
- UL approved.
- 1 Year Manufacturer's Warranty.
Item Specifications
- Laminator Type: Hot Roller
- Max Laminating Width: 27"
- Max Film Roll Diameter: 11"
- Max Laminating Film Thickness: 10mil
- Film Core Size: 1 or 3"
- Cooling Fans Number: 5
- Speed: 4 Feet per Minute
- Release Liner Uptake: Yes
- Adjustable Temp: Yes
- Adjustable Speed: Yes
- Reverse Switch: Yes
- Hot or Cold: Both
- Mounting: Yes
- Encapsulating: Yes
- One Sided: Yes
- Power: 60Hz 1600W 115V
- Compatible Supplies: 1" or 3" Core Roll Laminate - 1.5-10mil Thick & Up to 27" Wide
Mounting Board - Up to 1/4" Thick - Shipping Length : 51
- Shipping Width: 27
- Shipping Height: 24
- Shipping (Web) Weight: 219 lbs
- Part Number: VERSALAM-2700-HC
Demonstration Video

Tamerica VERSALAM 2700-HC - One Sided Lamination
Transcript :
We are now going to set up a one sided lamination with the 2700-HC Laminator!
First, make sure your film is properly aligned so the adhesive side is facing forward like so. Then twist the rod in. It will only twist in one direction. Align the roll with the measurements on the bar and fit it back in place. It is important to note, that for the best results of a one sided lamination project you should use nylon film. Pull some film out past the heat rollers.
Next wrap the film below the top metal bar, over the other bar and then draped it over the heat rollers.
At this point, make sure ...
We are now going to set up a one sided lamination with the 2700-HC Laminator!
First, make sure your film is properly aligned so the adhesive side is facing forward like so. Then twist the rod in. It will only twist in one direction. Align the roll with the measurements on the bar and fit it back in place. It is important to note, that for the best results of a one sided lamination project you should use nylon film. Pull some film out past the heat rollers.
Next wrap the film below the top metal bar, over the other bar and then draped it over the heat rollers.
At this point, make sure the bottom heat roller is turned off.
Turn on the control panel, push the “U” button to set the top roller heat and use the arrows to adjust it. There is a guide for what heat to use, though you’ll still have to adjust accordingly.
When you’re set temperature is ready, push the red “hot” button for it to begin warming.
Now is the time to put the heat roller in the down position.
With a thicker card, or even the provided threading diagram, push the film through the rollers—of course make sure the motor is set and hit run. At this point make sure the card gets threaded properly in the back.
It will come out under the black roller, but we want it over. So unscrew the sides and lift the roller up, then threading the card and film up and over the black roller. Run it through and screw the black roller back in place.
There are some basic instructions on the table in the front, too.
Before we start on our project, you probably will need to use the de-curling bar. You can lift it up in it’s upward position on both sides.
Now set your edge guides to help guide your projects within the film.
When you first run it, make sure to run a few feet first and watch the back. With almost all laminators, the film can easily wrap around the rollers. We don’t want that.
Now feed your projects in. Continue to watch the back, and continue with the rest of your projects.
When finished, you can cut the film with the blades attached in the back.
It may take some experimenting to get the best results with heat, and speeds, whether to use the de-curling bar, or even to bypass the black bar. Get to know your laminator. You can also turn on the fans with this bottom switch.

Basic Setup
Transcript :
Out of the box setup for the Versalam 2700-HC is very simple.
First screw in the base pieces. The two straight bars screw into the leg pieces with wheels.
Then, with the laminator placed on top, you’ll want to screw it on next to the rubber supports.
For the film roll holders, the screw are in place already. Unscrew them, then properly align the orange piece and screw it on. Screw in the other side next.
Put the blue one on the bottom like so. Then finish off the remaining one.
The film roll bar comes with the 3 inch adapters in place. If you want to remove these unscrew them wi ...
Out of the box setup for the Versalam 2700-HC is very simple.
First screw in the base pieces. The two straight bars screw into the leg pieces with wheels.
Then, with the laminator placed on top, you’ll want to screw it on next to the rubber supports.
For the film roll holders, the screw are in place already. Unscrew them, then properly align the orange piece and screw it on. Screw in the other side next.
Put the blue one on the bottom like so. Then finish off the remaining one.
The film roll bar comes with the 3 inch adapters in place. If you want to remove these unscrew them with a 5/64 inch allen/hex wrench. Then you can slide them off.
Compare to Similar Tamerica Hot & Cold Roll Laminators
| Model Name | Tamerica TCC-2700XM | Tamerica Versalam-1300 | Tamerica Versalam 2700-HC | Tamerica TCC-1200HC | Tamerica TCC1200 | Tamerica TCC1655-HC |
|---|---|---|---|---|---|---|
| Model |  |
 |
 |
 |
 |
 |
| Lamination Thickness | 1.5 - 10 mil | 1.5 - 10 mil | 1.5 - 10 mil | 1.5 - 10 mil | 1.5 - 10 mil | 1.5 - 10 mil |
| Lamination Speed | 8.8 fpm | 8.8 fpm | 4 fpm | 13 fpm | 4 fpm | 4 fpm |
| Laminating Width | 27" | 13" | 27" | 45" | 45" | 65" |
| Warm Up Time | N/A | N/A | N/A | N/A | N/A | 25min |
| Heating System | 1-Side and 2-Side laminating | 1-Side and 2-Side laminating | 1-Side and 2-Side laminating | N/A | 1-Side and 2-Side laminating | Heated Rollers |
| Speed Control | Yes | Yes | Yes | N/A | Yes | Yes |
| Temperature Control | Yes | Yes | Yes | Yes | Yes | Yes |
| Roller Adjustment | Yes | Yes | Yes | Yes | Yes | Yes |
| Mounting Capability | up to 1/4" | up to 1/4" | up to 1/4" | up to 1/2" | up to 1/2" | up to 1/2" |
| Reverse Function | Yes | Yes | Yes | Yes | Yes | Yes |
| Core Size | 1" | 1" and 3" | 1" and 3" | 1” - 2.25” and 3” | 1" and 3" | 1” - 2.25” and 3” |
| Dimensions | 48" x 19" x 18" | 34" x 24" x 18" | 51" x 27" x 24" | 62" x 45" x 27" | 66" x 27" x 52" | 83" x 27" x 34" |
| Power Consumption | 115V/60Hz/1600W | 115V/60Hz/1600W | 115V/60Hz/1600W | 220V/50Hz/3000W | 220V/50Hz/3000W | 220V/50Hz/3000W |
| Warranty | 1 Year Manufacturer's Warranty | 1 Year Manufacturer's Warranty | 1 Year Manufacturer's Warranty | 1 Year Manufacturer's Warranty | 1 Year Manufacturer's Warranty | 1 Year Manufacturer's Warranty |


