-
Model NameModelHeat / ColdLaminating WidthMaximum Speed (feet/minute)Speed ControlMaximum TemperatureHeating MethodMounting GapPressure/Gap AdjustmentPressure/Gap MechanismRoller DiameterMain RollersSupply ShaftTension AdjustmentFilm Tension SensorDigital MicrocontrollerColor Graphic DisplayTouchscreen InterfaceOperating TutorialsRoll Label PrinterWeb ClutchMotorized Liner & RewindRoll to Roll CapableRear RewindInline SlittingFront UnwindFoot PedalOptical Safety EyesStandSwing Up Feed TablePower SupplyPower ConsumptionWarranty PartsWarranty LaborInstallation & TrainingNet Weight (lbs.)DimensionsSafety Approval
-
865DH-4RS
 Dual Heat65"13Variable266° FQuartz Tube1"InfiniteDual Hand Wheel5"SiliconeSwing Out with 3" Quick GripSingle KnobN/AN/AN/AN/AN/AN/A✔✔✔✔✔2✔✔✔✔240v 24A5760W1 year1 yearIncluded84687 x 34 x 49"cTUVus
 -
663TH
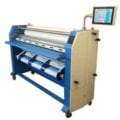 Top Heat Assist63"20Variable140° FMetal Alloy1"InfiniteElectric5"SiliconeSwing Out with 3" Quick GripSingle Knob✔✔✔✔✔✔N/A✔✔✔✔✔✔✔✔✔120v 12A1440W1 year1 yearOptional67583 x 31 x 63"cTUVus
 -
563TH-4RS
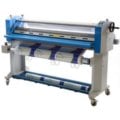 Top Heat Assist63"20Variable140° FMetal Alloy1"InfiniteHand Wheel4.5"SiliconeSwing Out with 3" Quick GripSingle KnobN/AN/AN/AN/AN/AN/AN/A✔✔✔✔✔✔✔✔✔110v 12A1320W1 year1 yearOptional49187 x 26.5 x 52.5"cTUVus
 -
363-TH
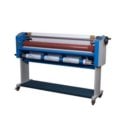 Top Heat Assist63"20Variable140° FMetal Alloy1"InfiniteHand Wheel5"Rubber3" Quick GripSingle KnobN/AN/AN/AN/AN/AN/AN/AChain Link✔✔N/A✔✔✔✔✔120v 12a1440W1 year1 yearOptional37680 x 23 x 48"cTUVus
 -
355-TH
 Top Heat Assist55"20Variable140° FMetal Alloy1"InfiniteHand Wheel5"Rubber3" Quick GripSingle KnobN/AN/AN/AN/AN/AN/AN/AChain Link✔✔N/A✔✔✔✔✔120v 11a1320W1 year1 yearOptional32172" x 23" x 48"cTUVus
 -
263-C
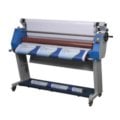 Cold63"13VariableN/AN/A1"InfiniteHand Wheel4.5"Rubber3" Quick GripSingle KnobN/AN/AN/AN/AN/AN/AN/AChain LinkN/AN/AN/A✔✔✔✔Fixed110v 0.4A44W1 year1 yearOptional32280" x 24" x 55"cTUVus
 -
255-C
 Cold55"13VariableN/AN/A1"InfiniteHand Wheel4.5"Rubber3" Quick GripSingle KnobN/AN/AN/AN/AN/AN/AN/AChain LinkN/AN/AN/A✔✔✔✔Fixed110v 0.4A44W1 year1 yearOptional25773 x 24 x 55"cTUVus
 -
230-C
 Cold30"11.5VariableN/AN/A1/2"InfiniteHand Wheel2.5"Silicone1" Shaft / AdaptorsDual brakesN/AN/AN/AN/AN/AN/AN/A✔N/AN/AN/A✔✔✔✔✔110v 0.3A33W1 year1 yearOptional11743 x 17 x 42"cTUVus
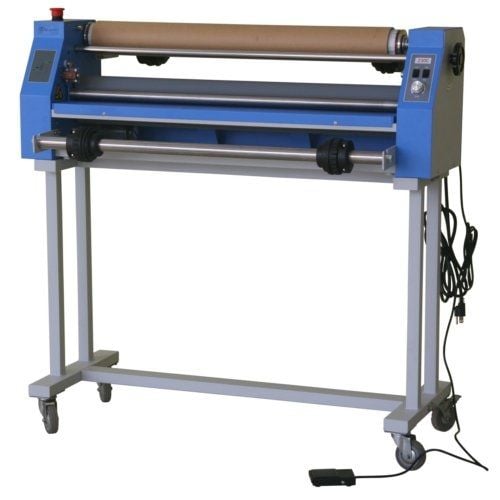
GFP 230C 30" Cold Roll Laminator
FAQ: 0 Questions, 0 Answers
0 Q&As
Item# 230-C
- 30" cold roll laminator
- Compatible with film up to 10mil thick (3" core) & boards up to 1/2" thick
- Requires no electricity & is safe for heat-sensitive prints
- Up to 138" per minute adjustable speed
Product Name
Item Number
Price
Qty
ProductDescription
The GFP 230C is a 30" compact cold laminator that delivers consistently professional results, making it ideal for photo studios, copy shops and graphic designers. This versatile laminator can laminate, mount and pre-mask tape. It has a laminating width of up to 30" at a speed of up to 11.5 feet per minute. Its intuitive controls made this laminator user-friendly. The 230C needs only 5 square feet of space and fits easily in your office. When not in use, just simply roll it away. This GFP 230C 30" Cold Roll Laminator is the perfect complement to the latest wide format inkjet printers.
Product Details
- Can mount, laminate, pre-mask tape
- Simple to operate: forward/reverse, run/foot and variable speed.
- Designed for small operations
- Intuitive controls
- Rugged, reliable, feature-rich
- Fits easily in your office. Uses less than 5 square feet
- Quick and easy set-up.
- Infinite hand wheel adjustment.
- 2.5" diameter rollers.
- Stand and Foot Switch included
- Applications: Banners, Posters, POP Displays, Photographs, Architectural Designs, Maps, Presentations, Vinyl Lettering Pre-mask.
Item Specifications
- Laminating Width: 30"
- Roller Diameter: 2.5"
- Maximum Speed (feet/minute): 11.5 ft/min
- Main rollers: Silicone
- Roller Gap: 1/2"
- Pressure/Gap Adjustment: Infinite
- Pressure/Gap Mechanism: Hand Wheel
- Unwinds: Top/Bottom
- Liner Rewind: Direct Drive
- Supply Shaft: 1" Shaft/Adaptors
- Tension adjustment: Dual Brakes
- Power Supply: 110v 0.3A
- Power Consumption: 33W
- Foot Pedal: Included
- Stand with casters: Included
- Compatible Supplies: 3" Core Pressure Sensitive Roll Film - 1.5-10mil Thick & 30" Wide
Mounting Board - Up to 1/2" Thick - Compatible Accessories: Dust Cover for GFP 230C Laminator
- Net Weight w/ stand: 117 lbs.
- Dimensions: 43" x 16.5" x 42"
- Shipping Dimensions: 161 lbs. 48.5" x 21" x 23"
- Manufacturer's Warranty: One Year Parts & Labor
Demonstration Video

Gfp 230C - Tutorial
Transcript :
Today, we're going to look at the GFP 230C. You can notice that the control panel is very easy to use; it's very intuitive, very simple. We have run switch, foot pedal switch, forward, reverse, and a speed dial. The feed table has an interlock on it that holds it in place during running. To release that, press the red button, flip the table up. This helps you load the machine easier and thread. Here we have the bottom supply shaft, and you can put mount adhesive on here: craft paper or adhesive-back vinyl. You'll notice that it has two adjustable core adapters on the shaft itself with brake pa ...
Today, we're going to look at the GFP 230C. You can notice that the control panel is very easy to use; it's very intuitive, very simple. We have run switch, foot pedal switch, forward, reverse, and a speed dial. The feed table has an interlock on it that holds it in place during running. To release that, press the red button, flip the table up. This helps you load the machine easier and thread. Here we have the bottom supply shaft, and you can put mount adhesive on here: craft paper or adhesive-back vinyl. You'll notice that it has two adjustable core adapters on the shaft itself with brake pads. So what you'll do is you'll put your film on and line it up centered to your machine, tighten down the bolts on both sides, and then you can start running it through and make your brake adjustments as you're running. Also on the feed table, we have a safety feature with this hold-down bar that will allow you to run 3/16 of an inch boards through here without actually getting close to the rollers. If you need to go to something thicker than 3/16 of an inch, say a quarter inch or a little above, you can remove the screws on both sides and raise that bar up, and then put it in these holes. That'll allow you to go closer to a half-inch board. On the left side cover, you'll notice an emergency stop switch. To activate, press down; to release, you spin and let it pop up all by itself, and that will reactivate the motor. Down here, we have our toolkit where we can keep our film cutter and our wrench for adjusting the core adapters. Around the backside, we have the upper supply shaft with two air core adapters for our film, and we'll move these wherever we need them. We'd like to keep the product centered to the machine as much as possible. Once you're centered, you will tighten the cork shaft or core adapter in place by using the supplied Allen wrench. Also on the backside is the rewind assembly, and this has a shaft with a cardboard tube on it. To remove, we push this over, and that allows it to release from the other side. And you'll notice that there's a core clip in the center of this. That's what bites into the inside of that cardboard tube and prevents it from spinning on the shaft. On this side, we have the main fuse; we have the power cord, which is 110 volts, and then the main switch will illuminate when in the on position. Next to that, we have the receptacle for the foot pedal that just ties in, and by pressing that activates the motor. On this side of the machine, we have the hand grip for raising and lowering that top roller. By turning it clockwise, we're lowering the roller; turning it counterclockwise or raising the lower. Note you do not want to over-tighten this top roller because if you do, you're going to introduce rivers and wrinkles in your finished product.

230C Installation & Assembly Video
Transcript :
"GFP 230C Cold Roll Laaminator
Installation & Assembly
Required Tools:
#2 Philipps Screwdriver (or electric with #2 Phillips bit)
Metric Allen Wrenches (supplied in a crate)
Adjustable Wrench or pliars
Knife
GF0 230C Laminator
Inspecting the crate for damage.
Inspect the crate for any physical damage. Bring any damage to the immediate attention of the carrier.
Opening the crate. Remove the screws from the bottom of the crate. Inspect the contents of the crate. Lay out the stand components and hardware. Note the position of the stand legs, indent to the inside. Install the cross m ...
"GFP 230C Cold Roll Laaminator
Installation & Assembly
Required Tools:
#2 Philipps Screwdriver (or electric with #2 Phillips bit)
Metric Allen Wrenches (supplied in a crate)
Adjustable Wrench or pliars
Knife
GF0 230C Laminator
Inspecting the crate for damage.
Inspect the crate for any physical damage. Bring any damage to the immediate attention of the carrier.
Opening the crate. Remove the screws from the bottom of the crate. Inspect the contents of the crate. Lay out the stand components and hardware. Note the position of the stand legs, indent to the inside. Install the cross members using the associated bolts. Note: always place lock washer against bolt head or screw. Do not tight the bolts until all have been installed. Tighten bolts with provided Allen wrench.
Placing the machine on the stand. Remove the 4 nuts securing the machine to the skid. Identify the lifting points and positing holes. Use 2 people to lift the unit and place on the stand. The machine's front must be on same side as locking casters. Remove the crate bolts. Unlatch the feed table and remove the packing screws. Swing the table up to access the rollers. Remove all packing foam.
Installing the Upper and Lower Unwind Brackets
Installing the Foot Pedal and Utility Basket
Install the Foot Pedal Cord and Utility Basket
"

Gfp Applications - PSA Overlaminate on Printed Vinyl using the Gfp 220C or 230C Laminators
Transcript :
"So now we're going to do a single side lamination with a cold laminate here onto a roll of printed media that we print on vinyl here. We're going to start by loading up our film onto our back supply shaft or rear supply shaft by opening our cradles, removing the shaft, coming over to our film, simply putting the shaft into the roll laminating film, twisting, and putting the shaft back into the cradles. Now, we're just going to close up our cradles, and we can align this with our ruler that's on our shaft. We got an 18-inch roll here, so we're going to just put it between the nines and leave t ...
"So now we're going to do a single side lamination with a cold laminate here onto a roll of printed media that we print on vinyl here. We're going to start by loading up our film onto our back supply shaft or rear supply shaft by opening our cradles, removing the shaft, coming over to our film, simply putting the shaft into the roll laminating film, twisting, and putting the shaft back into the cradles. Now, we're just going to close up our cradles, and we can align this with our ruler that's on our shaft. We got an 18-inch roll here, so we're going to just put it between the nines and leave that be.
Now, we're going to come to our media. So, we're going to remove our lower supply shaft and do practically the same thing. We're going to remove the shaft, put our roll of vinyl, come through, and then into the cradles, close our cradles, and center our roll. Another way to web it up, another method I'm going to start the same way. We got to get our film to the release liner take-up to get our release liner off. I'm going to pull the tape, pull back and spin back up, and then we're going to take our film again and go under our take-up KN around the front hand Wheel bar and spin our take-up and get our film across here.
We're going to take our knife, our blade, being safe and be around the rollers and just score our film. We're going to separate our film. What we're going to do is we're going to bring it down to the front of the roller, the top roller, kind of just tuck it for a second, then going to lift our table and then just bring it down past the bottom roller about a couple of inches past the bottom roller and just let it hang close my table. Then I'm going to grab my leader board and I'm just going to push that into the rollers and just run that a few inches till I have a little bit here left. And what I'm going to do is I'm going to take some tape, some heavier tape, and just take a piece of that and stick that for a second here.
I'm going to bring my roll of prints and just pull up and I'm going to stick it to the lead edge of the board and tape it down good and just make sure. Now that I got it in place, I'll take a second piece of tape just to be safe and then run it. What will happen is once we're through the board, the roller will stop, the machine will stop, and we just come down and just close our roller until we hit that stop point and then a little bit more, a 12th of a turn, watch our liner here. We're going to slow down our take-up and just let it run, and we're good to go."
More Support Videos
Gfp 220C/230C Applications - Mounting To A Substrate
Transcript:
We're going to pre-coat a board on our 230C laminator, which you can also do this process on the new 220C laminator. The process is the same on there. We're going to start by taking our roll of adhesive here and getting it onto the machine. So, I'm going to remove my top supply shaft and slide that shaft to the adhesive roll and center that up and back on my machine, and close my cradles by the groove on the cradle. Then, I can look at my ruler; it's a 25-inch roll we got, so I'll put it at 12 and 1/2 and 12 and 1/2 to center it. Now, since we're doing a roll of adhesive and we're not using a film with a release liner we're taking off, we can remove just to make it easier. We can remove our release liner take-up if we want and set that aside for now...
Read More
We're going to pre-coat a board on our 230C laminator, which you can also do this process on the new 220C laminator. The process is the same on there. We're going to start by taking our roll of adhesive here and getting it onto the machine. So, I'm going to remove my top supply shaft and slide that shaft to the adhesive roll and center that up and back on my machine, and close my cradles by the groove on the cradle. Then, I can look at my ruler; it's a 25-inch roll we got, so I'll put it at 12 and 1/2 and 12 and 1/2 to center it. Now, since we're doing a roll of adhesive and we're not using a film with a release liner we're taking off, we can remove just to make it easier. We can remove our release liner take-up if we want and set that aside for now. The next thing I want to do, okay, we're back at our front of the machine. We got a roll of adhesive on the top supply shaft. So now, I got to set my roller pressure for my board. So, I'm going to take a piece that I'm using as a leader board that's the same thickness as our main board that we're going to pre-coat. So, I just want to make sure I never want to use something a different thickness because I want to get the roller set right. So, I'm going to slide it in between my rollers, and what I'm going to do is I'm going to give it a little wiggle, and as I'm doing that, I'm going to bring my roller pressure dial down, my pressure dial, until my board gets caught and I can't move it anymore here. And then, once I get that, we know we have the right pressure. It's foam board and stuff like foam board chloroplast. I don't want to overpressure because I don't want to crush it. If it's a more rigid substrate maybe I can add a little extra hour on the clock as he said on the dial as it's not going to affect the actual thickness of the substrate. I'll put it in reverse to back it out to get it out of here because I can't remove I change my dial here to get it out. I can't open it up and pull it out because I'm going to lose all the work I just did. So, I'll just back it out. You can run it forward and go out the back if you want if that's easier. Once I get it out of here, I'm going to bring flip it back to forward, making sure I do that because if I don't, we're going to have to run it forward to get through reverse won't work for us when we pre-coat. So, I'm going to bring my adhesive down next, and I'm just going to bring it down in the front of the roller and kind of try to tuck it behind this bar or hand wheel bar. And then, I'm going to unlock my safety unlock and lift my table. And then, once I do that, I'm going to bring my adhesive back down, and I'm going to take my leader board and just kind of press it in between the rollers like that and then step on my pedal and run that through. And I'm going to run that through far enough up to the roller so I can bring my table back down like that. So now, what I want to see now is my adhesive to be tight to that roll as we see there. If it's not tight, take another scrap little small board maybe and run it through it in there and just try to get that out because we don't want any tunneling once we run our good board. But I'm ready to run our good board, so I'm going to pretty bud it up against my leader board, and I'm going to hit the run, and I'm just going to follow that in. I might adjust my speed; I'm on run. You can use the foot pedal if you want to control; either way, it's going to work fine on here. And then, my finished board, if we had multiple ones, we would just bud it up against the next one and just follow it in, or I have the ability to take a saw, so if I'm just doing say one board on my last board, I can file this one in with another leader type board just so I can cut it out of the back like this and just enough so I can get this out and then I'll stop it.


