Self-sealing design allows for quick and easy lamination without the need for a machine.
Perfectly sized for standard letter documents (8.5" x 11") and photos, ensuring versatility.
Durable 3mil thickness provides reliable protection against everyday wear and tear.
Crystal clear gloss finish enhances the appearance of your documents, making them look professional.
SKU
PRODUCT NAME
PRICE
QUANTITY
Product Description
Now you can keep important projects looking good, even when you're on the go. These standard-size sheets are ideal for quick projects, such as schedules, phone lists and other office documents. GBC SelfSeal Laminating Sheets are perfect if you either don't have a laminator or need to laminate items away from the office. They are perfect for use with heat sensitive materials, inks and photos. No machine is required. Just peel and seal.
Specifications
Size: Letter Size Sheets
Dimensions: 9" x 12"
Thickness (Gauge): 3mil
Quantity: 10 Pieces
GBC Part Number: 3747308
Primary UPC: 033816050563
Please note. These are Laminating Sheets and Not Laminating Pouches.
Video
How To Use GBC Self Seal Laminating Sheets Demo Video
Transcript :
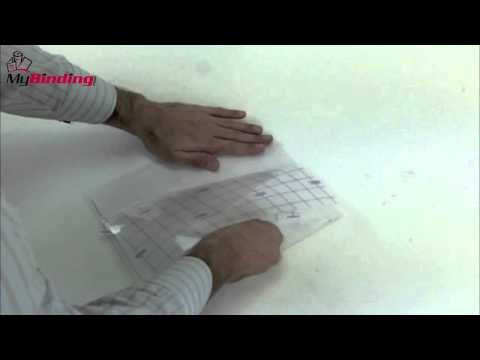
Welcome to MyBinding How To videos. Today's question is how to use GBC Self-Seal Laminating Sheets. Laminating materials with self-laminating sheets is much easier than it initially seems. There are three basic steps printed right here on the cover. Let's walk you through them. Once you've selected the right size self-laminating pouch for your project, place your project face down on the clear side. Close the pouch and look through the transparent grid on the project below. Make sure that everything lines up just the way that you want it to be. Flip open the pouch again and locate the small 1/8 inch strip that's located right at the crease. Gently pull it out. This will be used to hold down your project in place when you go to do the rest of the laminating process. With your paper anchored, make sure once again everything is lined up the way you want, crease that down. Open the sheet back up again and pull from the corner on the inside all the way across the paper, releasing that back. Give yourself a little bit of a start as you pull down, close the lid, the cover, and pull. It's best to pull from the corner and work your way out. Pull it out slow and steady, assuring there are no bubbles as you pull it. Flatten from the crease edge out, assuring there are no bubbles in your finished product. And there it is. It's that'simple, really. Some self-laminating sheets, such as these by GBC, can be edited after you finish your project. Turn your project faced down and pull back the sticky side that you just put down all the way up, or as far as you need. Make adjustments to your paper however you need and close it right back up. You can do this for 24 hours after your initial seal. Many different sizes of self-laminating sheets are made, good for photos, good for ID badges, business cards, or anything that you might need. There's no waste, size is perfect for your projects. And that's it, that is how to use GBC Self-Seal Laminating Sheets. For more articles, how to's, demos, and reviews, check out MyBinding.com.