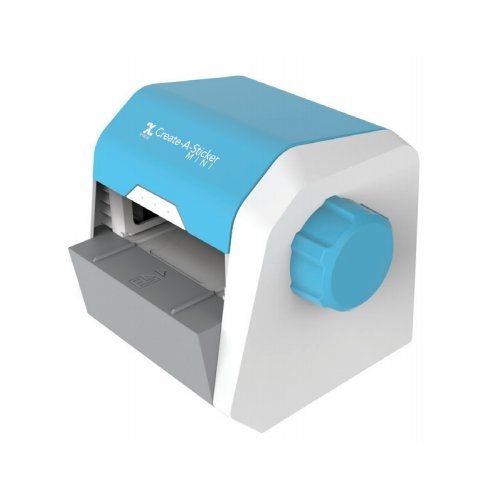
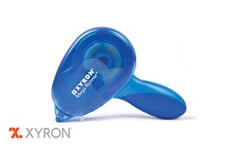
Xyron Create-A-Sticker Mini (Model 250) with Cartridge - XRN250-CFTEN
- 0
- 1
Product Description
Product Details
- Simply place item on the feed tray, turn knob, tear and peel sticker. It's that easy.
- Apply adhesive edge-to-edge for a strong hold.
- No messy glue to clean up.
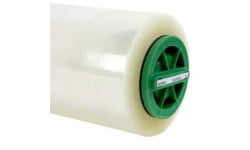
- Comes with 20' acid-free permanent adhesive cartridge
- Other cartridges sold separately.
Item Specifications
- Product Code: XRN250-CFTENX
- Dimensions: 6.535" x 5.709" x 5.906"
- Material Width: 2.5in. (6.4cm)
- Material Length: 20ft (6.09 m)
- Manufacturer's Warranty: 1 Year Manufacturer's Warranty
Demonstration Video
Welcome to MyBinding video. Lets take a look at the Xyron Create-A-Sticker Model 250, makes permanent and temporary stickers up to two-and-a-half inches wide. Let me demonstrate by taking this name I cut off a letterhead and turning it into a sticker. Simply slide it face up into the machine and roll it until it pops out the back end, and you trim it along the cutting edge of the machine or you use scissors to trim it. With that all done, simply peel it away from the paper as you would any sticker and it will adhere to most every service. The Xyron 250 Create-A-Sticker comes with a 20 foot long cartridge and as you can see here it is very simple to remove and replace with a new one. You’re on your way to making a great many stickers with the Xyron Create-A-Sticker. For more demos, reviews, and how-tos, check out MyBinding.com.
This is also great for kids because it’s fun to crank the handle, the colors are cute, they can do projects quickly, no mess, no fuzz, love it. It also works like we said on chipboard letters. It takes anything up to the thickness of a nickel, so you can run, if you have large buttons, you’ve got real thick ribbon you’re trying to run through, this is this is the perfect machine for it. Again, no rubbing, you can go quickly, and you can also feed your letters and numbers in one at a time or in multiple if you’re trying to spell out your name Helen. You can feed in the H, crank until you see it go through the rollers, feed in the E, so that you all get them in one fell swoop.
The other thing I like about this is it’s great for crops or class projects. If you’re working on something and can’t stick it down right away, you run it through and then you can carry it around in your tope on the adhesive backing and it’s going to be perfect, and well cared for. Now this is one of the things I love most about this project and about this machine. What we’ve done is we’ve taken a 1 ½ inch square run it through so that it’s adhesive on the back, and I’m going to cut this out, with my great and straight fantastically even line. Then we’re going to run it back through the machine but you’re going to put the side with the backing face up. So what we’re doing is putting adhesive on both sides. So we’re going to run that through, and then take everybody’s crafting product: glitter! And you’re going to peel the top part off set it down on your paper, give it a good shake, tap it off, and now you’ve got an adhesive glittered embellishment. This is also great for flocking, anything that you’d like, a tiny beading, anything that you’d like to attach to the top. Sparkling embellishments are huge, and so this is a great way to do it inexpensively at home. you could do this on chipboard letters, we could have done this on the boarder, it’s just a great fun way to add that special touch to your projects.
This also just like any other Xyron Adhesive Machine is very easy to refill, you pop off the top, pick it up, add your other refill, put it back in, and close the lid. And you’re ready to go. Xyron has also recently made changes to their packaging so that when you’re in the store and you’re looking at the boxes, even though they’re similar they have these colored dots, you can see which are permanent and which are repositionable which is nice because you have different needs for different projects. You might need one for card making and one for your home décor items. The other great thing about Xyron products is it’s great to have both on hand and you don’t have to use all of one before you use the other. You can pop them out, set them aside on your desk, and interchange them as you wish, whatever makes it. You can be more crafty. For more information about the Xyron 2 ½ inch create-a-sticker, go to xyron.com/projects.
Jessica Barnett: Thank you.
Beth Kingston: Show us what we are going to be doing today.
Jessica Barnett: We are going to start off running through some ribbons and we'll take some ribbons and go ahead and run them through the Xyron 250.
Beth Kingston: Yes, let's run them through the machine. This is the 2.5 inch Sticker Maker and the way this w ... Read More
Jessica Barnett: Thank you.
Beth Kingston: Show us what we are going to be doing today.
Jessica Barnett: We are going to start off running through some ribbons and we'll take some ribbons and go ahead and run them through the Xyron 250.
Beth Kingston: Yes, let's run them through the machine. This is the 2.5 inch Sticker Maker and the way this works is you stick the item that you are going to be using; it takes anything up to the thickness of a nickel. Today, we are going to be using ribbon. You put it into the feed tray and then you roll the knob away from you; except toward you because I'm doing it backwards. We are going to roll it right through the machine and this is going to make an adhesive on the back. All the way through until you get to the end and there are some little plastic teeth on the back and you know that's when you reached the end of your ribbon.
Then we are going to give it a tear and you can run your ribbon if you have small pieces, you can run two at a time. You can also use the 5 inch or 9 inch if you want to do a whole bunch of ribbon at the same time. You can feed it through all together. We've already pre-done some because we're such smart girls and this is what we are going to put on our lamp shade today.
Jessica Barnett: I'm going to show you how to make this lamp shade right here. So, I started on the back on the seams so that it hides it.
Beth Kingston: Smart.
Jessica Barnett: Pick up the ribbon we just ran through. Peel off there. Beth Kingston: I also love that you can choose different widths of ribbon or decorative ones, a little gingham. I mean, it's perfect for a child's room, dining room, office, the possibilities are endless.
Jessica Barnett: And I just randomly chose the ribbons, I didn't put any specific pattern, but if it's easier for you to do it that way, you can certainly choose a specific pattern to follow.
Beth Kingston: And when you're working with dried lampshade, obviously this is smaller at the top and larger at the bottom. If you were working with barrel lampshade, you can also go around and around.
Jessica Barnett: Yes and have a little bit more modern look to it. Beth Kingston: And in addition to finding the ribbon anywhere, you can also really use any lampshade. This one that has rivets in it, it doesn't matter, you cover it up, it will look fantastic. I mean, people do love the lime green lampshades, but you can use this again in any room because you can convert whatever.
Jessica Barnett: And when the light shines through, you'll notice the pattern anyway.
Beth Kingston: Oh, well that's clever too. Very good. And so, the more you put this on, obviously when it's shorter on the top and wider on the bottom, it's going to go diagonally around the lampshade.
Jessica Barnett: Right. We are getting to the point now where we are starting to have these at an angle.
Beth Kingston: And I love the look of that because this one that you've done all the way around. I love the way that it goes diagonally. It just adds more texture and...
Jessica Barnett: Mm-hmm. And when you get to that point when they start to overlap, I did one side and then the other so that it has more of a woven look. Otherwise one whole side will lay over the other side.
Beth Kingston: Oh, so clever! You're such a clever girl! But we are going to stay here and decorate lamps all day. Thanks for joining us for Xyron's Inspiration in Motion and we'll see you next time.
Staff Review
Xyron Create-A-Sticker Model 250 Review
Small laminators are becoming increasingly popular for use in craft applications. Some of the best ones are designed by Xyron and make up their Create-A-Sticker line. The 250 represents Xyron's medium size sticker maker and is an excellent tool for many uses. Here are the details of the 250.
-
The Xyron 250 is capable of converting any flat object into a sticker. It accepts items as wide as two inches and as long as needed. The machine comes with a cartridge loaded with 20 feet of acid free, non-toxic permanent adhesive tape as well as an idea book. The acid free adhesive means that your items won't yellow with age or become damaged by the glue. Refill cartridges are relatively inexpensive and can have either permanent or repositionable options. However, you may find that you don't need a refill all that often; 20 feet lasts for a while when you're only using a few inches at a time.
-
The compact design of this device allows it to stay in a scrapbooking tote or desk drawer. It's lightweight and portable, making it easy to take with you to a scrapbooking party or other crafting event.
-
It's so simple to use, the box declares it safe for children as young as five. All you have to do is insert the item, turn the handle to send it through, then trim the laminate and voila! You have your very own customized sticker. And since it doesn't require heat or electricity, you don't have to find a place to plug it in or wait for it to warm up.
-
The uses for this device are endless. Scrapbookers love to create self-adhesive lettering and die cuts. Add glitter to chipboard letters or other accent pieces by putting them through the machine upside down; you can rerun them to add glue to the backside for attachment. Ribbons are another popular item for use with this machine. Making ribbon into a sticker often allows it to attach better than using special ribbon glue. Card makers can send through any paper they need as well as cardstock, vellum, and felt. You can even use this machine with thin buttons.
-
There are a few additional tools you may want to purchase in tandem with this item. First, a rub-on tool is useful to ensure the adhesive is firmly attached before removing the backing. And second, you will want an adhesive eraser. Excess glue can collect on the edges; an eraser will gently wipe this away without damaging delicate items.
Clearly the Xyron Create-A-Sticker 250 is a great tool for any craft purposes. No more messy glue to deal with, simply turn your small items into a sticker for easy application. And since you can find this machine for under $30, the convenience is definitely worth the cost. Scrapbookers, card makers, and creative kids will all appreciate the fun they can have with this device. We would definitely recommend the Xyron 250 as an excellent addition to any home.


