MyBinding Knowledge Base
- Binding (248 Article)
- General Binding (42)
- Plastic Comb Binding (57)
- Fastback Binding (59)
- Perfect Binding (2)
- Modular Punching (8)
- Zipbind (3)
- Twin Loop Wire (13)
- Coil Binding (22)
- Thermal Binding (14)
- Strip Binding (1)
- VeloBind (4)
- Binding Covers (14)
- Proclick Binding (10)
- SureBind (4)
- Screw Post (2)
- Hole Punches (2)
- Staplers (4)
- Komtrak Insprial Binding (2)
- Paper (1)
- Rhin-O-Tuff (5)
- Binding Machines Comparison (17)
- Laminating (109 Article)
- General Laminating (26)
- Roll Lamination (16)
- Pouch Lamination (36)
- Pouch Board Laminator (3)
- School Laminator (3)
- Foil Laminating (3)
- Royal Sovereign Laminators (10)
- Laminators Comparison (3)
- Boards (11 Article)
- Bulletin Boards (3)
- Whiteboards (5)
- Chalkboards (1)
- Paper Shredders (44 Article)
- General Shredding (35)
- Industrial Shredders (1)
- Cross-Cut Shredders (2)
- Cardboard Shredders (1)
- Multimedia Shredders (1)
- Personal Shredders (1)
- High Security Shredders (2)
- Ring Binders (9 Article)
- Specialty Binders (2)
- Reinforced Paper (1)
- Health Care Punched Paper (1)
- Perforated Paper (2)
- View Binders (1)
- Index Tabs (9 Article)
- Index Tab Dividers (2)
- Copier Tabs (4)
- Pocket Folders (1)
- Custom Index Tabs (1)
- Pre-Printed Index Tabs (1)
- Paper Handling (37 Article)
- Paper Folders (9)
- Paper Joggers (2)
- Guillotine Cutters (4)
- Rotary Trimmer (3)
- Electronic Paper Cutters (1)
- Corner Rounders (2)
- Paper Scoring (2)
- Paper Drill (2)
- Booklet Makers (3)
- Stack Cutters (1)
- Paper Handling Equipment Comparison (5)
- ID Accessories (12 Article)
- Badge Holder (1)
- Lanyards (8)
- Badge Reels (1)
receive
$5off
*On order $25 or more.
How do I bind a document using zipbind?
Hundreds of thousands of companies across the country have a plastic comb binding machine sitting in their offices. However, many companies have decided that plastic comb binding does not present the professional image that they are looking for. Over the years, plastic comb binding has become more and more common and the look and feel that it represents has become less desirable for professional presentations and proposals. If you do have a plastic comb binding machine and are looking for an alternative to traditional plastic comb binding you might want to consider GBC Zipbind. The Zipbind uses the same hole pattern as plastic binding combs but offers a reclosable solution with a completely new look and feel. This article is designed to provide a simple set of instructions for binding documents using Zipbind. Here are five steps for binding documents with Zipbind binding spines:
- The first step for binding documents using Zipbind is to assemble your document. After printing the pages for your document, you need to assemble the document along with the binding covers and any index dividers or inserts that you want to add to the document.
- After you have assembled your document, you can choose the size of Zipbind spine that is most appropriate for your document. Currently there are only two sizes of Zipbind binding spines available. Small (3/8”) and Medium (1/2”). Depending on the thickness of your document, you will need to round up to the size slightly larger than your document. It is also important to note that zipbind binding spines are only available in 11” lengths so they are not a good option for binding half size documents or documents with longer binding edges.
- After you have selected the appropriate size of Zipbind binding spine, you will need to select the color for your spines. As of right now, there are two colors available for Zipbind binding: black and frost.
- After preparing your document and selecting the size and color of the Zipbind spine, you can finally start the binding process. You are ready to punch the pages. Depending on the binding machine that you are using, punching your document will work differently. Most manual binding machines involve inserting small stacks of paper into the punching slot and pulling the handle to punch the holes. If you have an electric comb binding machine, you will either press the button or use the foot pedal to punch the document.
- After your document is punched, you will need to take the Zipbind spine that you have chosen and prepare it for binding your document. In order to make the binding process go easier, you will want to crease your spine slightly so that it will close more easily. You will then want to take the spine and insert it through the holes of your document. The easiest way to do this tends to be to hold the document with one hand and use the other hand to string the Zipbind spine through the holes. If you have a hard time inserting the pages onto the spine this way, each box of zipbind comes with a special tool that will set on your comb opener. This provides a place to hang your Zipbind spines while you insert the pages onto the spine.
- Once the spine has been threaded through the holes of the document, you will need to snap the first few loops shut manually using your hand. After you have snapped the first few loops shut, you can use the Zipbind zipper tool (one is included in every box of Zipbind strips) to zip the rest of the spine shut.
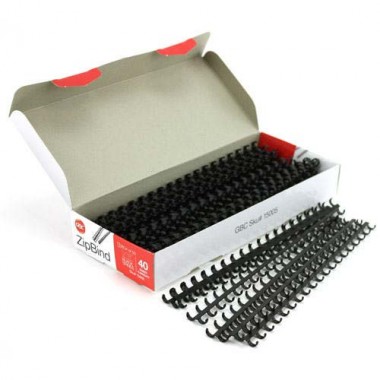
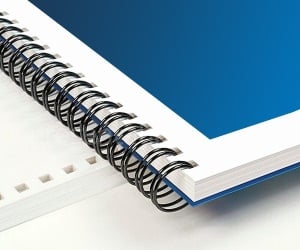
< Over the years, a number of customers have asked me whether they can use twin loop wire with their plastic comb binding machine. These customers often don’t want to have to buy a brand new machine but like the look and feel of twin loop wire binding. However, the answer to their question isn’t as simple as it seems. You see, they actually do make twin loop wire that is designed to work with the plastic comb binding hole pattern. With that said, if you want to use these wires you are going to need a way to close the wires. What is Spiral-O Wire? Let me explain a little bit more…There is a product that we carry called Spiral-O Wire. This wire has 19 loops and is designed to work with the hole pattern from a plastic comb binding machine. Spiral-O Wire is sometimes called Wire Combs or Ibico Wire and was originally designed for use with some of the older Ibico binding machines. A number of the older Ibico plastic comb binding machines also included a twin loop wire closer on the front of them to allow users to use both plastic combs and wire. This 19 loop wire was designed for this purpose. What Equipment is Needed? As the Ibico brand has been phased out by GBC and all of the older Ibico plastic binding machines have been replaced with new models, they no longer have the twin loop wire closer on the front of them. This presents a problem in trying to use these spiral-o wires since you can’t use the wires without a way to close them. One of the only options left is to purchase a Twin Loop wire closer. However, since twin loop wire closers are not incredibly cheap this option usually only appeals to users who have larger electric plastic comb binding machines. Otherwise, it is often advisable to simply buy a low end 3:1 pitch twin loop wire binding machine (the supplies are cheaper). This being said, if you have one of the older Ibico binding machines that has a wire closer included you are in luck. The Spiral-O binding supplies that we carry will work perfectly with your machine and you will be able to use both plastic combs and wire depending on your needs. These Spiral-O binding supplies are available in Black, Silver, White, Blue and Red and in sizes up to 1″ in diameter. If you aren’t sure what type of wire binding supplies that you need to work with your machine simply give us a call. Our trained sales representatives will be glad to help you find the correct supplies for use with your machine.(Read More)

Loading...


