Professional Quality Results: Achieve crystal-clear, bubble-free lamination with the advanced six roller thermal system, perfect for photos and challenging materials.
User-Friendly Controls: Easily adjust temperature and speed settings with the 8-bit micro-processor control system for a seamless laminating experience.
Durable and Reliable Design: Built with all-metal construction and industrial-grade components, ensuring longevity and consistent performance for both personal and professional use.
Safety Features: Equipped with overheat protection and energy-saving stand-by mode, providing peace of mind during operation and extending the life of the laminator.
Product Description
The Akiles Prolam Photo is a six roller photo laminator that delivers crystal clear, bubble-free laminating. The Photo Ready technology provides a balanced heat dissipation during laminating process, making it perfect for laminating photographs and other hard-to-laminate materials. The Pro-Lam Photo offers a variable speed & temperature control combination allows for a fast lamination of all standard pouch thicknesses (from 3 mils up to 10 mils). It uses the patented Akiles Flex-Tite system that allows the rollers to adjust themselves and maintain the proper laminating pressure with different material thickness. The Pro-Lam Photo is perfect for hot foiling and mounting. Plus, it is loaded with user friendly features; making it the perfect laminator to protect your photos.
Product Details
6 Roller Thermal System (4 heated rollers + 2 Cold rollers) allows for a more professional, crystal-clear, bubble-free lamination finish.
Advanced Photo-Ready technology provides a balanced heat dissipation during laminating process, making it perfect for laminating photographs and other hard-to-laminate materials.
Variable speed & temperature control combination allows for a fast lamination of all standard pouch thicknesses (from 3 mils up to 10 mils) with the simple press of a button (no waiting period when changing thickness).
Exclusive "Flex-Tite" System allows the rollers to adjust themselves and maintain the proper laminating pressure with different material thickness. Perfect for hot foiling and mounting.
8-bit Micro-Processor Control System precisely sets the exact temperature & speed for a fast, consistent and user-friendly laminating experience.
Energy Saving Stand-by Mode to conserve energy and prolong the lifespan of your laminator.
Overheat Protection System automatically cuts off heating power if temperature exceeds 160 Degrees C (320 Degrees F).
Auto Memory Function machine will remember the last speed & temperature settings before turning off, saving you the trouble of re-adjusting the settings next time you turn it on.
All Metal Construction for a more professional, heavy duty look & a longer lasting lifespan.
Silicon Rollers provide the flexibility of laminating with or without a carrier.
Metal Gears & Industrial Motor (1150 Watts / 12V) to guarantee strength and durability.
Jam Release (Reverse) Switch allows easy corrective action for jams.
Cold Lamination Function
CE & TUV certified and approved
Manufacturer's Warranty: 1 Year Manufacturer's Warranty
Specifications
Model: ProLam Photo
Throat Capacity: 330 mm (13")
Motor: DC 12V / 1150W
Laminating Heat Range: 32 - 320
Actual Machine Dimensions (L x W x H): 22" x 11-1/2" x 5-1/2"
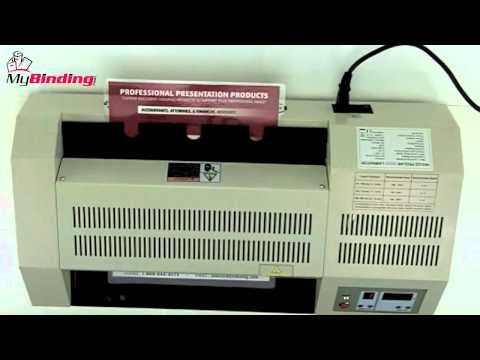
Akiles Pro-Lam Photo Six Roller 13 Inch Laminator Demo Video
Transcript :
Welcome to MyBinding video. Today we're looking at the Akiles ProLam Photo, a six roller professional laminator. This demo video will show you how to go from this to this. Here's how to use the machine step by step.
First, turn it on with the power switch on the back. There's a very helpful and simple chart on the top of the machine. This will help you select the correct temperature and speed for the size pouch thickness you're using. With your selections made, gather your materials as it warms up and begin to place them inside laminating pouches. As with all pouch laminators, make sure the crease end goes in first into the throat of the machine. Once it's inside, let the Akiles take over from here. It will bring your project all the way through the machine and out the other side. Once your project is completely finished, lay it flat on a surface to cool. Use the control pad to make adjustments to speed, keeping in mind the higher the number, the faster the rollers, but the less heat applied to the project. Over time, you'll master the optimum speed and temperature for each kind of pouch. Smaller projects are done in the same way and you can drop the temperature all the way down to zero for cold lamination for photos or other color sensitive materials. Pressing and holding the reverse button on the control panel backs the rollers up so that you can remove or re-center a project. Because of the ProLam Photo's extra large 13 inch wide throat, large projects can also be laminated. Pictured here are side by side documents or poster sized documents that need one full and long pouch. Just assure that you have good margins within your pouch, with the crease headed into the machine, and it will take it from there. The ProLam Photo can handle most any size document and pouch thicknesses up to 10mil. It really is that simple with the ProLam Photo six roller laminator by Akiles. For more demos and reviews of this product and many more, check out MyBinding.com.
I couldn't be happier with my purchase. All the speed and temperature settings on it are fabulous. It has taken me a little playing around to find the right settings for the items I'm passing through but the experimenting has all been worth it. It is a dream!
One of the top reasons for using a laminator is to protect your precious photographs and one machine that can help you do just that is the Akiles Pro-Lam Photo Laminator. This is one of the best photo laminators available, but it does have a couple of weaknesses that need to be considered. Please continue reading to find out all about them.
Strengths:
This device has six rollers for a perfect finish. Two of them are cool, while the other four are hot so the heat is distributed evenly. This configuration ensures that photographs are laminated perfectly, and you can also achieve good results with other items that are difficult to laminate, including documents printed on inkjet photo papers. The rollers are part of Akiles’ patented Flex-Tite system that forces the rollers to maintain the appropriate amount of pressure no matter what the temperature is set at.
This machine has a 13-inch feed opening that can handle your standard 4″ x 6″ snapshots all the way up to portrait-sized photos. The Pro-Lam Photo can even handle thin mounting boards.
The Pro-Lam Photo is equipped with variable temperature settings so you can do cold lamination. It can also be used with pouches ranging in thickness from 3 to 10 mil. You won’t need to give the machine a breather when switching temperatures and the device will even remember your settings so you can use them again, even if you shut off your device.
Every time you use this machine, you can be confident that the temperature and speed are both set correctly because this device is equipped with an 8-bit micro processor that guarantees the right setting is in place. Also, the device will shut off automatically if it reaches a temperature higher than 320 degrees (160 degrees Celsius), which will definitely keep your machine from overheating or burning up.
This machine has variable laminating speeds that are dependent on which temperature setting you’re using. The fastest it can go is 59 inches of material per minute.
There is a jam-release switch you can use to quickly and easily resolve a jam.
The Pro-Lam Photo’s parts and housing are made entirely of metal, so this product is incredibly durable.
Weaknesses:
Although some warranty is better than none at all, it’s disappointing that this product only has one year’s worth of protection. Still, the machine is built extremely well and chances are you will never have to use the warranty.
Like most of Akiles’ products, the Pro-Lam is very industrial-looking and lacks the style of some other laminators, such as the GBC HeatSeal series.
This is a pretty bulky machine that will take up approximately 2 cubic feet, so it’s not ideal if your workplace is lacking space. Likewise, this is not an inexpensive machine. It can be purchased for around $500.00, which will be too expensive for some people. However, it is an excellent choice for users who demand the highest quality output from their laminator.
Overall, the Akiles Pro-Lam Photo Laminator is a great device that has a lot of awesome features and makes it a snap to beautifully laminate your photos and paper documents. Although the price is high and the unit isn’t hip-looking, it nonetheless is a wonderful choice if protecting your photographs is a top priority.
Professional Quality Results: Achieve crystal-clear, bubble-free lamination with the advanced six roller thermal system, perfect for photos and challenging materials.
User-Friendly Controls: Easily adjust temperature and speed settings with the 8-bit micro-processor control system for a seamless laminating experience.
Durable and Reliable Design: Built with all-metal construction and industrial-grade components, ensuring longevity and consistent performance for both personal and professional use.
Safety Features: Equipped with overheat protection and energy-saving stand-by mode, providing peace of mind during operation and extending the life of the laminator.
$939.00
1 review
Welcome, Binding101 Customers!
Binding101 is now part of MyBinding.
You're in the right place! Same great service. Same great team. Even bigger selection.