The Rhin-O-Tuff HD7700 Ultima Heavy Duty Electric Punch is an exceptional tabletop punch that has no equal. The patented Quick Change Die System has all of the features you have come to expect from Rhin-O-Tuff, making this a Performance Design Punch that will handle any size project, large or small. Binding machines can be added to your vertical HD7700 system. The HD4470 for plastic comb binding, EWC 8370 , HD8370, HD8000 for wire binding or the HD4170 for plastic coil binding. Optional Mounting Brackets allow it to be securely attached or use the binding units freestanding to create separate punch and bind stations.
Product Details
Upgraded gearbox and drive train system for exceptional durability
New 6-year manufacturer warranty
Modular design allows for easy accessory setup to fit custom workflows
Patented auto reverse feature triggers an auto-reversing function to reduce jamming and prevent downtime or repairs
Manual reverse option provides added peace of mind
14" (356mm) open-ended extra capacity die
"Accu-set" paper adjustment knob for fine adjustments on odd paper sizes ensures precise punches every time
U-view waste tray holds up to 150% more waste than other tabletop punches
Diagnostic display lights give indications of important machine conditions
Punches up to 55 sheets (or 110 pages) of 20# (80gsm) paper (total number of sheets depends on the paper weight and punch pattern used)
Punch up to 5 plastic covers regardless of hole pattern (depending on mil thickness).
Fast binding punch machine handles up to 65 cycles per minute.
Utilizes patented "QCDS" Quick Change Die System.
More than 20 interchangeable dies available with 12 standard hole patterns including comb, Wire-O® twin loop, plastic coil, GBC velo binding, and 3-hole loose leaf.
All punch pins easily disengage to prevent half-holes and allow for punch pattern customizations.
Smooth, quiet, powerful, on-demand operation.
Operate via the standard foot pedal and palm switch or the optional versa switch.
Rhin-O-Tuff Onyx HD7725/HD7700 Ultima Assembly Video
Transcript :
Welcome to MyBinding video. This is the demo and assembly of the Onyx HD7700. This heavy duty tabletop punch is the top of the line punch solution for all your binding needs. Before we get to the assembly, let's watch a demonstration to see just how this machine works. First you'll need to set the paper stop according to your project's needs. Twist the dial on the left side of the machine to fine tune to get it exactly on the line that you need. With that all set, run a test paper. Slide it into the throat of the machine, all the way to the left, press down on the Palm switch or the foot pedal. A handy test at this point is to fold the paper in half, line up the corners, and see if the holes all line up. It should be centered with no half or missed holes. The solution to half holes is to remove a pin. All the pins are disengageable on the Rhin-O-Tuff die. Pull the die out, find out which pin it is that you need to remove, open the carriage, remove the pin, replace the carriage, and you're all set. Pin removal is the same for all Rhin-O-Tuff dies. It's very simple, it's very quick. Lock your die back into place and let's punch again and we'll see how we're doing. This one looks perfect. Do the fold test again and everything looks great. It's time to begin.
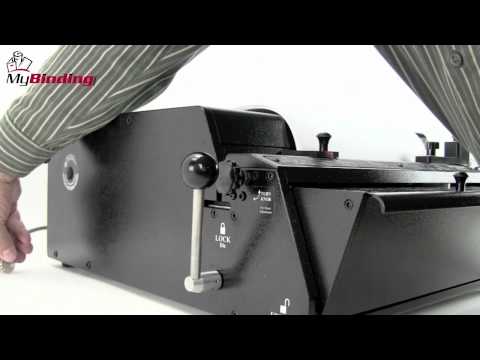
With your project all in order in the way you'd like it to be, process through your whole project, pack by pack of up to 55 sheets in a single punch. All Rhin-O-Tuff punches come with the patented auto-reverse feature, keeping paper jams a thing of the past. However, it can happen if just too many sheets are put in at the same time. Stored on the back side of the machine is a small handle. This goes in on the left-hand side of the machine right into the groove; turning it counter clockwise will reverse the pins on the machine, then you can remove your paper. If you need to, you can peer down just to the left side of the paper stop and you can actually watch the pins retract to make sure they are all gone so you can remove your paper. The chip tray in the front is transparent so you can keep an eye on just how many chips are building up.
That's the demonstration and how-to. And now for the assembly. Once you've removed your machine from the box, place it on a sturdy table and remove the plastic coating that protects the transparent cover of the chip tray. Inside the chip tray, you'll find all the parts of assembly that you'll need. There's oil for lubrication, two handles to lock and unlock the die, a power cord, a Palm switch, as well as the foot pedal.
The first step is to install the two handles. Remove from the bag and place them on either side. Screw them tight all the way down. These will service the lock and unlocking of the punched dies. The Onyx HD7700 comes with a foot pedal that plugs into the back of the machine and activates the punch. Also included with this machine is the Palm switch; some prefer it to the foot pedal. It plugs into the same place on the back of the machine and is activated either by finger or by palm. If you have purchased the optional Versa switch, now would be a good time to install it. Simply remove the knob from the paper stop and take the stop itself off. Then replace it with the Versa switch and screw the same knob back down. This switch plugs into the back of the machine in the same spot for the foot pedal or the Palm switch.
For the Onyx HD7700, the dies go in on the right-hand side. Place them in, slide it all the way until the black part is flush with the machine. And then lock both handles on the right and left. There you go, you're all set. That's the demo and assembly of the Onyx HD7700. You're on your way to a great many books. For more demos, reviews, and how-tos, check out MyBinding.com.
Rhin-O-Tuff HD7725/HD7700 Ultima Binding Punch Review
Are you looking for a high-quality binding punch that can utilize interchangeable die sets? If so, you’ll want to check out the Rhin-O-Tuff HD7700 Ultima. Here’s a rundown of its strengths and weaknesses.
Strengths:
The HD7700 Ultima’s primary strengths are its phenomenal punching capacities. It’s possible to punch anywhere from 40 to 55 sheets of 20 lb. bond paper per lift. These are some of the highest punching capacities you could ever hope to find. The punching capacity may vary a bit depending on which die set you use. For example, when using the three-hole set, you can do 55 sheets at once while the coil set will probably be able to punch 40 sheets. You’ll just have to try it for yourself to see which die sheets can punch the most.
This machine has a vertical punching mechanism. Vertical punching makes it more likely that your pages will be punched perfectly so you won’t waste time and paper.
As alluded to before, the HD7700 Ultima has interchangeable die sets that can be used to punch different hole patterns for various types of binding. The sets available can be used for plastic comb, color coil, wire, and other types of binding. (There’s even a three-hole set.) Each machine comes with one die set of your choice. The die sets are easy to exchange and can be pretty much slid in and out of the device. No extra tools are needed so that makes the process even easier.
This machine has a 14-inch punching throat. It’s large enough for legal-sized paper (8.5 x 14”) and other sizes of documents. Throats of this size aren’t particularly common, so it’s a great feature to have. The dies in each set can be disengaged so you can punch the right number of holes depending on the size of your document.
The HD7700 Ultima’s chip tray can hold up to 150% more than typical trays. It even has a window so you can see when it’s getting full. And there are also diagnostic lights to keep you abreast of the machine’s functions. Finally, there’s a reverse mode just in cast the paper gets jammed and a foot pedal you can use if you want to keep your hands free.
This device has a one-year warranty and features extremely durable construction. All of the parts are made out of metal, so you may find that you don’t need the warranty at all even if you use the machine frequently.
Weaknesses:
While the HD7700 Ultima would be great for binderies and industrial environments, its intimidating appearance might not be appropriate for some office settings.
This is a very large device that measures 8.5” (height) x 21” (width) x 22.5” (length). It’s also heavy, tipping the scales at 103 pounds. So you’ll want to make sure there’s enough room in your work area for it.
If you want to work with more than one binding method, you’ll need to purchase additional die sets.
The Rhin-O-Tuff HD7700 Ultima has a lot more strengths than weaknesses and is really one of the best die punches on the market. It’s great that it can produce so many different hole patterns and that the die sets are easy to change out. (However, keep in mind they’re are sold separately.) The punching capacities are terrific and you’ll be able to work with different sizes of documents. So long as the device’s appearance and size aren’t a big deal, you should check out the HD7700 Ultima today.